
Orchestrator
RPA Bot Orchestration > Orchestrator overview.
Overview
ElectroNeek Orchestrator is a cloud-based automation platform designed to provide IT Service Providers with centralized management of their automation environment. It simplifies the process of launching, monitoring, and managing bots, leading to improved efficiency, reduced errors, and time and cost savings.
Orchestrator offers advanced features such as automation scheduling, version control, and user permissions, enabling the delivery of high-quality services to clients with ease. You can use it to remotely run bots, set up specific launch schedules, and manage Orchestrators and workflows effortlessly.
Orchestrator top capabilities include:
- Centralized automation management
- Scheduling and Triggering bots
- Remote execution and monitoring
- Resource allocation and scalability
- Logs and audit trails
Let's explore its functionalities in more detail.
Interface and Features
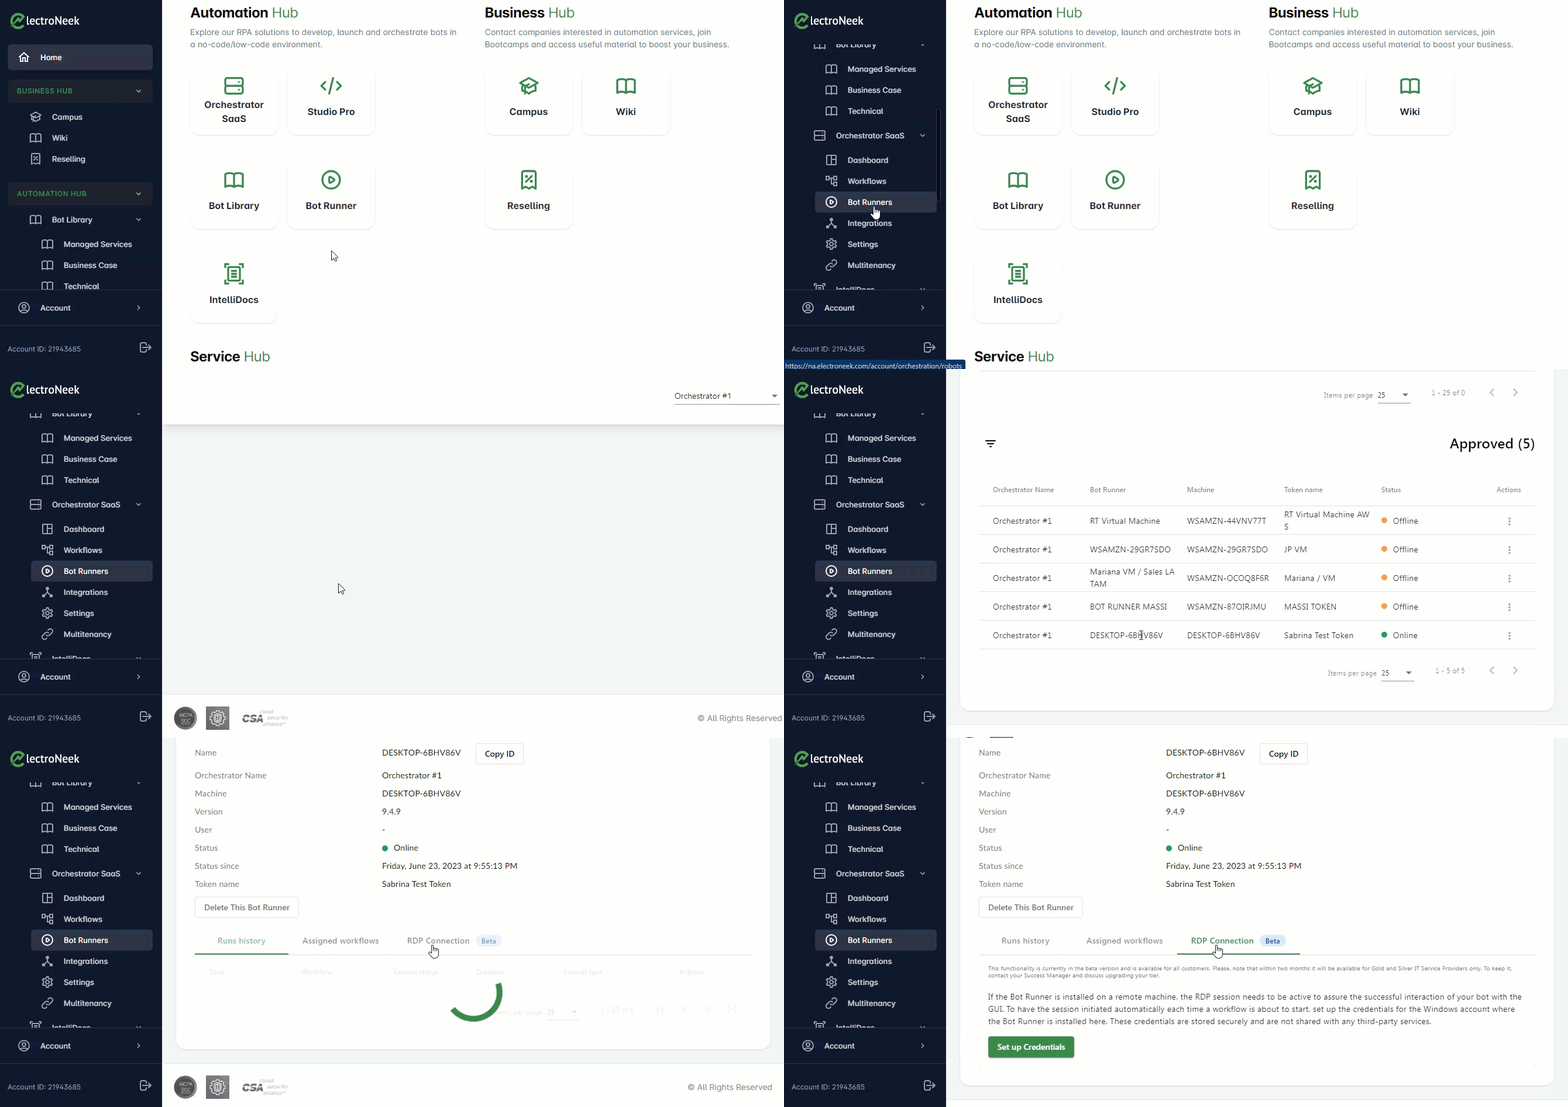
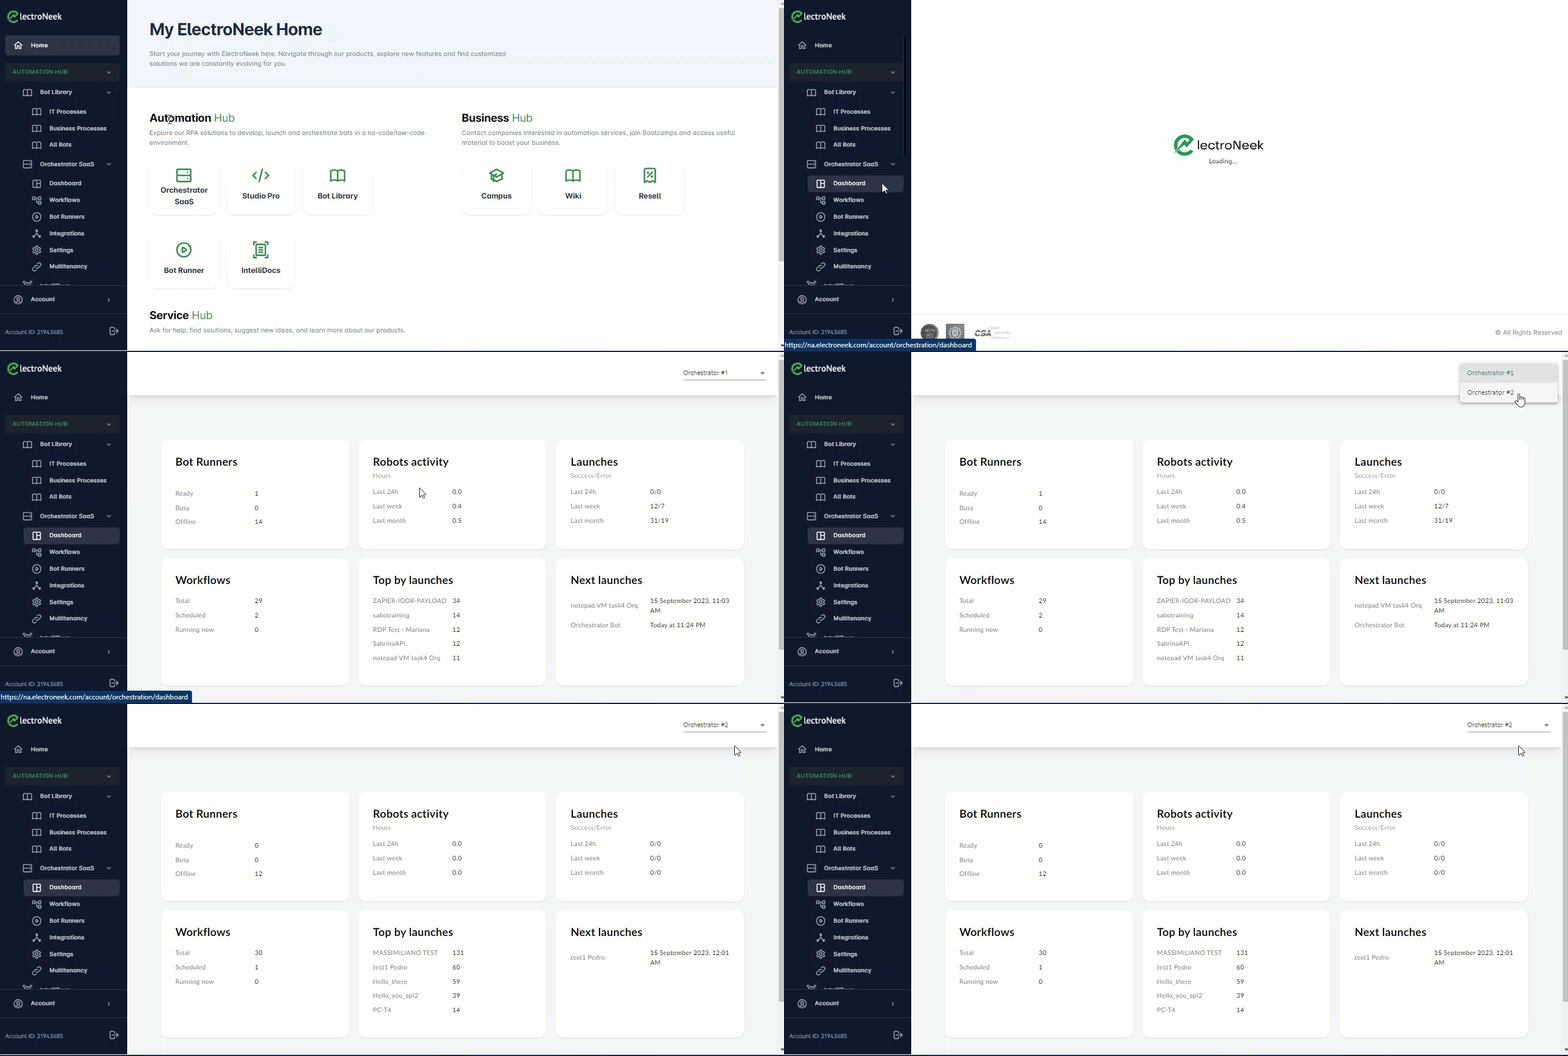
To access Orchestrator, go to the User Portal and click on RPA Bot Orchestration in the navigation menu. Expand this option, and then click on "Orchestrator SaaS." You can also find the Orchestrator SaaS tile on the home screen.
The Orchestrator options are organized into the following sections: Dashboard, Workflows, Bot Runners, Integrations, Settings, and Multitenancy. Let's explore each section and its capabilities.
Dashboard
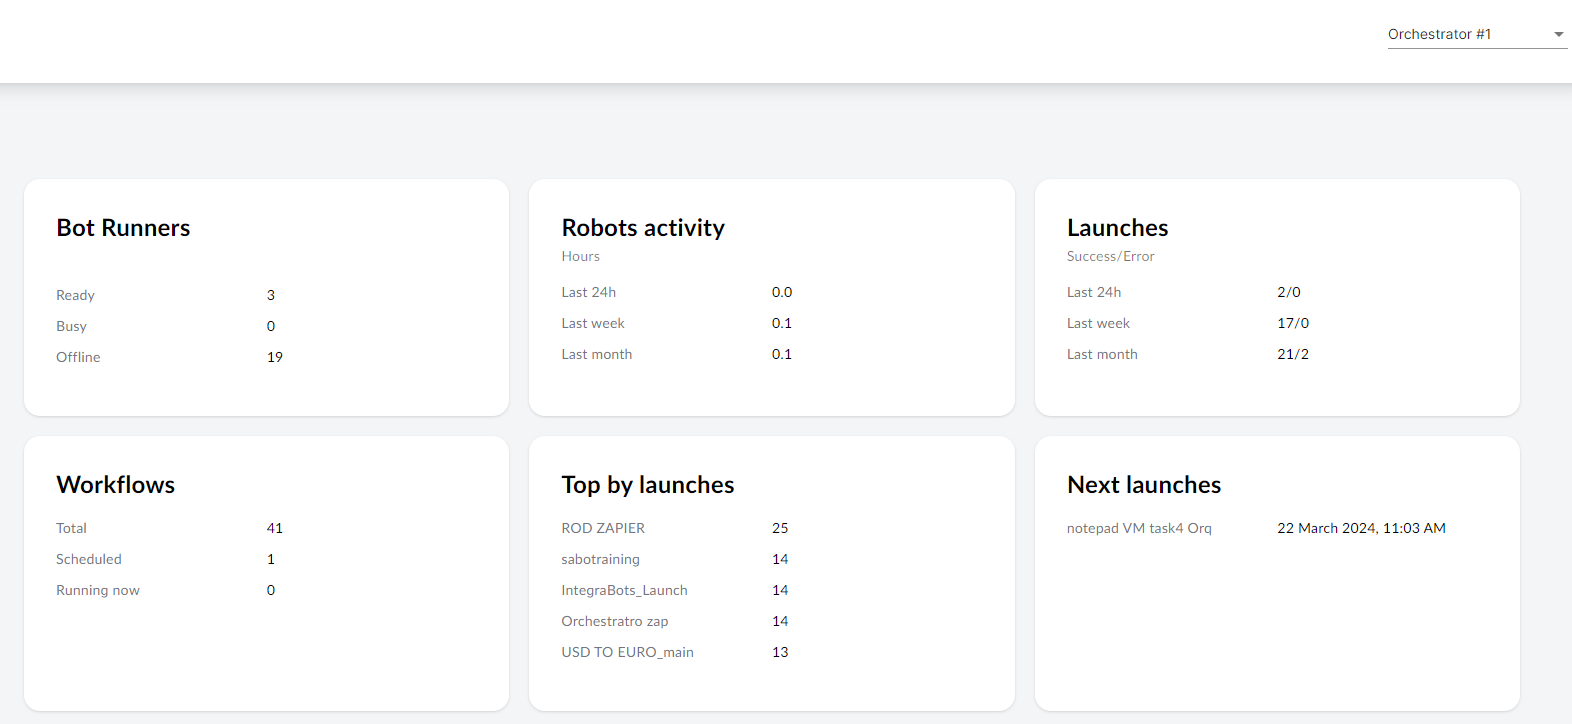
The Dashboard page allows you to manage general information about Orchestrators, monitor performance, and track bot activities.
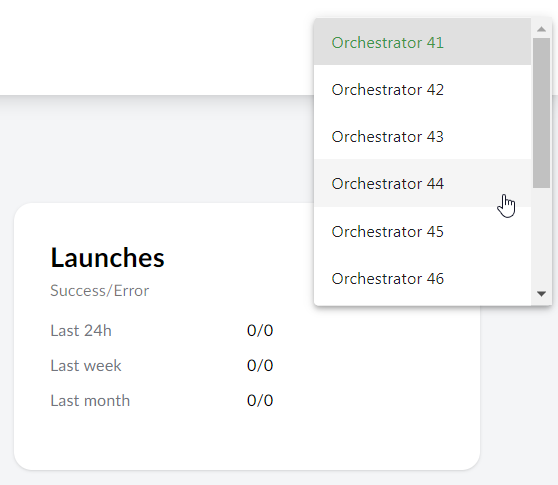
Note that you can select a different Orchestrator by using the drop-down menu in the top-right corner of the screen.
Workflows
The Workflows section lists the bots you have published to Orchestrator. From here you can launch them, check how they are doing and open each one for more settings.
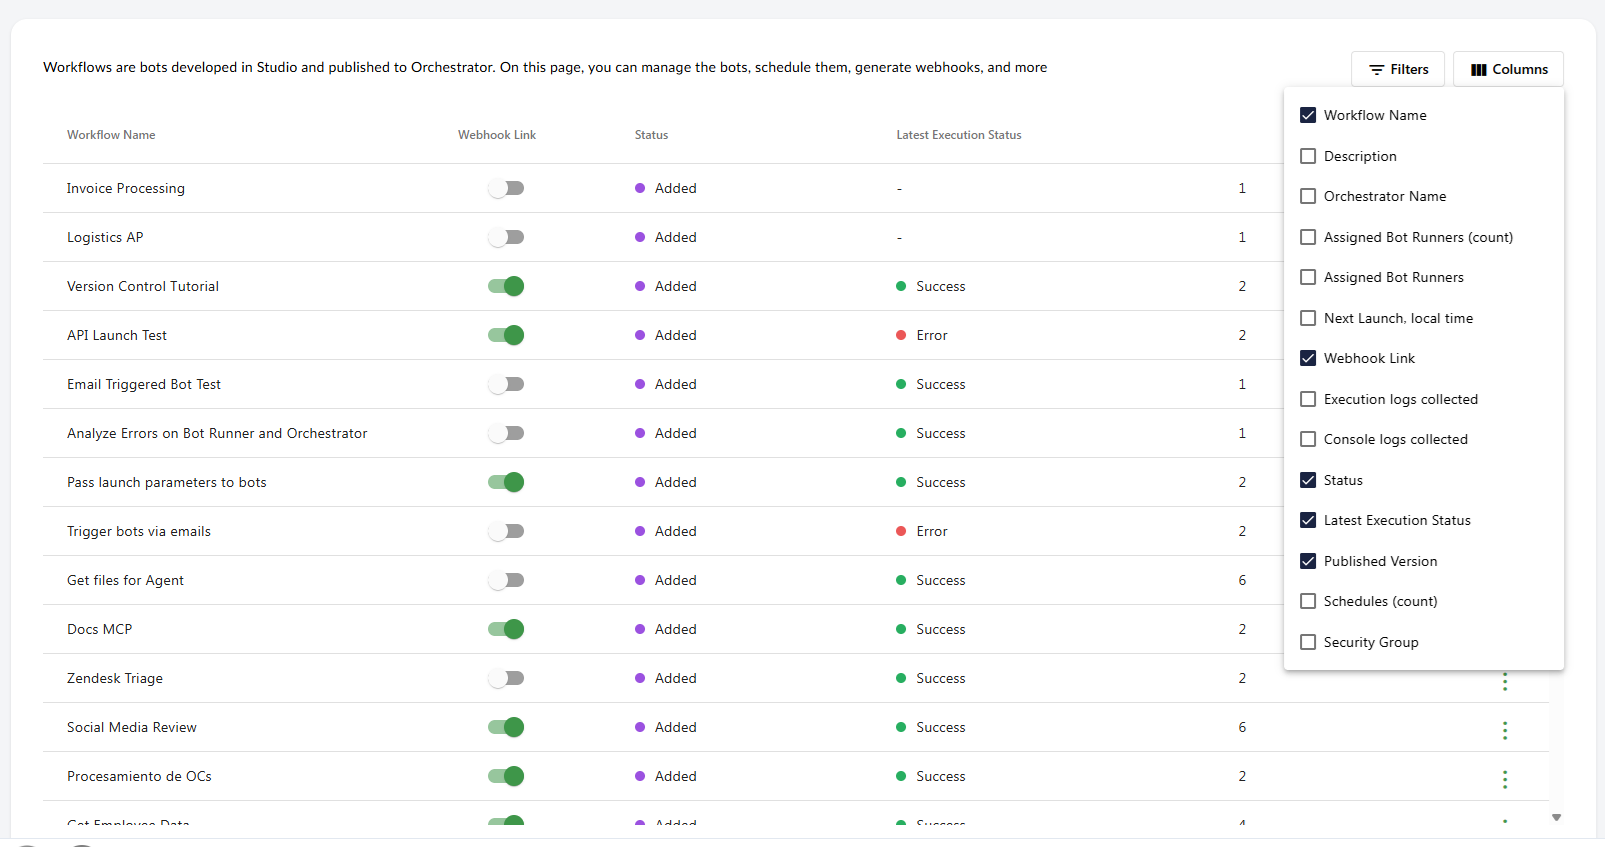
Choosing columns
Click Columns to choose which columns the table shows. The available columns are:
| Column | Shown by default |
|---|---|
| Workflow Name | Yes |
| Description | Yes |
| Orchestrator Name | Yes |
| Assigned Bot Runners (count) | Yes |
| Assigned Bot Runners | No |
| Next Launch, local time | Yes |
| Webhook Link | Yes |
| Execution logs collected | No |
| Console logs collected | No |
| Status | Yes |
| Latest Execution Status | Yes |
| Published Version | No |
| Schedules (count) | No |
| Security Group | Only when Advanced Access Management is enabled |
The Actions column is always shown.
Sorting and filtering
Click a column name to sort the table by that column. Click Filters to narrow down the list by one or more columns. The filter options depend on the type of column:
- Text columns: type the text to search for.
- Number columns: equal to, not equal to, greater than, smaller than, greater or equal to, smaller or equal to.
- List and dropdown columns: pick one or more values. Selected values show as chips.
- Date and time columns: before, after or exactly, for both date and time.
- Toggle columns: On or Off.
The Webhook Link, Execution logs collected and Console logs collected columns can also be switched on or off directly from the table, without opening the workflow.
Actions
Each row has the following actions:
- Launch Workflow: run the workflow now. Available only when a "Bot Runner to run now" is set for the workflow.
- View: open the workflow on its Runs history tab.
- Schedule: open the workflow on its Schedules tab.
- Copy Webhook Link: copy the link that triggers the workflow from a browser or another workflow. Available only when Webhook Link is On.
- Copy Workflow ID: copy the workflow's ID, for example to use it with the Orchestrator API.
- Delete: remove the bot from Orchestrator while keeping it saved on your PC.
You can also click on any row to open the Bot Details page, where you'll find additional settings and actions.
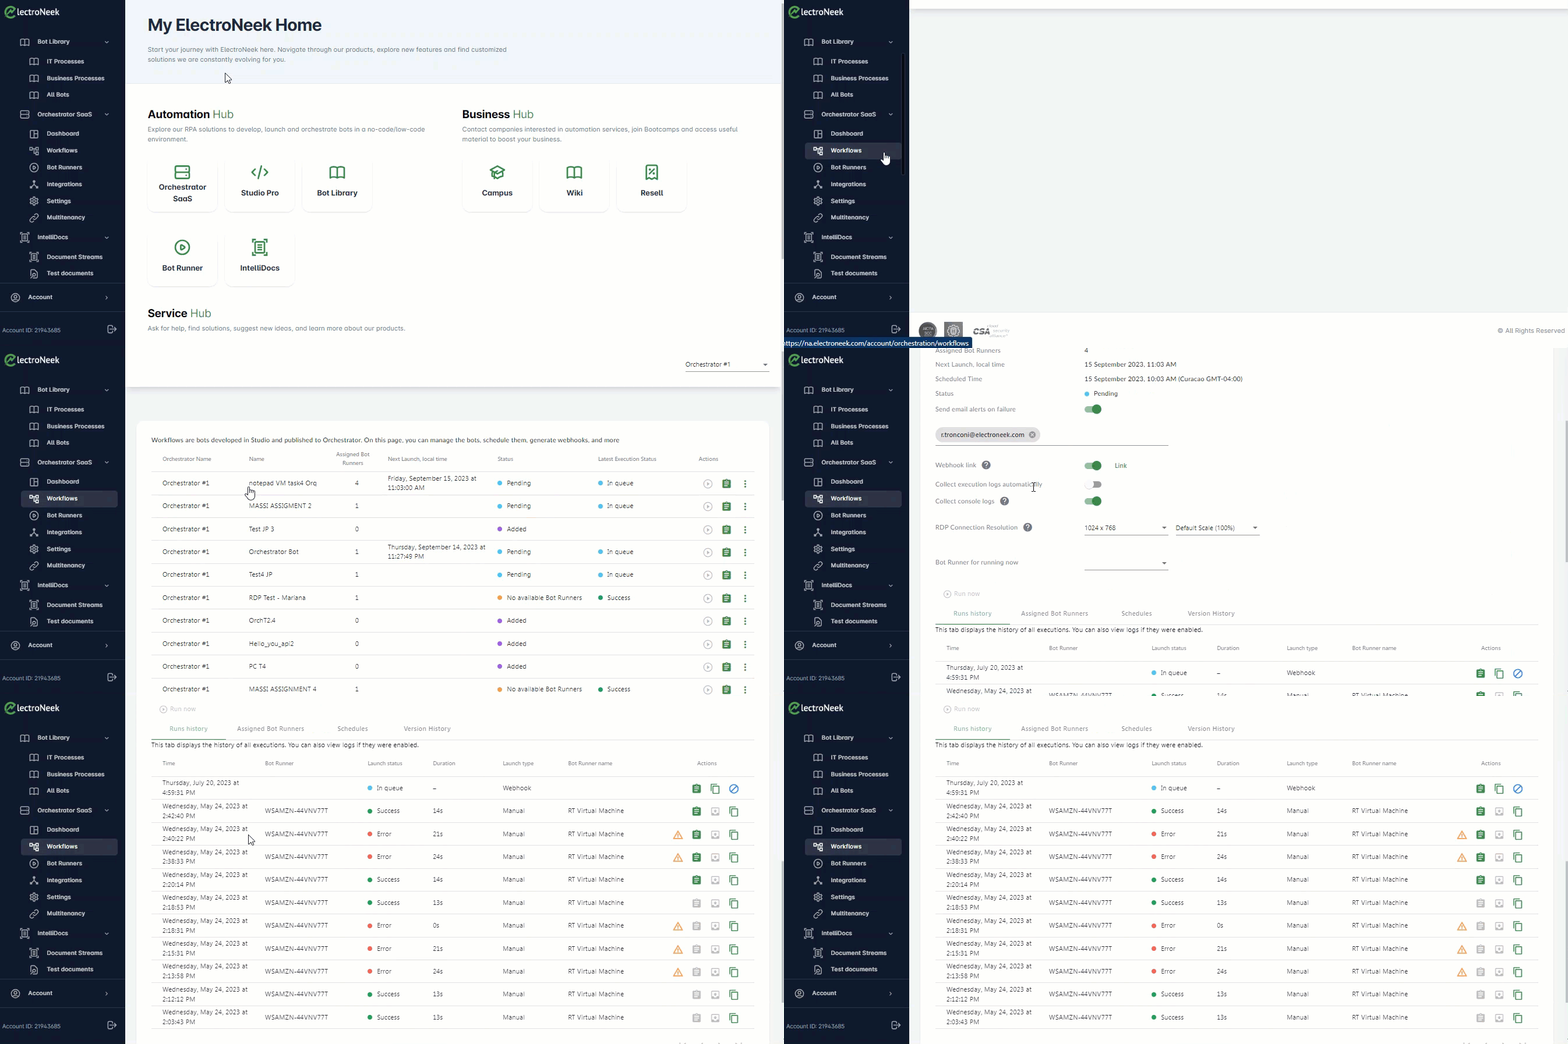
On the Bot Details page, you can view the bot's name, description, and other relevant information. You'll also have options to perform various actions, such as sending email alerts on failure, obtaining a Webhook link, collecting execution logs automatically, collecting console logs, and running the bot.
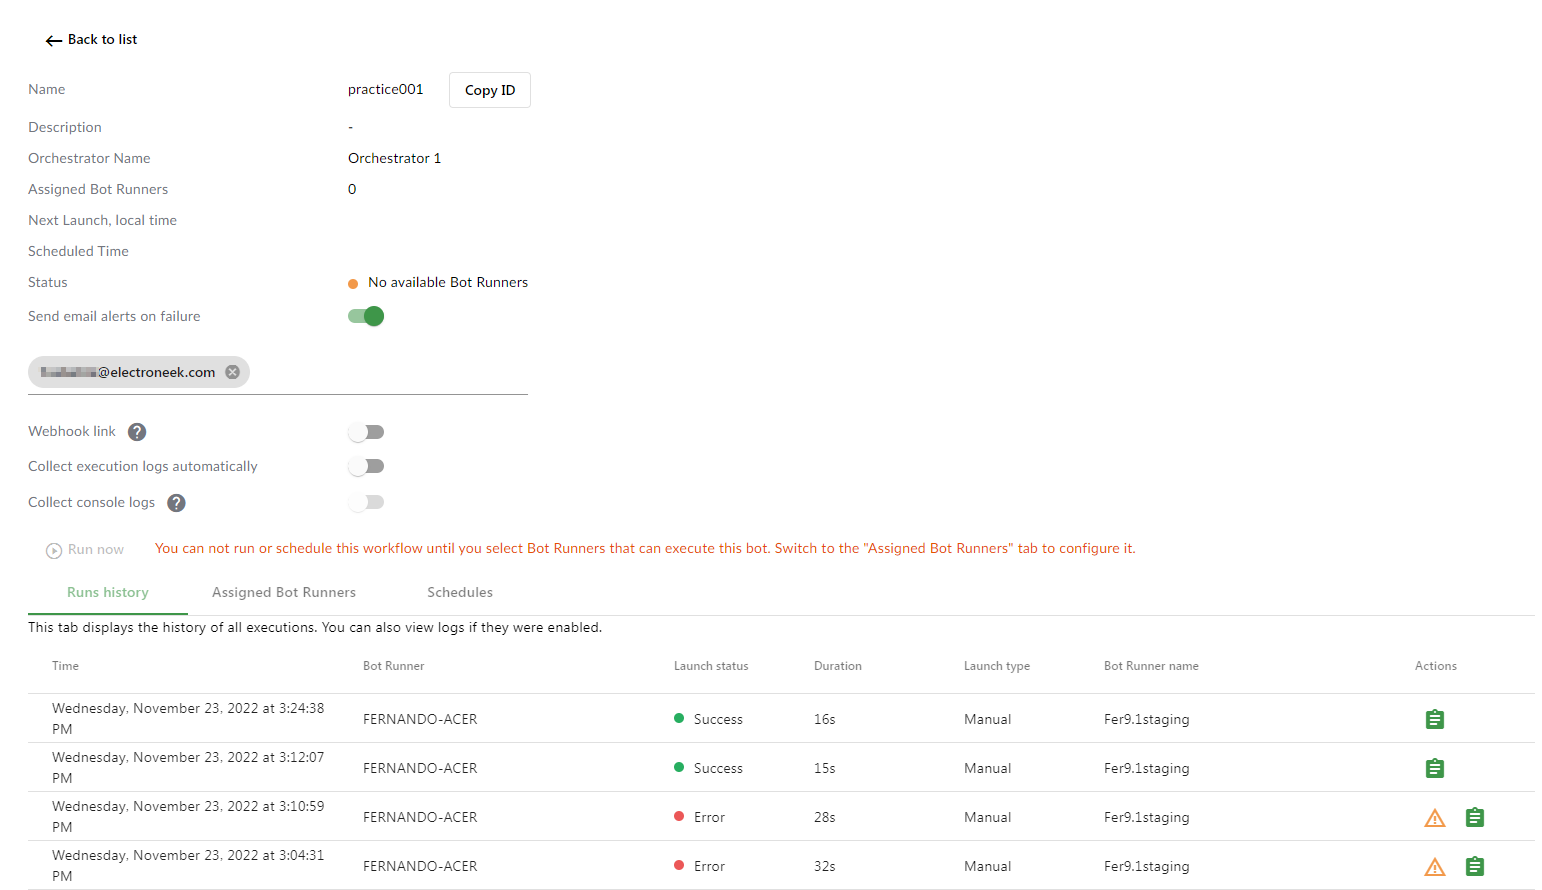
The "Runs history" tab lists every execution of the bot, including the Bot Runner that executed it, its status (success, error or stopped), the launch type (manual, API, schedule, Webhook link, etc.) and these timing columns:
| Column | What it shows |
|---|---|
| Created at | When the launch was created. For a queued launch, this is when it entered the queue. |
| Time in queue | Time between Created at and Execution start. |
| Execution start | When the launch changed to "In progress". If it was cancelled before starting, this shows when it was cancelled. |
| Execution duration | Time between Execution start and the final status. |
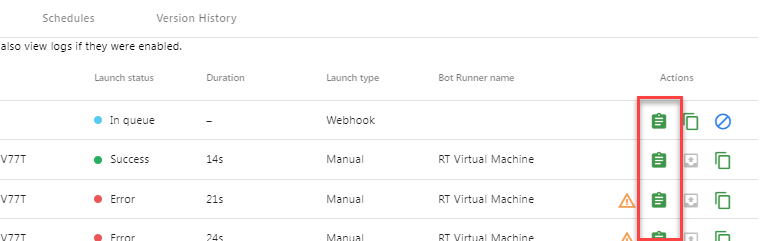
The Actions column offers additional options.
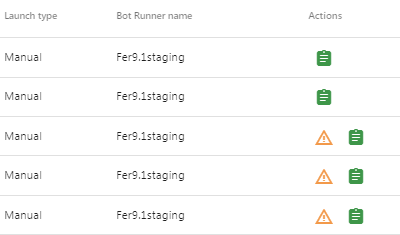
By clicking the board icon, you can open the "View Logs" page, or click the exclamation icon to view error details in a pop-up screen.
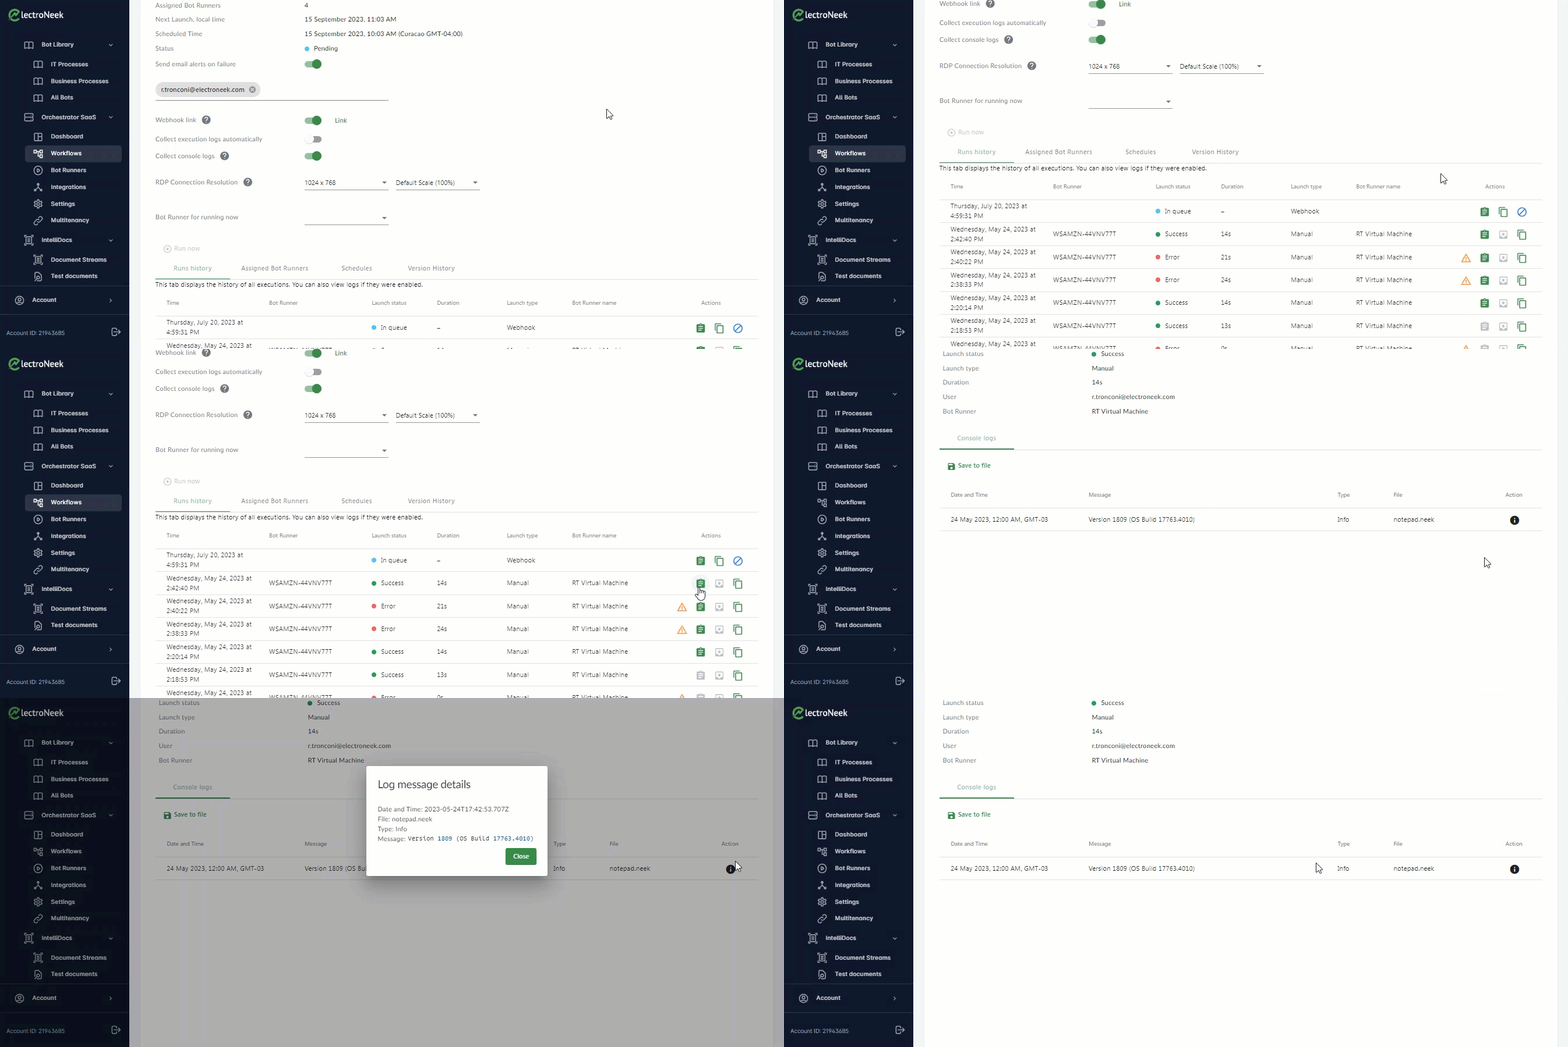
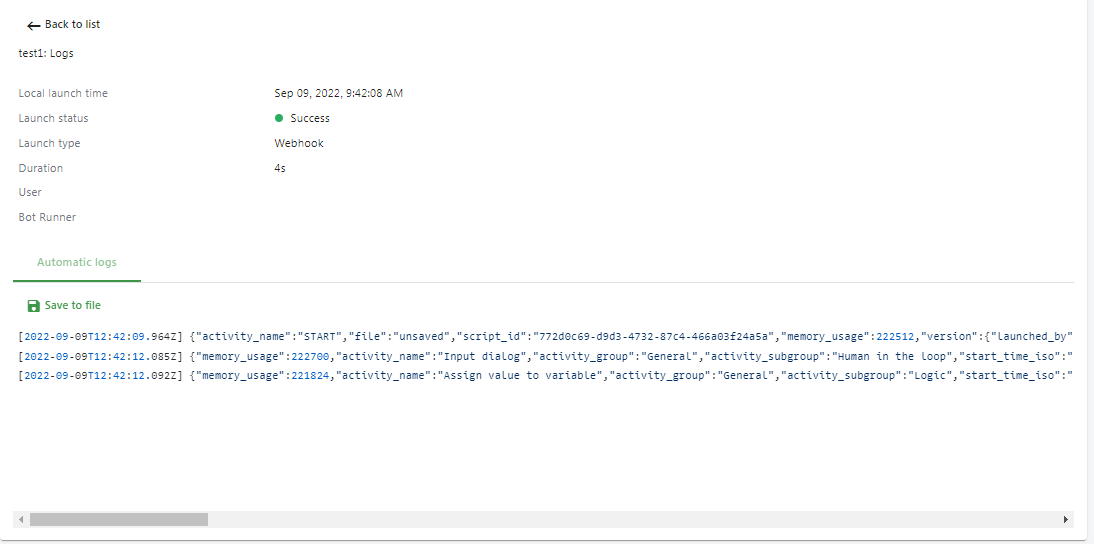
More information about assigned Bot Runners and the workflow schedule can be found on the respective tabs.
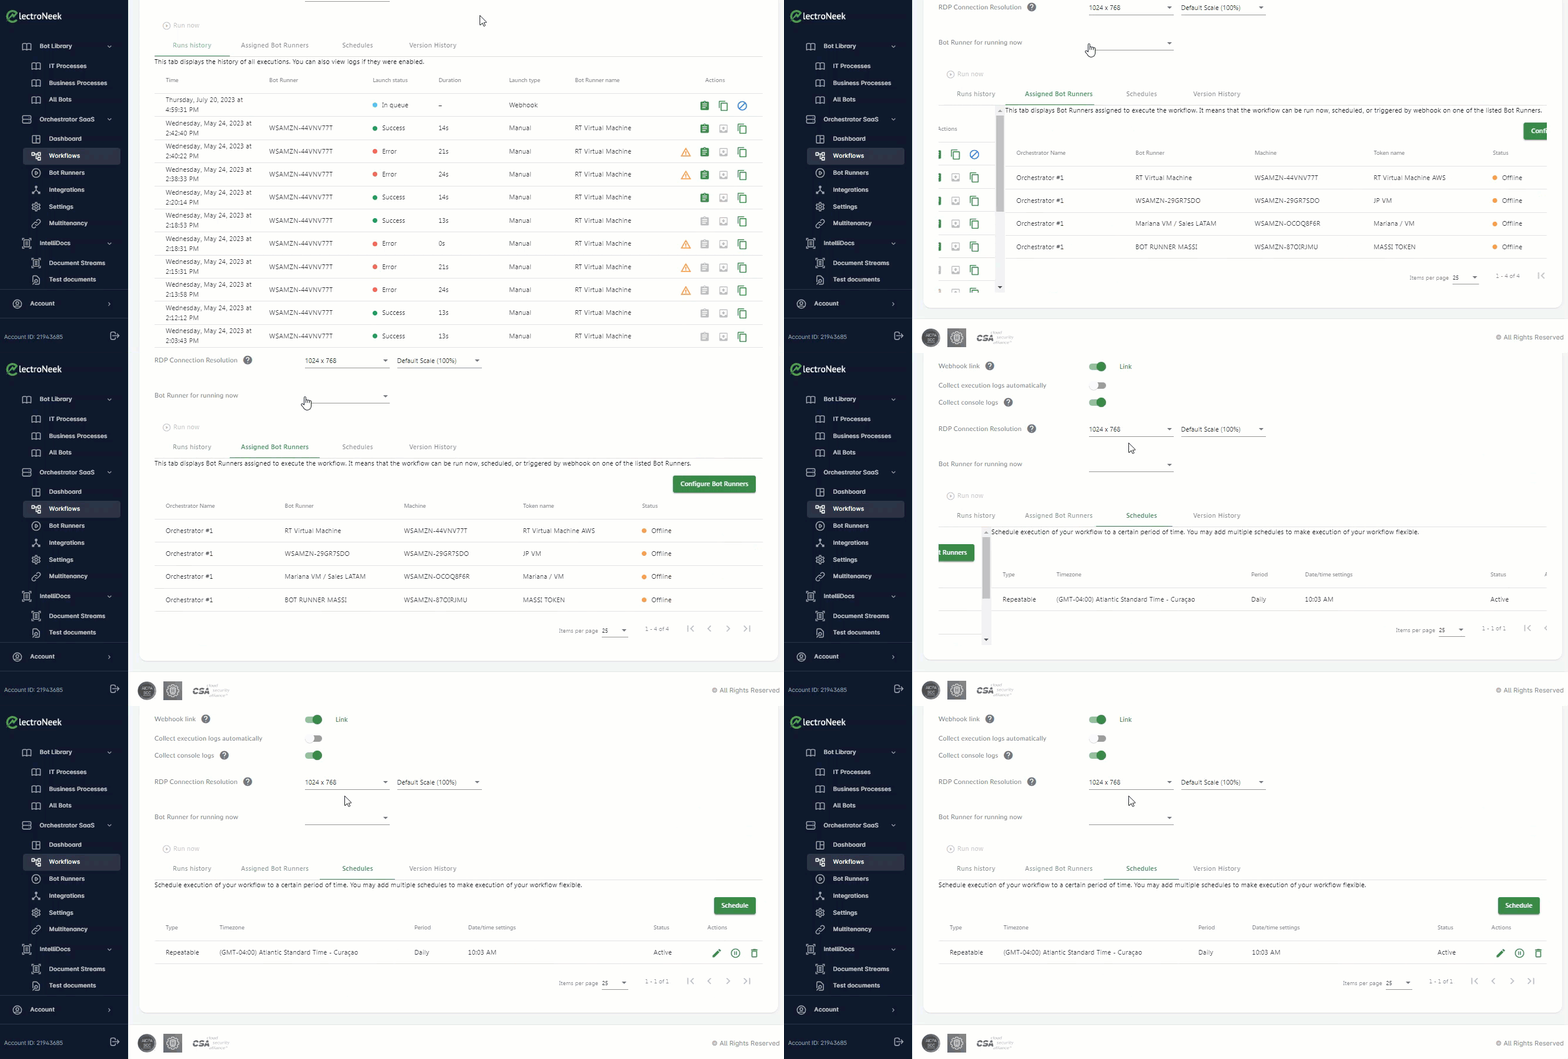
Bear in mind that you can accelerate your learning journey on these actions and settings right here, at ElectroNeek's Help Center. Take a look at our How-to articles section.
Bot Runners
The Bot Runners page lists every instance of Bot Runner connected to Orchestrator, split into Approved and Not approved.
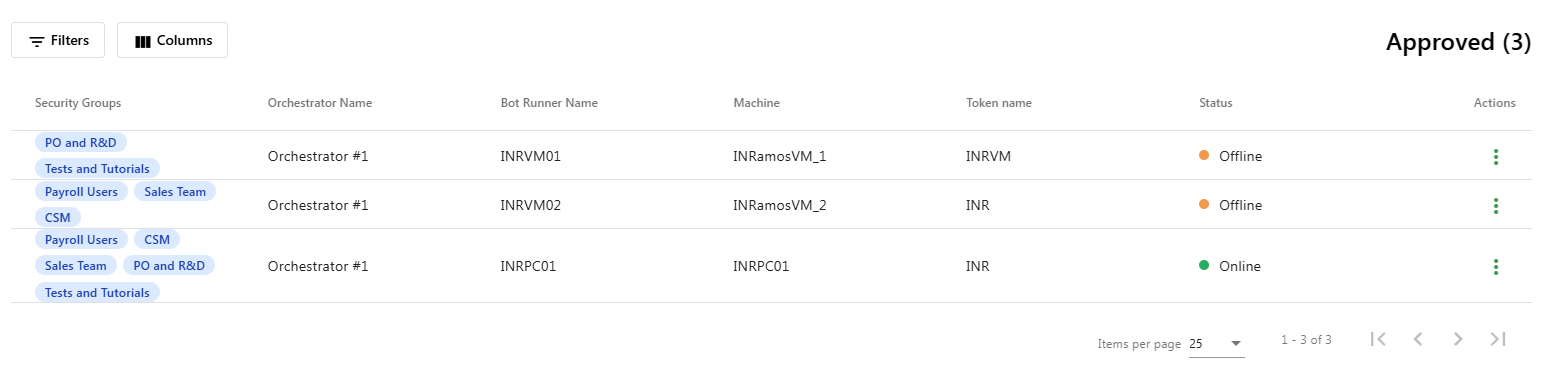
In the Approved list, click Columns to choose which columns to show, sort by any of them, and click Filters to filter them the same way as in Workflows. The available columns are:
| Column | Shown by default |
|---|---|
| Orchestrator Name | Yes |
| Bot Runner Name | Yes |
| Machine | Yes |
| Token name | Yes |
| Status | Yes |
| Security Groups | Only when Advanced Access Management is enabled |
Each row has the following actions:
- View: open the Bot Runner on its Runs history tab.
- Copy Bot Runner ID: copy the Bot Runner's ID, for example to use it with the Orchestrator API.
- Delete: remove the Bot Runner from Orchestrator.
Integrations
The Integrations page includes two features: Zapier and ElectroNeek API. These features allow you to connect to workflows and run your bots through API tokens. Learn more about transferring data to an API request in this article.
Settings
In the Settings section, you can access various configuration options for your Orchestrator.
Here are some of the settings you can manage:
- Rename Orchestrator: You can rename your Orchestrator to provide a more descriptive name.
- Security Groups: If the Advanced Access Management feature is enabled, you can configure which Security Groups have access to this Orchestrator's resources (Workflows and Bot Runners.)
Multitenancy
The Multitenancy page allows you to connect to an Orchestrator from another team and generate an access key to grant that team access to your Orchestrator. This feature enables collaboration and sharing of resources between different teams using Orchestrator.
These are the main sections and functionalities available in Orchestrator. It provides a comprehensive set of features to centrally manage your automation environment and streamline your RPA execution routines.
You can find detailed steps on how to configure Multitenancy in Orchestrator in this How-to Article .