
Connections and credentials
MISC > Troubleshooting > Connections and credentials.
The "Application-specific password required: https://support.google.com/accounts/answer/185833 (Failure)" error
Text and meaning of the error
This article will be removed soon.We have rephrased this message to help you find a solution in an easier way. The new message reads:
Sorry! The authentication process failed. Verify your account credentials in Studio Pro and try again. For further information about credentials refer to this article.
This error may occur when working with activities, related to Google services.
The error message can look like this:
Application-specific password required: https://support.google.com/accounts/answer/185833] (Failure).
If you encounter this error, it means that you do not have the Google App Password set up correctly.
Solution
In order to solve this error, you need to set up the Google App Password. You can learn how to do it in this article.
Workflow publish error. Access deny.
Text and meaning of the error
This error can occur when publishing bots to Orchestrator. There will be a message in the console: Workflow publish error. Access deny. Such error occures when the user publishing the bot doesn't have an Admin role in Orchestrator.
Solution
To solve this error:
Assign the Admin role to your account. You can learn more about roles and permissions here.
Invalid credentials (Failure)
Text and meaning of the error
This error occurs when using the Google mail service.

If the error continues to occur after checking the correctness of the username and password - you need to configure your account in the email service.
Solution
Use app passwords. Using app passwords is a standard security technique when 2FA is enabled for an account. The goal is to make it impossible to compromise your main password when used in a third-party app (like ElectroNeek).
Google accounts allow you to create a password associated with one specific application (like a token).
To configure it, you need to go to the Google account page → “Security” → “Signing in to Google” → App passwords (see screenshot) and create an application for which you create a specific (special) password, which you can specify as a setting for the robot.
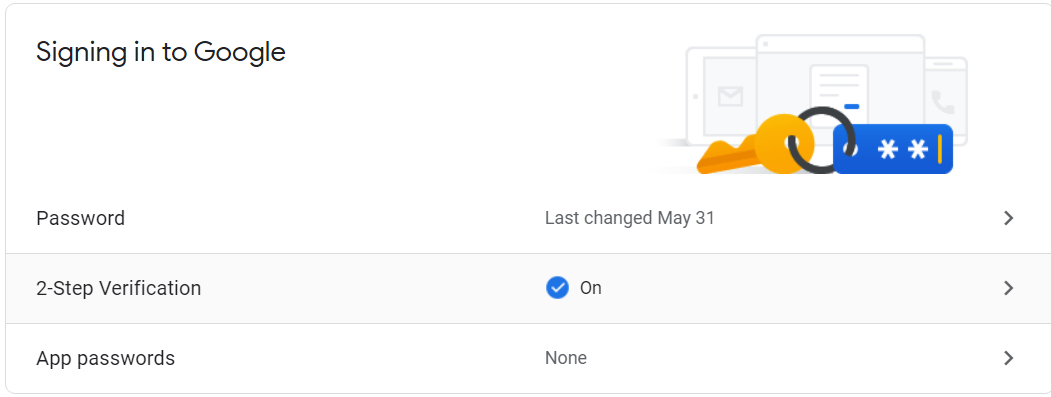
Follow this link to read more about this settings.
Self signed certificate in certificate chain
Text and meaning of error
Such an error can occur:
- If you work with activities from the “Email” group
- When authorizing in Studio/Bot Runner
This error occurs if the network, where Bot Runner is running, has an intermediate certificate in the certificate chain.
Solutions
Solution 1 (for mail):
- Open an application which can restrict the network (e.g. antivirus)
- Disable scanning of incoming and outgoing mail
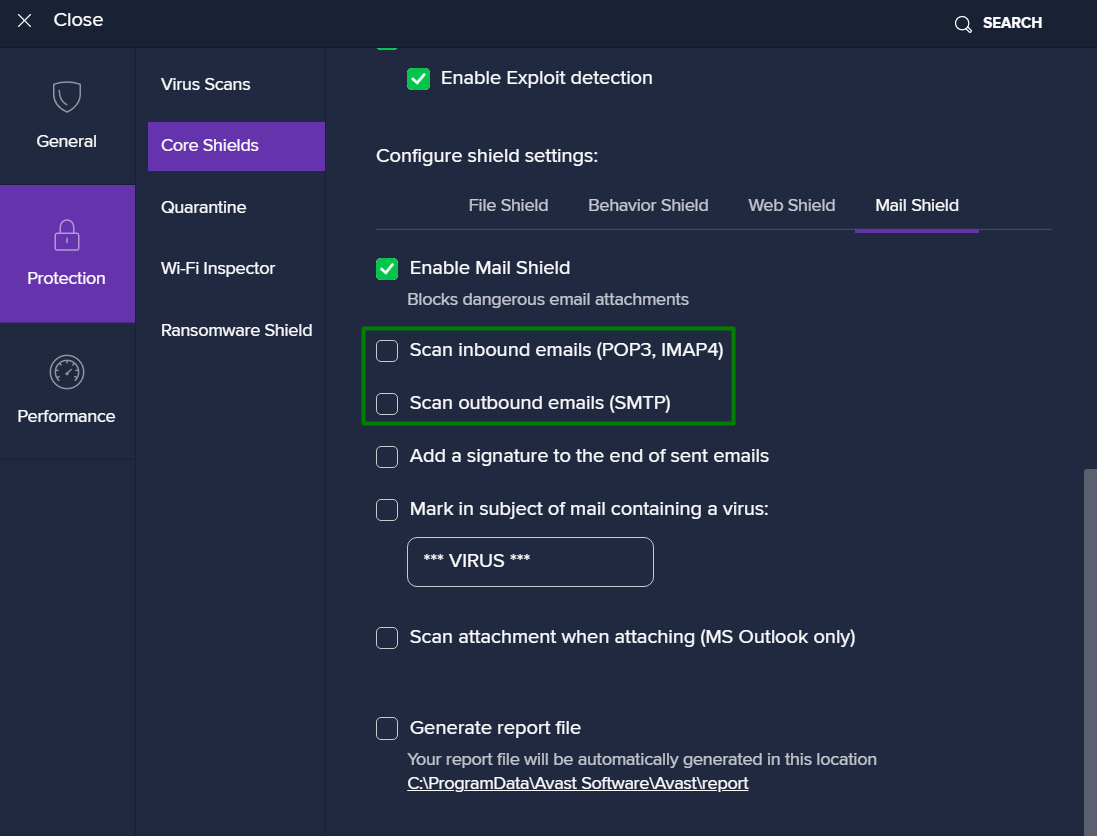
Example of disabled scan of incoming and outgoing mail in Avast antivirus
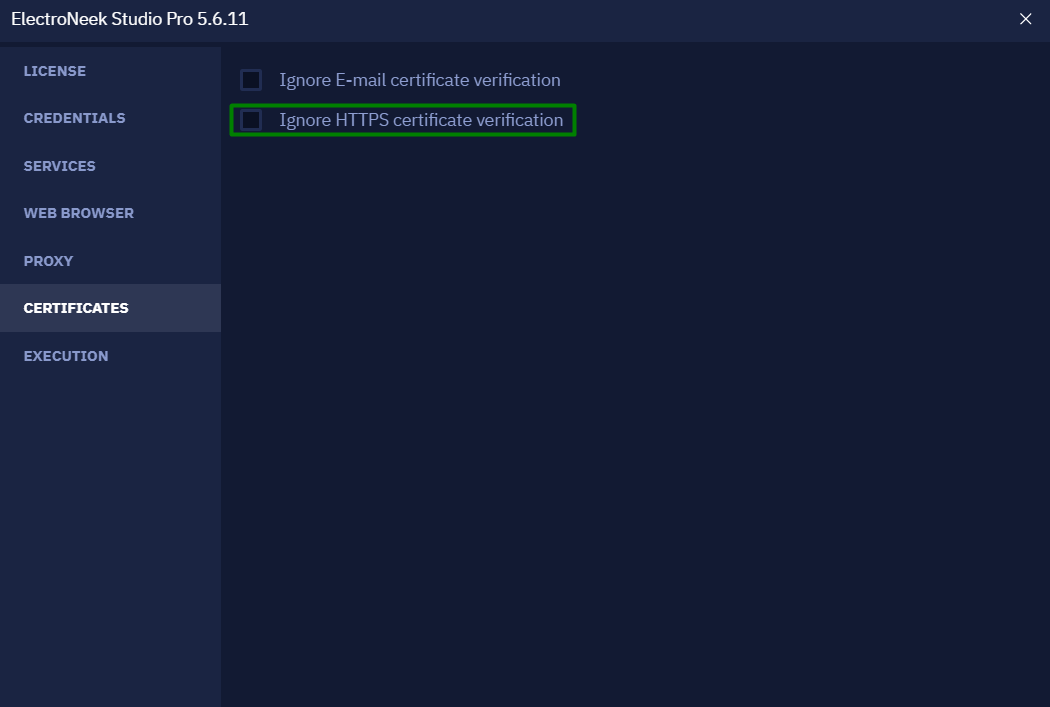
Solution 2 (authorization):
The error message “Self signed certificate in certificate” shows that someone in the network chain is tampering with the certificate - gateway, proxy etc. It might be for malicious intentions so you have to contact your system administrator first. If your administrator ensures its safety, you can select this checkbox to ignore certificate validation (the display of this tab may change depending on the role of the employee):

Unable to get local issuer certificate
Text and meaning of error
The error occurs when logging into Studio Pro/Bot Runner and may be due to an existing proxy connection or Internet access and/or local restrictions on that machine.

Solution
Check with your system administrator about the safety of enabling this checkbox.
The error message “Unable to get local issuer certificate” shows that someone in the network chain is tampering with the certificate - gateway, proxy, etc. It might be for malicious intentions so you have to contact your system administrator first. If your administrator ensures its safety, you can select this checkbox to ignore certificate validation (the display of this tab may change depending on the role of the employee):
Unable to verify the first certificate
Text and meaning of error
Such an error can occur:
- If you work with activities from the “Email” group
- When authorizing in Studio Pro/Bot Runner
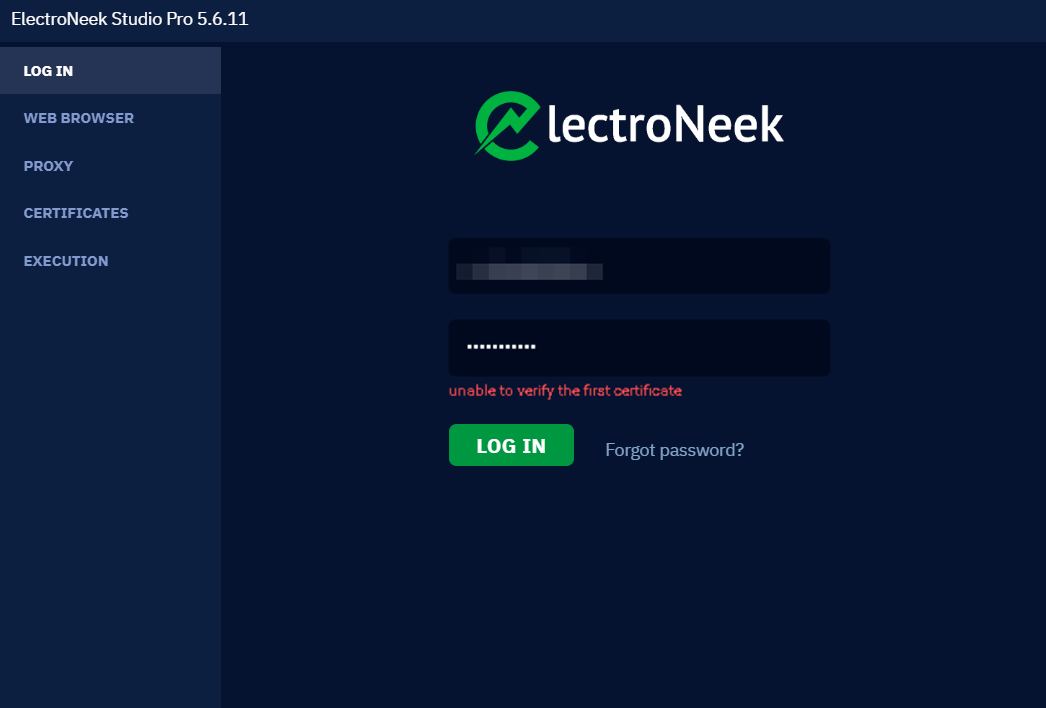
Solution
Check with your system administrator about the safety of enabling this checkbox.
The error message “Unable to verify the first certificate” shows that someone in the network chain is tampering with the certificate - gateway, proxy, etc. It might be for malicious intentions so you have to contact your system administrator first. If your administrator ensures its safety, you can select this checkbox to ignore certificate validation (the display of this tab may change depending on the role of the employee):

Client network socket disconnected before secure TLS connection was established
Text and meaning of error
The error occurs due to a proxy connection on your network.
Solution
If your proxy uses the basic authentication method or can be configured this way, go to “Settings” → “Proxy” menu of ElectroNeek Bot Runner and type an entry like this:
http://username:password@proxy_ip:proxy_port
Error connecting to ElectroNeek Bot Runner
The possible causes of such an error and the methods to eliminate it are listed below:
If the information on this page does not help solve the problem, please contact our support team through our Portal's Support Center.
1. The data for license verification was not specified
Please check if all actions have been taken in accordance with this license activation manual:
License Activating
Step 1. Activation email
Step 2. Launching and authentication
2. Studio Pro was launched without Bot Runner
This situation may be due to someone manually closing Bot Runner or it was closed due to a system error.
In this case, you should close all ElectroNeek applications and restart them.
If this error occurs again, you should start Bot Runner firstly, and only then Studio Pro.
3. There are local restrictions on this machine that prevent the platform from working
In order for Studio Pro and Bot Runner to communicate with each other, local ports localhost:5000-5005 must be opened. Check these ports to see if they are open. If they are closed, open and restart the platform.
ERR_CONNECTION_CLOSED error
The ERR_CONNECTION_CLOSED error can be encountered while attempting to connect to a service, whether it's an API or a web platform. This exception message mainly occurs due to misconfigured network devices and mismatched server certificates.
NoteIn some cases, this error can be just a temporary glitch, and it will go away if the internet connection is restored.
Solution
Before proceeding with the following solutions, consider these initial steps:
- Try restarting or power cycling your internet router.
- If you're using a VPN, temporarily disable it.
- Double-check the accuracy of your connection parameters.
Method 1: Change DNS Address
- Hold down Windows+R keys to open Run.
- In the Run dialog box, type in
ncpa.cpland click OK. - Right-click on your network adapter and click Properties.
- Select Internet Protocol Version 4 (TCP/IPv4) and click Properties.
- Enable the "Use the following DNS server addresses" option.
- In the Preferred DNS server, type in 8.8.8.8
- In the Alternate DNS server, type in 4.4.4.4
- Save settings by clicking OK.
- Restart your PC to apply the changes.
Method 2: Reset TCP/IP Settings and Flush DNS Cache
- Open the Run dialog by pressing Windows+R keys.
- Type "CMD" and press Ctrl+Shift+Enter to launch Command Prompt as an administrator.
- In the Command Prompt, enter the following commands one by one, pressing Enter after each:
- netsh winsock rese
- netsh int ip reset
- ipconfig /release
- ipconfig /renew
- ipconfig /flushdns
- Close the Command Prompt and reboot your PC.
Method 3: Disable Proxy Server
- Open the Run dialog by pressing Windows+R keys..
- Type "inetcpl.cpl" and press OK.
- Navigate to the Connections tab and click on LAN settings.
- Uncheck the "Use a proxy server for your LAN" option.
- Check the "Automatically detect settings" option.
- Confirm and save the settings by clicking OK.
Updated about 1 year ago