
UI
Studio Pro activities > GUI Automation > UI. Includes "Get element property", "Get element value", "Get position" and more.
Activities
| Get element property | Get element value | Get position |
|---|---|---|
| Select an item to extract its value | Choose an element to obtain its value | Choose an element to obtain its size and coordinates |
| Set element value | Element found? | Wait for element |
| Change the value of a given element | Check if a specific element exists — and trigger an action if it does | Execute an action if an element appears after a given amount of time |
| Wait for vanishing | ||
| Execute an action if an element disappears after a given amount of time |
Get element property
Description
Extracts the value of the specified attribute in a selector. The 'Save value to variable' activity appears automatically when choosing the 'Get element property' activity. It automatically saves the value to a variable. However, the activity is not mandatory to use and can be removed from the workflow.
Parameters
Interface element
Allows you to select an item from a list of created ones. After the item has been selected, the visual display of the item will automatically appear.
If the 'Use focused element' option is selected then the robot will read the property of the element where the cursor is located.
Property
Enables you to enter the attribute name to extract its value, for example, Id, Name, ClassName, Type and other attributes.
Do not parse the result
With this option enabled, the bot will not attempt to convert the return value to the corresponding datatype and the result will always be a string. If this option is disabled, then the return value may be converted to the corresponding datatype, for example, 10 will be automatically converted from string to number.
Comment
Contains an annotation to the activity. The input text will be displayed above the activity name.
Result
The property is stored in the element_property_value variable by default. This variable represents a string. For example, if the field to edit text of the 'Notepad' application in Windows 10 is selected using the 'Element Picker' tool and the 'Name' attribute is specified in the 'Property Name' parameter, then the result will be the following: "Text Editor".
Usage Examples
This activity may be your choice when it is required to extract a name of a button, for instance.
Get element value
Description
Extracts the "Value" attribute from a selector. The 'Save value to variable' activity appears automatically when choosing the 'Get element value' activity. It automatically saves the value to a variable. However, the activity is not mandatory to use and can be removed from the workflow.
Parameters
Interface element
Allows you to select an item from a list of created ones. After the item has been selected, the visual display of the item will automatically appear.
If the 'Use focused element' option is selected then the robot will read the value of the element where the cursor is located.
Do not parse the result
With this option enabled, the bot will not attempt to convert the return value to the corresponding datatype and the result will always be a string. If this option is disabled, then the return value may be converted to the corresponding datatype, for example, 10 will be automatically converted from string to number.
Comment
Contains an annotation to the activity. The input text will be displayed above the activity name.
Result
The value is stored in the element_value variable by default. This variable represents a string. For example, if a folder with files in Windows Explorer is opened and if any file in this folder, for instance, "ocr_picture.png" is selected using the 'Element Picker' tool, then the result will be the following: "ocr_picture.png".
Usage Examples
This activity can be useful when it is necessary to work with editing fields. In this case, it is possible to get content of the field. For example, in the 'Internet Explorer' browser, the 'Value' attribute of the field with URL will contain the URL itself.
Get position
Description
Gets an element size and coordinates. The 'Save value to variable' appears automatically to save the result. However, the activity is not mandatory to use and can be removed from the workflow.
Parameters
Interface element
Select an element from a list or create new one.
'Use focused element' option allows to get the coordinates of the focused element without element selection.
Comment
Contains an annotation to the activity. The input text will be displayed above the activity name.
Result
The received size and coordinates are stored in element_bounds variable by default. The value is an object with the following structure:
{

 "left": "y coordinate of the left side of the rectangle with the element",

 "right": "x coordinate of the right side of the rectangle with the element",

 "top": "y coordinate of the top side of the rectangle with the element",

 "bottom": "y coordinate of the bottom side of the rectangle with the element",

 "width": "width of the rectangle with the specified element",

 "height": "height of the rectangle with the specified element",

 "x": "x coordinate of the top left corner of the rectangle with the element",

 "y": "y coordinate of the top left corner of the rectangle with the element"

}
Usage Examples
This activity may be considered as an 'anchor'. Suppose we have an element with a reliable selector, but we need to interact with another element with unstable selector. Assume we know that the distance between the stable and unstable elements is always fixed. In this case, we could locate the stable element position and then calculate a relative distance to the unstable element.
Set element value
Description
This activity lets you change the value attribute of the selected interface element.
A simple example of its usage is selecting the input field in Notepad and writing some text to it by changing the value of this element. It can be used for changing values of many other interface elements such as path to file fields and others.
Desktop Picker
To be able to click an element of an app, we must start from defining the app element to use. This is handled by Desktop Picker.
To pick the desired element, open the dropdown menu in the Interface element parameter and then click the ‘Pick New Element’ button.
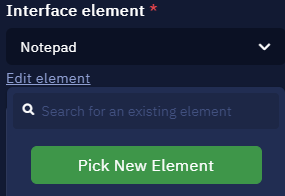
Here you can select an element or pick a new one
This will launch Desktop Picker. Open the desired app, hover your cursor over the required element (for example, text input field in Notepad). It will be highlighted red. Then press Ctrl + X to pick this element.
As soon as the element is picked, this window will appear. It indicates that the element was found and recognized. You can also set the element name here. It will be displayed in Studio Pro.
Advanced options menu displays the structure, or the selector of the indicated element. It usually consists of multiple tabs and each tab has its own attributes and values which represent the hierarchy of how the interface element is developed. You can modify, check or uncheck the attributes to achieve better accuracy or stability of interaction with the element.
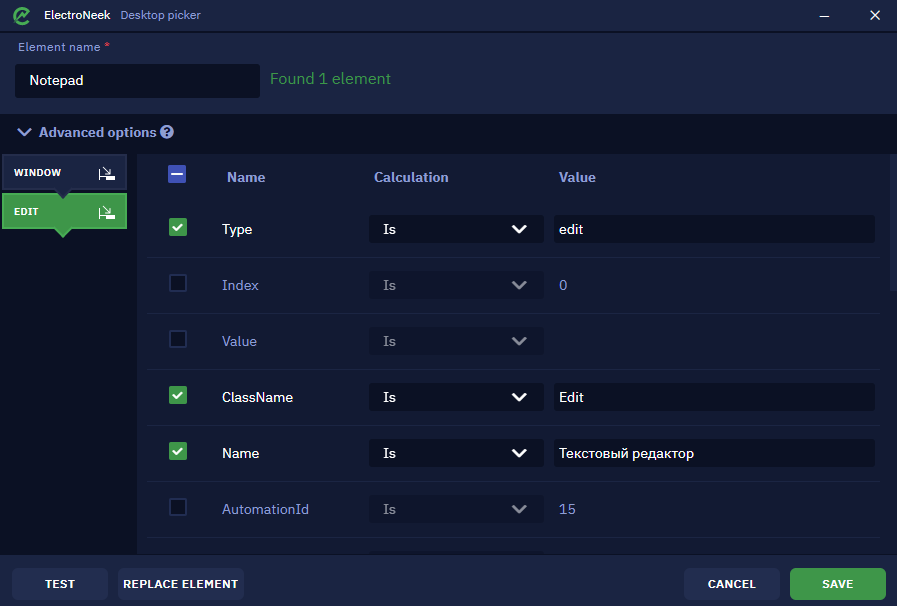
The ‘Test’ button lets you check if the element was defined correctly. Upon clicking it, focus will be shifted to the browser window and the picked element will be highlighted yellow if it was recognized correctly. It can display one of the following messages:
- Found 1 element means that the specific element was successfully recognized.
- Found >1 element means that there are a few similar elements. In this case it is required to pick one of them or double check the advanced options.
- Not found means that the element was not recognized and must be redefined or the advanced options must be corrected.
The ‘Replace element’ button lets you pick another element.
Click ‘Save’ once you are ready. This element will be saved for further usage in Studio Pro activities.
Once the setup is done, you should see this in the Interface element parameter. There is a preview image of the picked element.
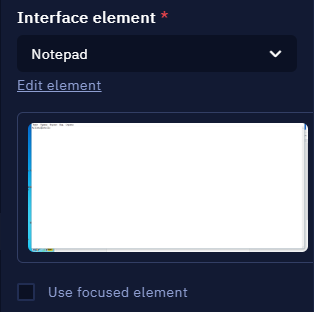
Preview of the selected element
Alternatively, the Use focused element checkbox lets you use the element in your currently opened app. For example, you have opened one more Notepad file and you are currently editing it (this means that your cursor is placed somewhere in its text input field). In this case you may skip choosing the specific element as described above. Your text will be typed into the focused app.
It is also possible to edit an existing element that you have previously picked. To do this, click the ‘Edit element’ button below its name.
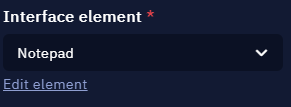
Here you can edit the element or pick a new one
This is what you will see. Here you can change its name or replace the element completely by picking a new one.
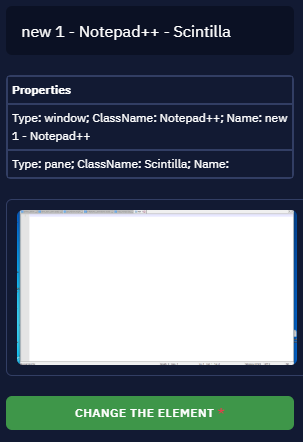
Element properties and the button that lets you replace it
If you choose to replace the element by clicking the ‘Change the element button’, Picker will be activated again. Once you pick the new element, this window will appear. It shows the old and new versions and lets you either save it and overwrite the old element or cancel the replacement.
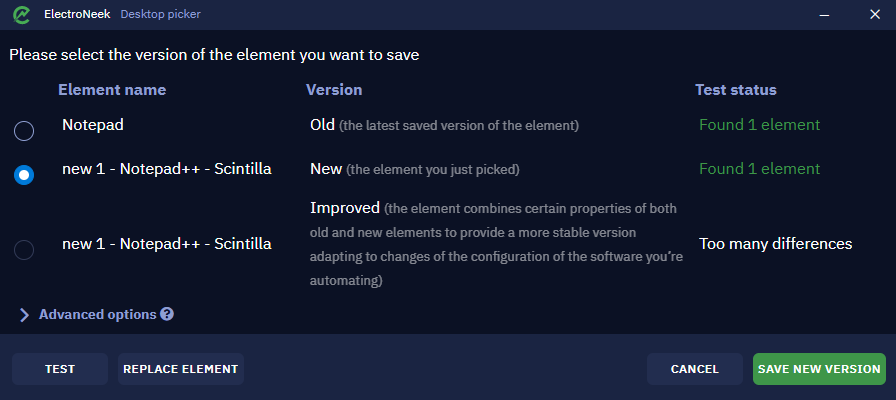
Here you can choose the new element version
An important note about elements names: when working with text editors such as Notepad or others, the file name is usually changed after the file was modified. Often an asterisk symbol (_) is added to its name. For example, if the file name is new1.txt, then after modifying it will become _new1.txt. Pay attention to this and make sure to choose the proper selector attributes.
Parameters
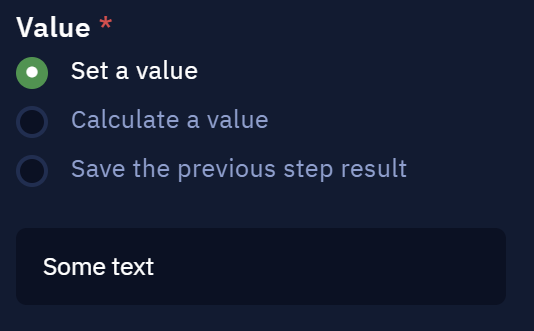
The Interface element parameter defines the element which value will be changed, and Value parameter defines how it will be changed. Much like in a lot of other activities, it is possible to input the value manually by selecting Set a value option, set the value dynamically using Calculate a value option and use the result of the previous activity by selecting Save the previous step result.
The Wait before, sec and Wait after, sec parameters indicate how much time will pass before or after executing this activity.

Wait before, sec and Wait after, sec parameters
Element found?
Description
Checks if an element exists on the screen. The 'Yes' branch is executed if the element exists, and the 'No' branch if it does not.
Parameters
Interface element
Select an element from a list or create new one.
Comment
Contains an annotation to the activity. The input text will be displayed above the activity name.
Usage Examples
This activity can be used to check if some actions were successful or not. I.e. check if login was successful and main window has been opened. Or to track any error pop-up windows.
Wait for element
Description
Waits for element to appear for specified amount of time. If the element will appear within waiting time, then the 'Yes' branch will be executed. Else the 'No' branch will continue.
Below is an example of how to set up and use an activity to check an element with a certain value in the property (that the element has the number '42' entered).
Parameters
Interface element
Select an element from a list or create new one.
Waiting time, sec
Amount of time in seconds to wait for the element.
Comment
Contains an annotation to the activity. The input text will be displayed above the activity name.
Usage Examples
This activity is a good option in cases where the elements appears not immediately.
Wait for vanishing
Description
Waits for element to disappear for specified amount of time. If the element disappears within waiting time, then the 'Yes' branch is executed. Else the 'No' branch continues.
Parameters
- Interface element: select an element from a list or create new one.
- Waiting time, sec: amount of time in seconds to wait for the element to disappear.
Usage Examples
This activity is a good option in case you need to continue only after the certain element disappears, i.e. pop-up window disappears after button is clicked.
Updated about 1 year ago