
OCR Engines
Activities
| Microsoft Cloud OCR | Google Cloud OCR |
|---|---|
| Recognizes an image text using Microsoft OCR technology | Recognizes an image text using Google OCR technology |
| ABBYY Cloud OCR | Recognition template |
| Recognizes an image text using the ABBYY Cloud OCR technology | Specify a document that will be used as the recognition template |
Microsoft Cloud OCR
Description
Recognizes an image text using Microsoft OCR technology.
NoteWe do not store processed images on our servers.
Prerequisite
To use this activity, the Bot Runner should be connected to the Orchestrator via a valid access token. For more information about this token connection, read this article.
Microsoft Azure credentials
To work with Microsoft Cloud OCR, you need to log in to the portal and activate the "Computer Vision" product. You can find out how to do this in the product documentation. The parameters required to work with Studio Pro can be found on the "Keys and Endpoint" page. "KEY 1" and "KEY 2" are the subscription keys. You can use any of them in Studio Pro. You can find more about the parameters you need to use in Studio Pro in the next section of this article.
Parameters
Endpoint and Subscription key
You can connect your Microsoft Cloud OCR service account to Studio Pro to work with this activity. Click the "ADD NEW ACCOUNT" button to add your account.
In the appeared window you will see a from for creating an account:
- Service — this field can be filled in any way, it will not affect the operation of this action.
- Login — here you need to specify the Endpoint.
- Password — here you need to specify the Subscription Key.
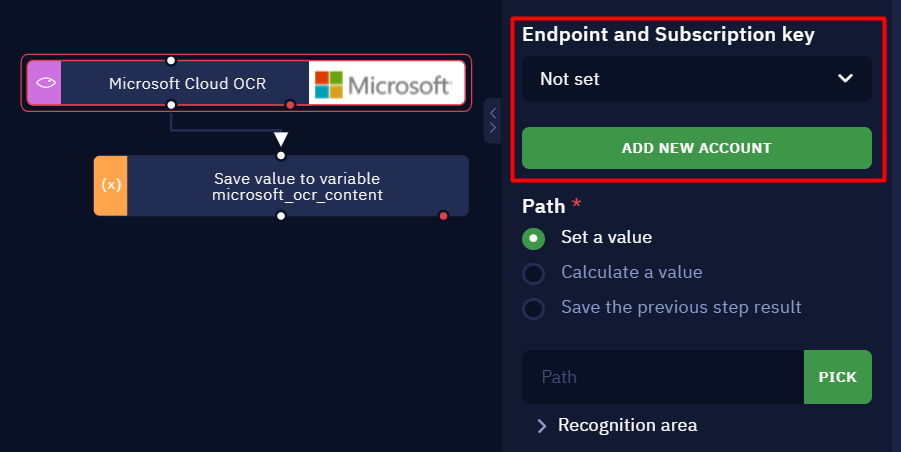
For testing and development purposes in Studio Pro, you can use the complimentary OCR plan provided by ElectroNeek according to your pricing plan. To use the complimentary plan, select the "Not set" option in the activity parameters.
Please note that since the Bot Runner product is free, no complimentary plan will be used when exporting the bot to .neex format. Thus, to build an attended-automation system you need to specify your account in the OCR service when working with the .neek file, and then export the bot to .neex.
Path
- Set a value: enables you to directly write the desired path. Clicking the 'Pick' button allows you to manually choose the path.
- Save the previous step result: chooses the previous activity result as a path.
- Calculate a value: enables you to use available properties and methods to form a path.
Supported formats:
- jpg
- png
- bmp
- gif
Maximum file size: 4 MB
Image dimensions: must be between 50 x 50 and 4200 x 4200 pixels, and the image cannot be larger than 10 megapixels.
Recognize handwritten text
With this option enabled, the OCR engine will try to convert the handwriting from the document to the text format.
Recognition area
If the 'Use recognition area' option is selected the robot will recognize the text inside the specified rectangular area. To set the area, the coordinates of the top left corner must be set as well as the rectangle width and height.
X
- Set a value: this allows you to specify the horizontal axis coordinate of the top left corner.
- Calculate a value: this allows you to use available variables, properties, and methods to specify the horizontal axis coordinate of the top left corner.
Y
- Set a value: this allows you to specify the vertical axis coordinate of the top left corner.
- Calculate a value: this allows you to use available variables, properties, and methods to specify the vertical axis coordinate of the top left corner.
Width
- Set a value: allows you to specify the rectangle width.
- Calculate a value: allows you to use available variables, properties and methods to specify the rectangle width.
Height
- Set a value: allows you to specify the rectangle height.
- Calculate a value: allows you to use available variables, properties and methods to specify the rectangle height.
Comment
Contains an annotation to the activity. The input text will be displayed above the activity name.
Result
To store the recognition result in a variable, a user needs to add the 'Assign value to variable' activity after the OCR block, specify the variable name, and choose the 'Save the previous step result' option.
The result is an array of 'key-value' objects. This object contains the following keys and values:
{

 "text": "recognized word",

 "location": {

 "y": "y coordinate of the top left corner of the rectangle with the word",

 "x": "x coordinate of the top left corner of the rectangle with the word",

 "width": "width of the rectangle with the recognized word",

 "height": "height of the rectangle with the recognized word"

 },

 "language": "language of the document"

 }
Usage Examples
This activity may be useful to use in the RPA processes where you have to deal with the text position. Because not only the text itself is being returned but also its coordinates you can make use of this function for the corresponding purposes.
NoteThere is a timeout of 3 seconds for this activity. If this time is not enough for the activity to recognize a large document, try splitting it into smaller parts.
Google Cloud OCR
Description
Recognizes an image text using Google OCR technology.
NoteWe do not store processed images on our servers.
Prerequisite
To use this activity, the Bot Runner should be connected to the Orchestrator via a valid access token. For more information about this token connection, read this article.
Google Cloud Platform credentials
To use Google Cloud services, you need to log in to the portal and create a project. After that, you need to activate the service "Cloud Vision API". Then navigate to the menu "APIs & Services" → "Credentials". On this page, you will find the "API Key". That is what you need to use as a password when creating an account. We will describe it in more detail in the next section of this article.
Parameters
API Key
You can connect your Google Cloud OCR service account to Studio Pro to work with this activity. Click on the "ADD NEW ACCOUNT" button to add your account.
In the appeared window you will see a form for creating an account:
- Service — this field can be filled in any way, it will not affect the operation of this action.
- Login — this field can be filled in any way, it will not affect the operation of this action.
- Password — here you need to specify the API Key.
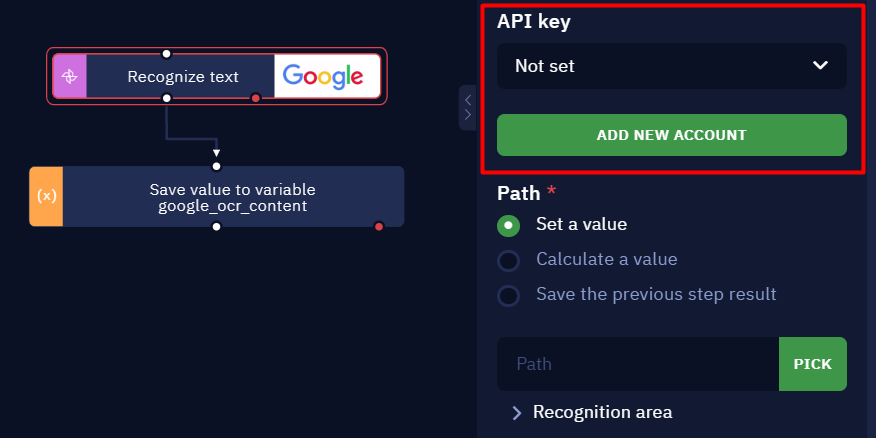
For testing and development purposes in Studio Pro, you can use the complimentary OCR plan provided by ElectroNeek according to your pricing plan. To use the complimentary plan, select the "Not set" option in the activity parameters.
Please note that since the Bot Runner product is free, no complimentary plan will be used when exporting the bot to .neex format. Thus, to build an attended-automation system you need to specify your account in the OCR service when working with the .neek file, and then export the bot to .neex.
Path
- Set a value: enables you to directly write the desired path. Clicking the 'Pick' button allows you to manually choose the path.
- Save the previous step result: chooses the previous activity result as a path.
- Calculate a value: enables you to use available properties and methods to form a path.
Supported formats
- jpeg
- png
- bmp
- gif
- svg
Maximum file size: 20 MB
Maximum image size: 75 megapixels (length × width)
Recognition area
If the "Recognition area" option is selected the robot will recognize the text inside the specified rectangular area. To set the area, the coordinates of the top left corner must be set as well as the rectangle width and height.
X
- Set a value: allows you to specify the horizontal axis coordinate of the top left corner.
- Calculate a value: allows you to use available variables, properties, and methods to specify the horizontal axis coordinate of the top left corner.
Y
- Set a value: allows you to specify the vertical axis coordinate of the top left corner.
- Calculate a value: allows you to use available variables, properties, and methods to specify the vertical axis coordinate of the top left corner.
Width
- Set a value: allows you to specify the rectangle width.
- Calculate a value: allows you to use available variables, properties, and methods to specify the rectangle width.
Height
- Set a value: allows you to specify the rectangle height.
- Calculate a value: allows you to use available variables, properties, and methods to specify the rectangle height.
Comment
Contains an annotation of the activity. The input text will be displayed above the activity name.
Result
Along with the "Recognize text" activity block, the "Save value to google_ocr_content variable" block also appears on the canvas. This is the variable where the text recognized from the image will be saved.
The result is an array of 'key-value' objects. This object contains the following keys and values:
{
 "text": "recognized word",
 "location": {
   "y": "y coordinate of the top left corner of the rectangle with the word",
   "x": "x coordinate of the top left corner of the rectangle with the word",
   "width": "width of the rectangle with the recognized word",
   "height": "height of the rectangle with the recognized word"
 },
 "language": "language of the recognized word"
}
Usage recommendations
In addition to the obvious reason for using this activity (recognizing text from an image), note that the coordinates of the words in the object array are also returned. This information may be useful in some RPA processes.
ABBYY Cloud OCR
Description
Recognizes an image text using the ABBYY Cloud OCR technology. Either images or pdf files can be processed.
How to work with credentials
The credentials in ABBYY OCR differ from other OCR services. You can learn more about it in this article.
NoteIf after performing the steps in the article above you cannot interact with this activity, please restart Studio Pro and try again.
Parameters
Path
- Set a value: enables you to directly write the desired path. Clicking the 'Pick' button allows you to manually choose the path.
- Save the previous step result: chooses the previous activity result as a path.
- Calculate a value: enables you to use available properties and methods to form a path.
Supported file extensions:
- .jpg
- .png
- .bmp
- .tiff
- .pcx
- .dcx
- .djvu
- .gif
- .wdp
Maximum file size: 100 MB
Language of the document: Enables you to select the document's written language.
Export format
This parameter allows you to select up to three formats in which the data will be exported. Supported data formats:
- .txt
- .txt unstructured
- .rtf
- .docx
- .xlsx
- searchable pdf
- .pdf with texts and pictures
- .XML
- .xml for corrected pictures
- alto
Comment
Contains an annotation of the activity. The input text will be displayed above the activity name.
Result
The result is saved in a text file in the following destination: 'C:\Users\<Username>\ElectroNeek'.
Usage Examples
This activity should be used when text is placed as an image which makes it impossible to extract the text using standard methods. In this case, you will use this function to scan the image and save all the recognized characters.
Make sure to keep in mind that you may not get the maximum accuracy sometimes. It depends on the image quality, text size, and some other characteristics.
Recognition template
Description
This activity enables you to specify a document which will be used as the recognition template. The document will be displayed as an image where, with a graphical tool, the user can select areas, where the text should be recognized from, and specify the corresponding variables which will store the recognition results.
Below is an example of how to set up and use an activity to create your own invoice recognition template (any other document can be) and an example of the recognized values.
Parameters
OCR Data
- Save the previous step result: chooses the previous function result as the OCR data obtained from an any OCR engine.
- Calculate a value: enables you to specify the variables containing the OCR data directly.
Template image file
A path to the image that should be used as the recognition template.
The following image formats are supported:
- .jpg
- .bmp
- .png
- .gif
- .tiff
Edit areas
After clicking on this button, a special visual tool opens. This visual tool enables the user to select areas - rectangles - where to extract text from. One click on the image sets the top left corner of the rectangle. Upon clicking, the rectangle size can be modified. When the desired size is set, make another click to stop selecting the area. After the area is set, the user needs to specify a variable which will store the recognized text.
Comment
Contains an annotation to the activity. The input text will be displayed above the activity name.
{

"text": "recognized word",

"location": {

"y": "y coordinate of the upper-left corner of the rectangular area with text",

"x": "x coordinate of the upper left corner of the rectangular area with text",

"width": "width of the rectangular area containing the recognized word",

"height": "height of the rectangular area containing the recognized word"

},

"language": "the language in which the recognized word is written"

}
Recommendations for use
This activity can be handy in RPA processes, where you also need to know in which area a particular text is located. Since not only the word itself but also its coordinate is returned, this can also be used for appropriate purposes.