How-tos: Studio Pro OCR services
OCR services in ElectroNeek
What is OCR?
Optical Character Recognition (OCR) is a technology that converts images with text into data that can be handled as plain text in any text editor.
RPA processes often have tasks that require using of OCR. Typically, scanned documents, PDF files, and photos need to be recognized in order to extract certain information from them, often process it, and enter it into some system.
The documents can have either a strictly fixed structure, where we can accurately predict the location of specific data on the sheet (for example, knowing in advance the position of the "Name" field in a passport), or a less rigid structure (such as a payment bill with a known set of fields that may appear in different areas of various documents). In some cases, the documents may not have a clearly defined structure at all.
We can process such documents based on the final task. In general, we distinguish four main approaches to recognize and convert text from a image (document):
1. Image into plain text
This approach allows you to recognize the data from an image and output it as a set of characters, with which you can work, for example, in a text editor. In this case, the definition of the meaning of the text is left to the person. For example, if the bot needs to find the amount of a bill in the text, the search algorithm must be written by the bot's developer. It is also worth keeping in mind that with this recognition, elements of the formatting of the document - the location of individual words, characters, etc. may be lost.
2. Image into plain text with characteristic forms
We are talking about tables, "key-value" pairs and so on. This method is similar to the previous one, but in the output, besides plain text, we get a separately formatted table or other characteristic form (a list of "key-value" pairs, for example).
This means that the implementation of an algorithm for finding information in such data does not require extracting table elements from the plain text, but can work with the table itself directly. Nevertheless, it is still up to the developer to determine the meaning of the information.
3. Image into text by selecting recognition zones
We can also recognize a specific pattern. Typically, this approach makes sense in documents with a strictly fixed structure. For example, we work with scans of passports and we know that the passport issue date is always located in this particular area of the document and nowhere else.
In this case, we can simply ask the bot to look in this particular area of the document and return its contents, recognizing the text from this area. This somewhat simplifies the determination of the meaning of the information, because the picture is divided into areas just by the semantic criterion.
For example, the area with the date of issue of the passport, the area with the name of the passport holder, the area with the place of issue of the passport, and others.
4. Image into a data set
You may often encounter the term "data extraction", which reveals the meaning of this approach. The output here is more than just a set of characters — it is already-transformed data.
For example, we know what information is stored in invoices. The result of applying the described approach to the invoice will be a set of data like "Seller - Smith's cargo LLC.", "TIN - ..." and so on.
Therefore, we do not need to extract the meaning of the recognized text independently, we already receive the transformed information and can immediately use it for its intended purpose.
Which OCR-services does ElectroNeek support?
At ElectroNeek, we want to give our users the widest possible OCR experience. So, first of all, we have a specific tool integrated to our Ecosystem: IntelliDocs. You can use it to create apply high-level Intelligent Document Processing (IDP) in your workflows. Learn how to easily do that in this article.
Besides that, we provide you with a set of solutions that implement all of the described approaches:
- Converting an image (document) into plain text.
- Convert image (document) to plain text with characteristic forms (table, "key-value" pairs and similar) highlighted.
- Converting an image into text by selecting recognition zones (specifying a recognition pattern).
- The Recognition template activity. This is the ElectroNeek's own design.
- Converting an image (document) into a data set (or data extraction).
Is there a charge?
ElectroNeek provides users with a free complimentary OCR page plan for one year for Google Cloud OCR and Microsoft Cloud OCR. We give this option for development and testing purposes so that the developer doesn't waste time signing up for an account with the vendor, but can focus immediately on the final task.
When a bot is developed and tested, the question arises of transferring the bot to a productive environment. Execution of bots in the productive environment is done through the Bot Runner tool.
Since this tool is free and does not require mandatory authorization in our system for the execution of bots, it does not provide for the use of a complementary plan. In this case we allow you to connect your own account with the vendor being used, so that the payment can be made on the vendor's side.
An exception is if the user is already authorized in Bot Runner - then the complementary plan can be used, but the number of pages of the complementary plan is limited, so for production it will not be enough and in any case it will be necessary to connect your own account with the vendor.
As for the other available OCR vendors in the system: ElectroNeek provides connectors that allow you to link your own account with these vendors.
This is done also because these vendors work with different types of documents, have flexible billing plans and can release regular updates. The connector allows you to always use the up-to-date version provided by the vendor and still easily change your plan from that vendor without affecting your integration with the bot.
NoteWe do not store processed images on our servers.
How to activate ABBYY OCR
Introduction
This page contains instructions on how to get a trial account to use the OCR technology from 'ABBYY'
To start using the ABBYY OCR technology:
- Create an account and get the application ID and password for the OCR.
- Add the application ID and password to Studio Pro.
These steps are described in detail below.
How to create an account
Follow this link to request a trial version of ABBYY OCR. When the account is set up, you will receive an email containing the Application ID and Application Password. Use these values to fill in the credentials in Studio Pro or Bot Runner:
Studio Pro
- Navigate to Settings → Credential Management → Services → ABBYY OCR
- Set up the Application ID and Application Password.
Bot Runner
- Launch Bot Runner.
- Right-click on the icon in the tray.
- Navigate to Settings → Services → ABBYY OCR.
- Set up the Application ID and Application Password.
NoteIf after performing the steps below you cannot interact with the ABBYY Cloud OCR activity, please restart Studio Pro and try again.
Once the activation is complete, the ABBY Cloud OCR activity will become available in the activities list#
How to use recognition template variables in subprograms
Working with PDF documents often involves extracting variables using the "Recognition template" activity. In this article, we will address the procedure to use these variables in multiple workflows.
Using recognition template variables in multiple workflows
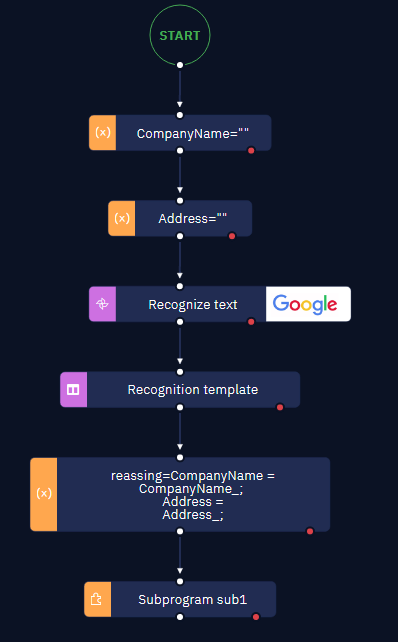
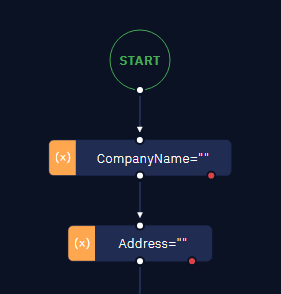
- Begin by defining the necessary variables as global types. This can be achieved using the "Assign value to variable" activity.
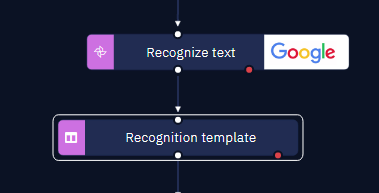
- Utilize the "Recognition template" activity and apply the previously created global variables to assign the extracted values.
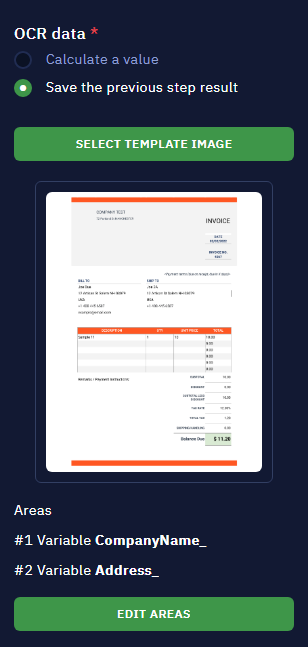
- Once the global variables are assigned values through the recognition template, they are now ready for use in other workflows or subprograms.
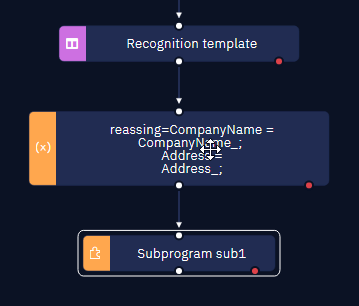
- Finally, the complete implementation would look like this: