
Data extraction
Studio Pro Activities > Document Processing > Data extraction. Includes "Klippa OCR", "Nanonets OCR", "Microsoft Form Recognizer OCR" and more,
Activities
| Klippa OCR | Nanonets OCR | Microsoft Form Recognizer OCR |
|---|---|---|
| Recognize text using the Klippa OCR service | Recognize the text using the Nanonets OCR service | Recognize text using the Microsoft Form Recognizer service |
| Amazon Textract OCR | CaptureFast OCR | |
| Recognize text from image using the Amazon Textract OCR service | Recognize text from image using the CaptureFast OCR service |
Klippa OCR
Description
This activity allows you to recognize text using the Klippa OCR service.
NoteWe do not store processed images on our servers.
How to work with credentials
To start using this activity, you first need to enter your credentials.

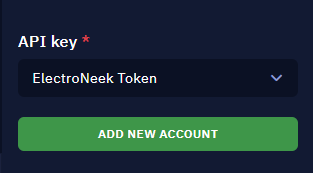
The button to add new credentials
This article describes in detail the process of adding credentials.
Parameters
API Key
Klippa OCR requires an account in the service itself. Create an account in Klippa and fill it out in Studio Pro to get access to the Klippa functionality. If you already have an account in Studio Pro, you can select it from the drop-down list. If not, click Add New Account and fill in the details.
In the appeared window you will see a form for creating an account:
- Service — this field can be filled in any way, it will not affect the operation of this action.
- Login — this field can be filled in any way, it will not affect the operation of this action.
- Password — here you need to specify the API Key.
The endpoint used in Klippa OCR is /parseDocument.
Path
- Set a value option allows you to manually specify the path to the image whose text you want to recognize. Click the "PICK" button to open the file explorer and select the path to the picture.
- Calculate a value option allows you to use a special formula or a special method to determine the path.
- Save the previous step result option takes the result of the previous workflow activity as the path.
Additional parameters
Use this parameter to pass custom parameters to Klippa, such as {"template": "financial_candidate"}. You can learn more about these parameters in this article.
Comment
This parameter allows you to create an annotation to the activity. The input text will be displayed above the activity name.
Nanonets OCR
Description
This activity allows you to recognize the text using the Nanonets OCR service.
How to work with credentials
To start using this activity, you first need to enter your credentials.
The button to add new credentials
This article describes in detail the process of adding credentials.
Parameters
API Key
Nanonets OCR requires an account in the service itself. When the account is created, generate an API key in your personal Nanonets profile and add it to the Credential Manager. If you already have an account in Studio Pro, you can select it from the drop-down list. If not, click "Add new account" and fill in the details.
The endpoint used in Nanonets OCR is /OCR/Model/{model_id}/LabelFile/.
Path
- Set a value: allows you to manually specify the path to the image whose text you want to recognize.
- Calculate a value: allows you to use a special formula or a special method to determine the path.
- Save the previous step result: takes the result of the previous workflow activity as the path.
Model ID
- Set a value: allows you to manually specify the Model ID.
- Calculate a value: allows you to use a special formula or a special method to determine the Model ID.
- Save the previous step result: takes the result of the previous workflow activity as the Model ID.
Comment
This parameter allows you to create an annotation to the activity. The input text will be displayed above the activity name.
Microsoft Form Recognizer OCR
Description
This activity allows you to recognize text using the Microsoft Form Recognizer service.
Parameters
Endpoint and Key
Microsoft Form Recognizer requires an account in the service itself. Create an account in Form Recognizer and fill it out in Studio Pro to get access to the Form Recognizer functionality. If you already have an account in Studio Pro, you can select it from the drop-down list. If not, click Add New Account and fill in the details.
In the appeared window you will see a from for creating an account:
- Service — this field can be filled in any way, it will not affect the operation of this action.
- Login — here you need to specify the
Endpoint.Endpointshould be entered with protocol HTTPS, for example: . - Password — here you need to specify the
API Key.
Endpoint for Microsoft Form Recognizer OCR is automatically selected depending on the selected data type to be recognized.
Path
- Set a value option allows you to manually specify the path to the image whose text you want to recognize. Click the "PICK" button to open the file explorer and select the path to the picture.
- Calculate a value option allows you to use a special formula or a special method to determine the path.
- Save the previous step result option takes the result of the previous workflow activity as the path.
Data type
Select the type of document you want to recognize:
- Business Card
- Id document
- Invoice
- Layout
- Receipt
Additional parameters
- Calculate a value option allows you to use a special formula or method to determine additional parameters. In this case, the formula or method must be written using JavaScript syntax.
- Save the previous step result option takes the result of the previous workflow activity as the additional parameters.
Comment
This parameter allows you to create an annotation to the activity. The input text will be displayed above the activity name.
Amazon Textract OCR
Description
This activity allows you to recognize text from image using the Amazon Textract OCR service.
How to work with credentials
To start using this activity, you first need to enter your credentials.

The button to add new credentials
This article describes in detail the process of adding credentials.
Parameters
ID and Secret
Amazon Textract OCR requires an account in the service itself. Create an account on Textract and fill in its details in Studio Pro to access the Textract functionality. If you already have an account in Studio Pro, you can select it from the drop-down list. If not, click "ADD NEW ACCOUNT" and fill in the details.
In the appeared window you will see a from for creating an account:
- Service — this field can be filled in any way, it will not affect the operation of this action.
- Login — here you need to specify the
ID. - Password — here you need to specify the
Secret.
The endpoint used in Amazon Textract OCR is AnalyzeDocument.
Path
- Set a value option allows you to manually specify the path to the image whose text you want to recognize. Click the "PICK" button to open the file explorer and select the path to the picture.
- Calculate a value option allows you to use a special formula or a special method to determine the path.
- Save the previous step result option takes the result of the previous workflow activity as the path.
Data type
Select the type of analysis you want to perform. Select the "Table" option to return information about the tables detected in the input document. Select "Form" to return data about the detected forms. To perform both types of analysis, select both options. All rows and words detected in the document will be displayed as a result.
Comment
This parameter allows you to create an annotation to the activity. The input text will be displayed above the activity name.
CaptureFast OCR
Description
This activity allows you to recognize text from image using the CaptureFast OCR service.
How to work with credentials
To start using this activity, you first need to enter your credentials.

The button to add new credentials
This article describes in detail the process of adding credentials.
Parameters
Email and Password
CaptureFast OCR requires an account in the service itself. Create an account in CaptureFast and fill it out in Studio Pro to get access to the CaptureFast functionality. If you already have an account in Studio Pro, you can select it from the drop-down list. If not, click "ADD NEW ACCOUNT" and fill in the details.
In the appeared window you will see a from for creating an account:
- Service — this field can be filled in any way, it will not affect the operation of this action.
- Login — here you need to specify the e-mail linked to your CaptureFast OCR account.
- Password — here you need to specify the password linked to the account.
Endpoint for CaptureFast OCR is automatically selected depending on the selected data type to be recognized.
Path
- Set a value option allows you to manually specify the path to the image whose text you want to recognize. Click the "Pick" button to open the file explorer and select the path to the picture.
- Calculate a value option allows you to use a special formula or a special method to determine the path.
- Save the previous step result option takes the result of the previous workflow activity as the path.
Document type
This option requires authorization in the CaptureFast service. When you click on the drop-down list, Studio Pro sends a request to the service and returns a list of document types from which you can select the types you want.
Comment
This parameter allows you to create an annotation to the activity. The input text will be displayed above the activity name.
Updated 4 months ago