
Tables
Activities
| Read table | For each row |
|---|---|
| Read the contents of a specified table | Apply a set of actions to each row in the specified table |
| Remove empty rows | Save table |
| Removes all empty rows from a table | Save the table in Excel, Google Sheets or CSV format |
Read table
Description
This activity is used to read the contents of a specified table. Excel, Google Sheets and CSV tables are supported.
When adding this activity to a workflow, an 'Assign value to variable' action block connected to this block will also appear. The result of reading operation will be saved to this variable. That being said, this variable stores the table contents and provides a visual representation of the table data.
However, using the 'Assign value to variable' activity is not strictly necessary in this case. It is safe to delete this block and handle the result any other way. For example, it is possible to connect the 'Read table' activity to the 'For each row' activity and use the Save the previous step result option.
One more important thing to remember: in case your table is currently open in any desktop application, do not forget to close it. Otherwise, Studio will not be able to get access to the file and execute the activity.
Parameters
The set of parameters depends on the chosen option: Excel, Google Sheets or CSV.
Read table from is the general parameter which defines what kind of table you are going to read. It is required.
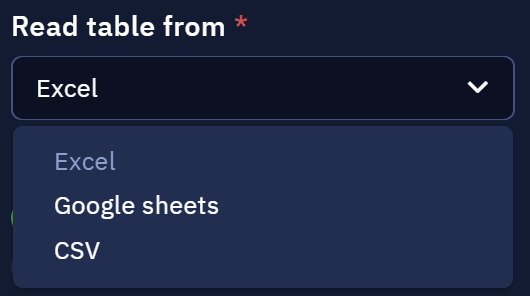
The Read table from parameter and the available options
Excel
Reading an Excel table works the same way as the separate 'Read Excel table' activity. Read about it in this article: Read Excel file.
Google Sheets
If we choose to read a table from Google Sheets, we will see the following parameters.
The first one here is Google account. It is required to connect the account where the table is stored. If you have not done this yet, this is what you will see here.

This message shows that the Google account is not connected
Click the link in this message. The settings menu will open. Here you will be able to login to your Google account and connect it. Click the Authenticate button to do it.
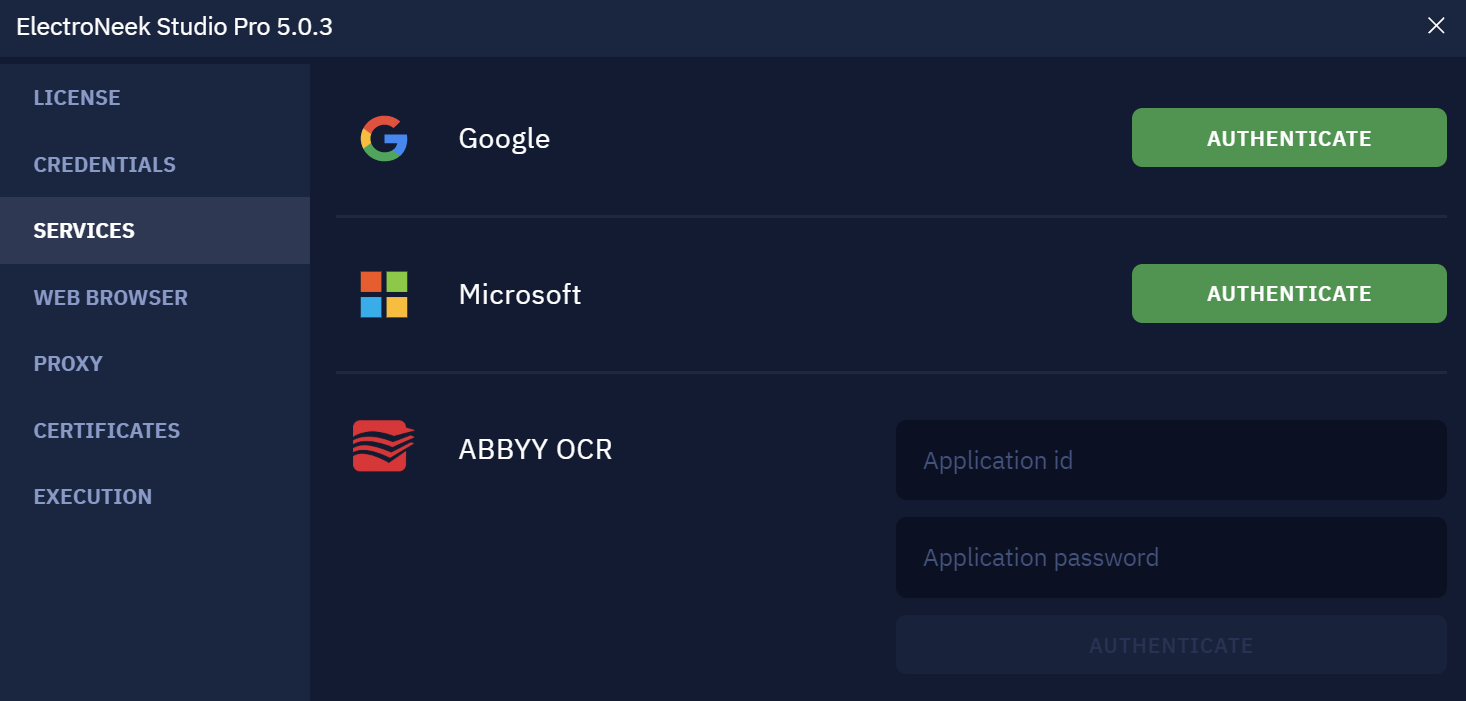
The Services menu where you can login to your account
Once it is done, you should see this message. It indicates that you can use the table stored in your account.

This message shows that your Google account is connected
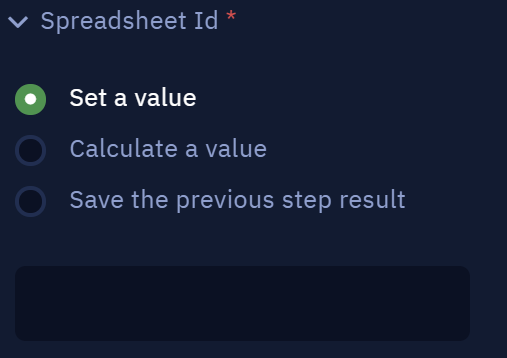
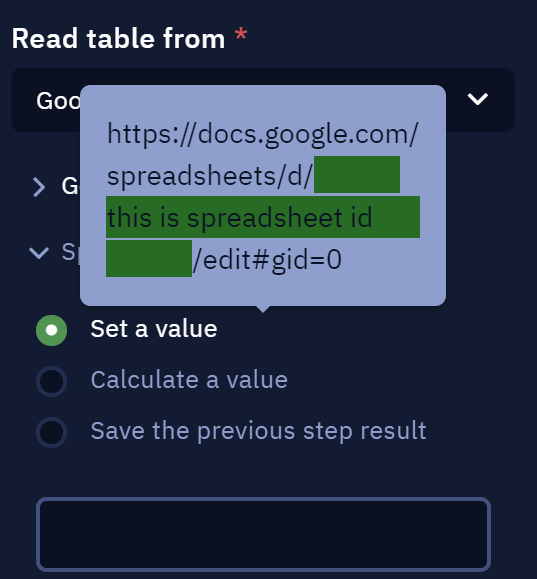
The next parameter is Spreadsheet Id. It is used to specify the table itself. Pay attention to the tooltip that appears when hovering your cursor over the input field: it is only required to input the ID of the table, not the whole link. This is a required parameter.
For example, if the link is <https://docs.google.com/spreadsheets/d/11sw2l2a6b1n2l8aDP_E9_SjAV/edit#gid=0>, then the ID is 11sw2l2a6b1n2l8aDP_E9_SjAV.
Spreadsheet Id parameter
Tooltip showing how to input the table ID
The last parameter is Range. It defines what part of the table needs to be read. There is also a tooltip for it. This is a required parameter.
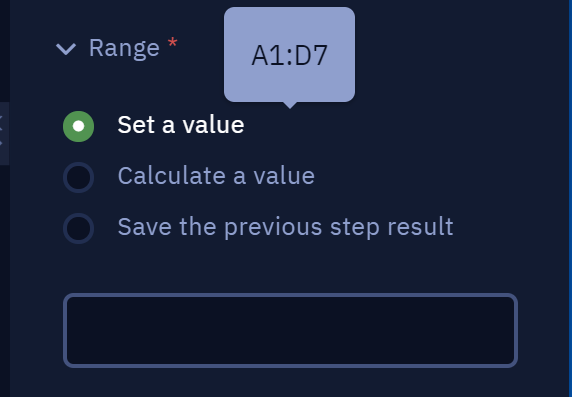
Range parameter and the tooltip
CSV
The only parameter here is Path which lets you specify the needed .csv table file. Use the 'Pick' option to choose the file using Explorer. This is a required parameter.
Studio Pro supports auto recognition of such delimiters as ,, ; and Tab. Regardless of the chosen delimiter, the data from the table will be read in the exact same way.
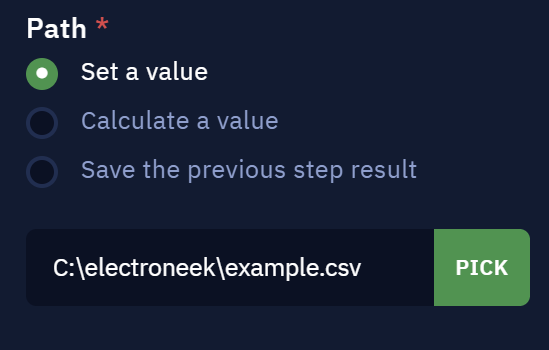
Path parameter
Results
In this case we used the 'Assign value to variable' activity to save and display the results.
Excel
The representation of Excel tables data is described here: Read Excel file
Google Sheets
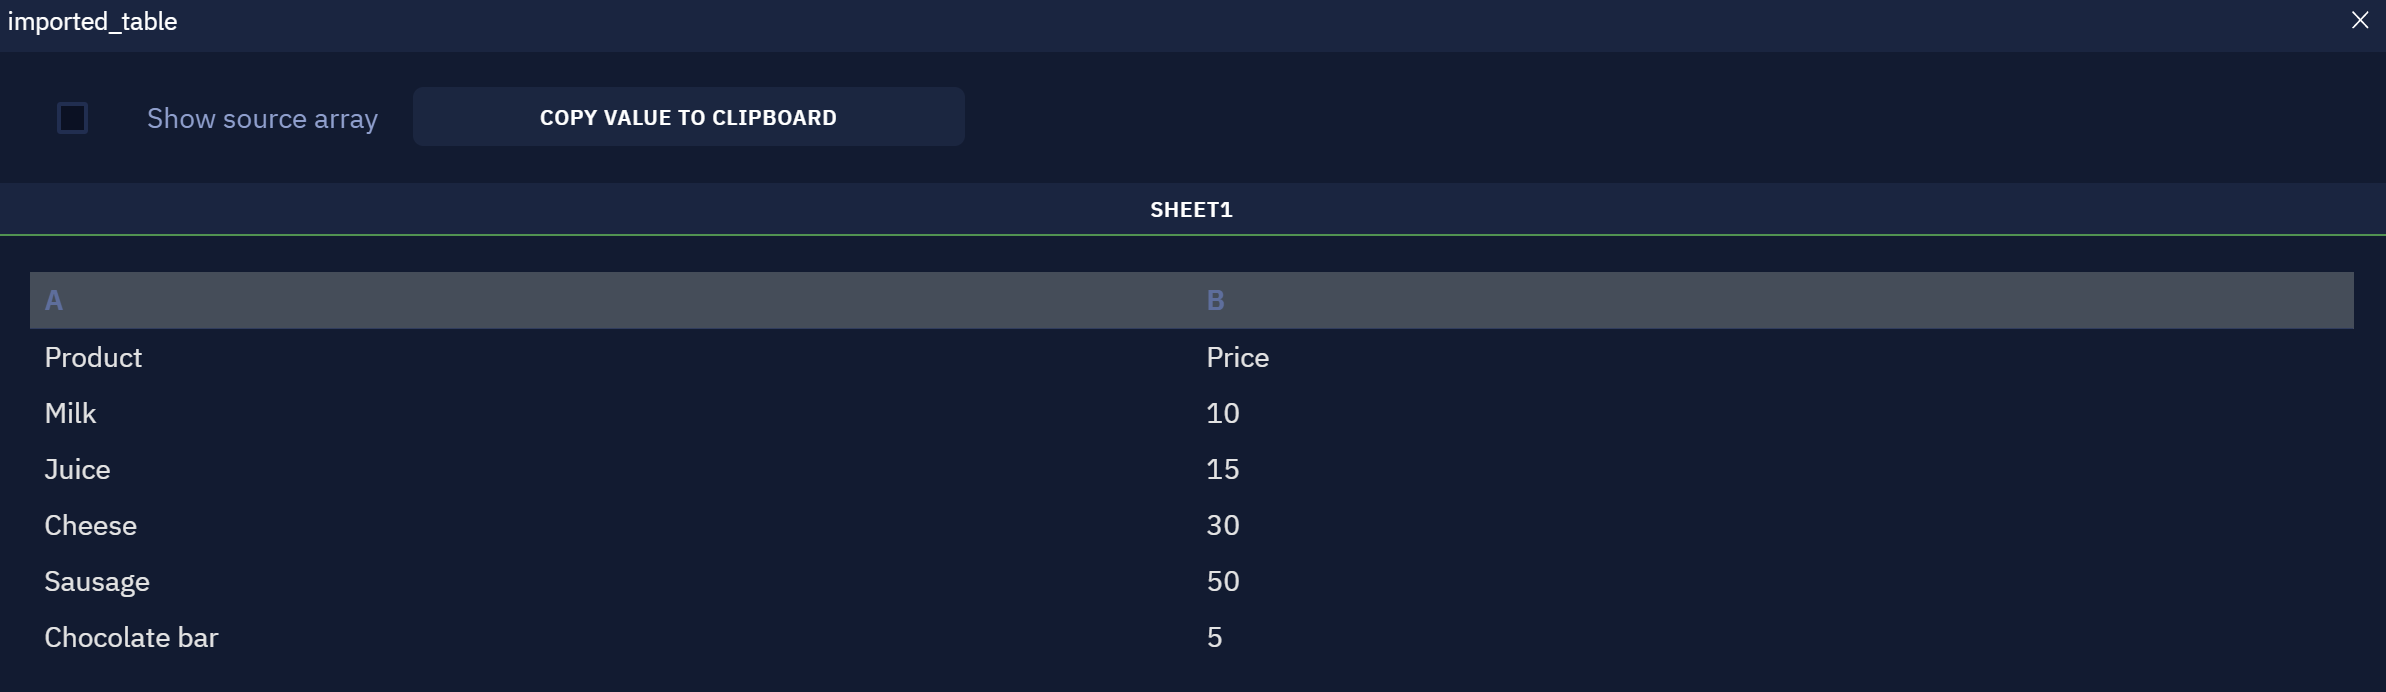
An example of a read Google Sheets table
CSV
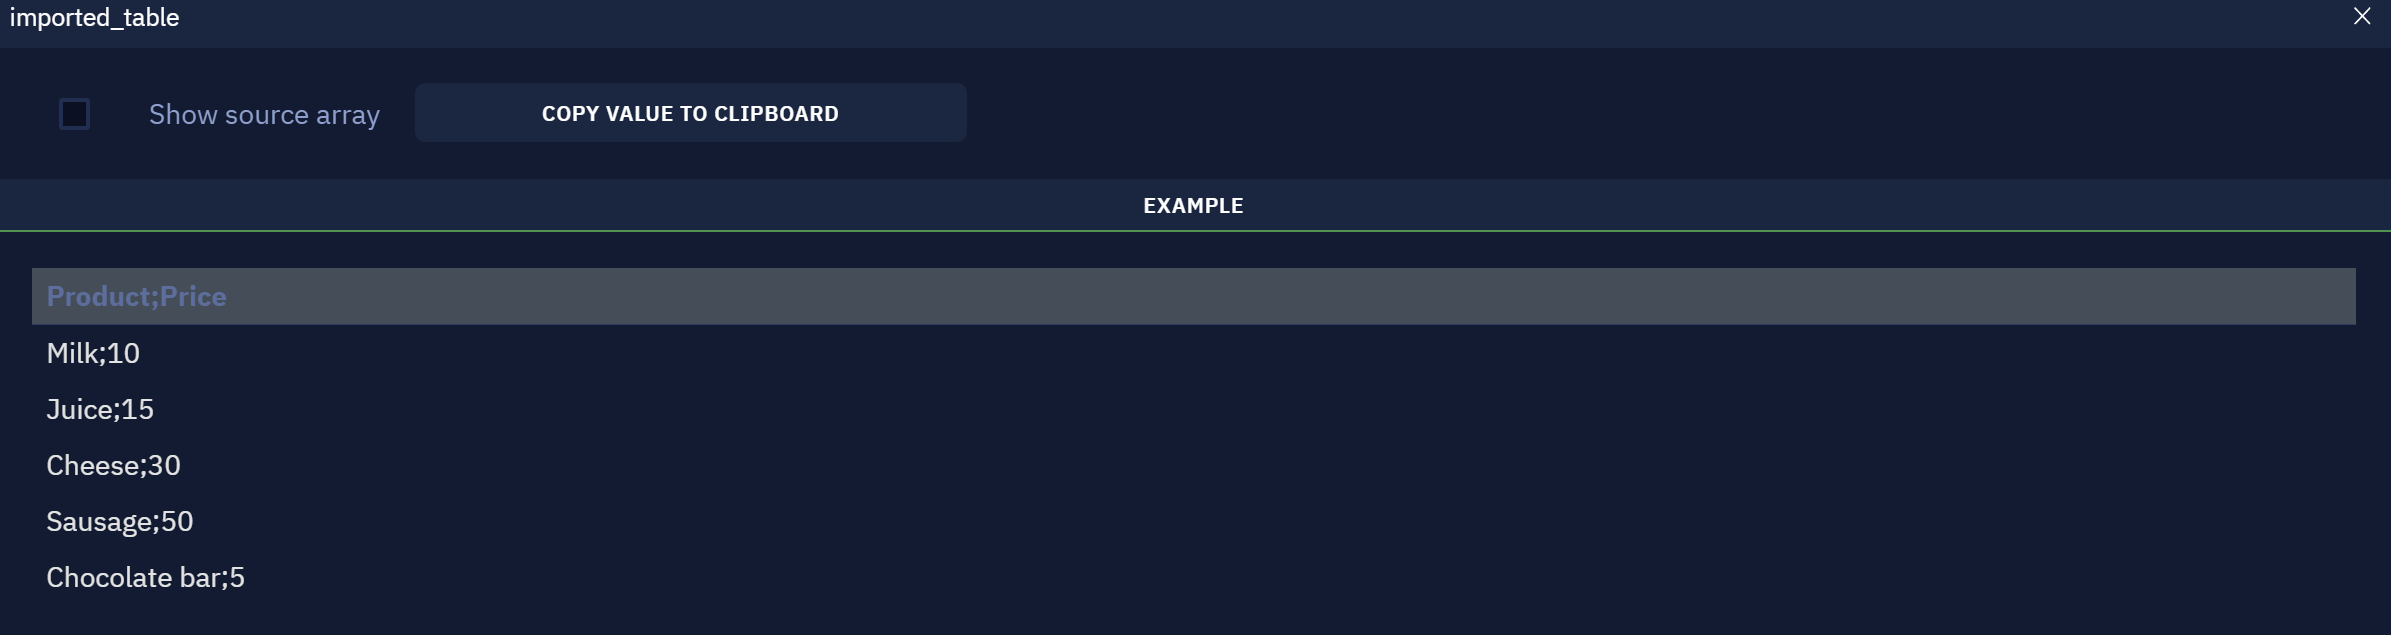
An example of a read CSV table
For each row
Description
This activity makes it possible to apply a set of actions to each row in the specified table.
It has a special structure. When added to a workflow, a gray region will appear. It contains the body of the loop (i.e. the set of actions you are going to perform). Drag and drop the desired activities here and connect them with the activity block itself and the 'Loop end' block.
This is how a newly added block looks like:
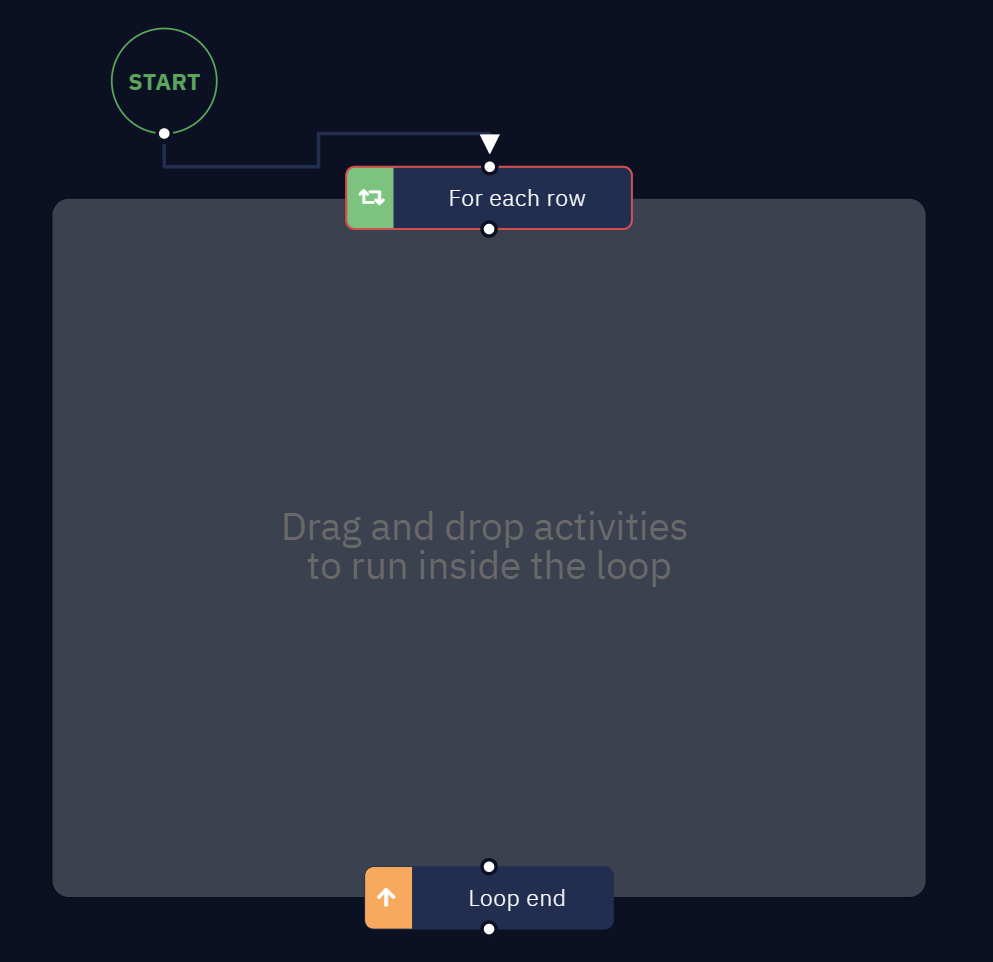
A template of the 'For each row' activity
Example
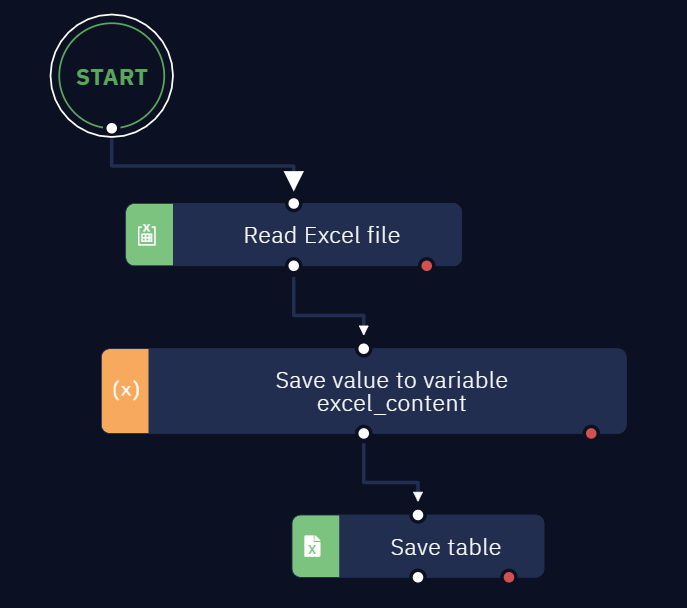
Let us start with an example of a workflow that has this activity. Here we read the contents of the table, save it to a variable and output the contents by each column to the console.
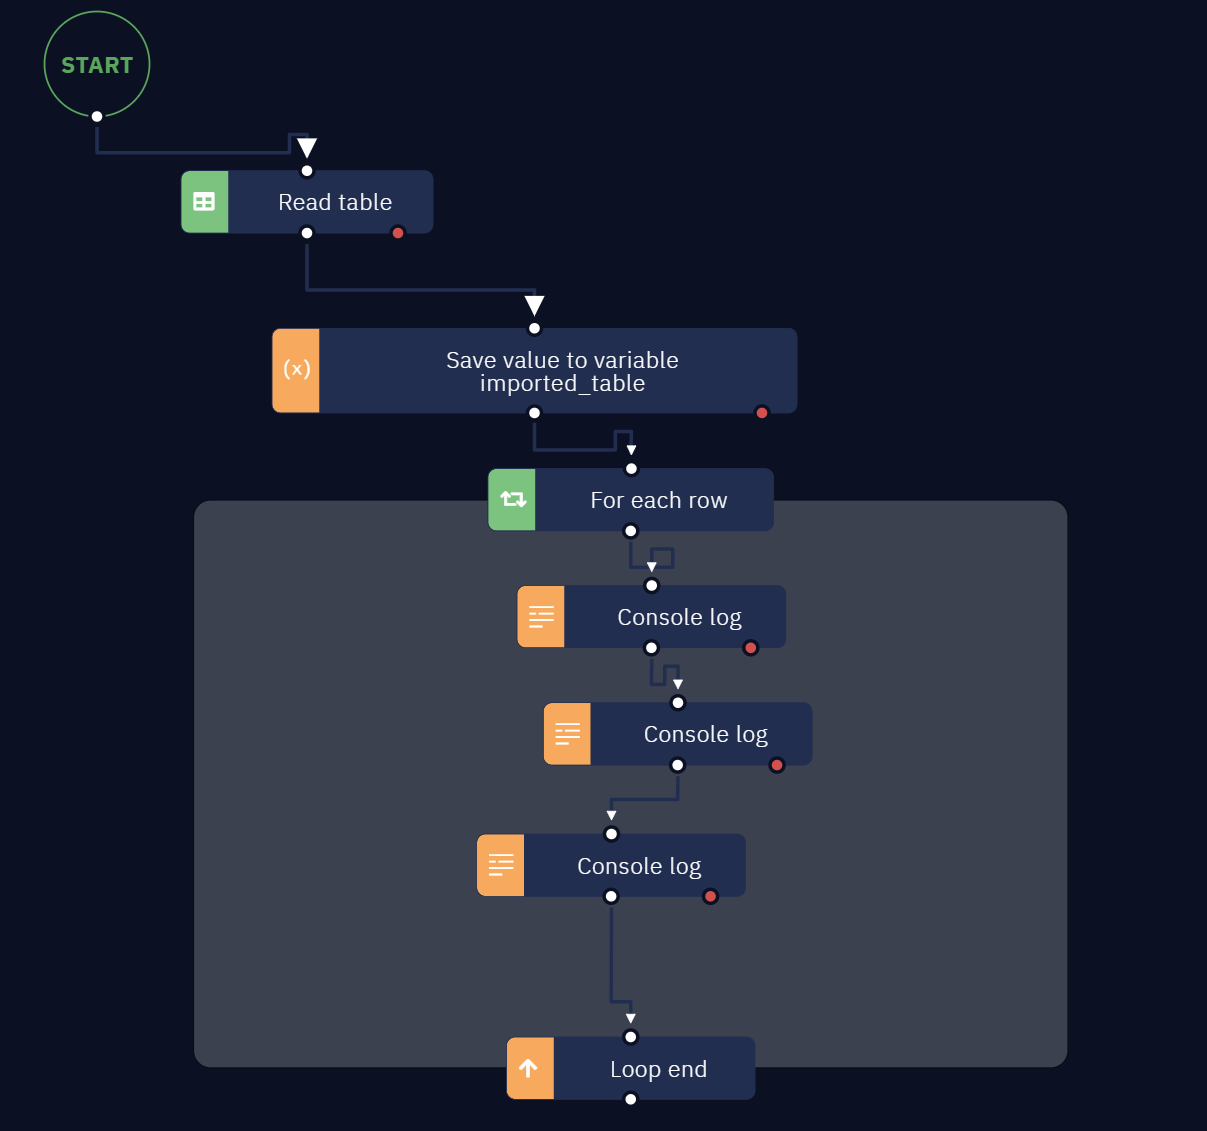
An example of a workflow with this activity
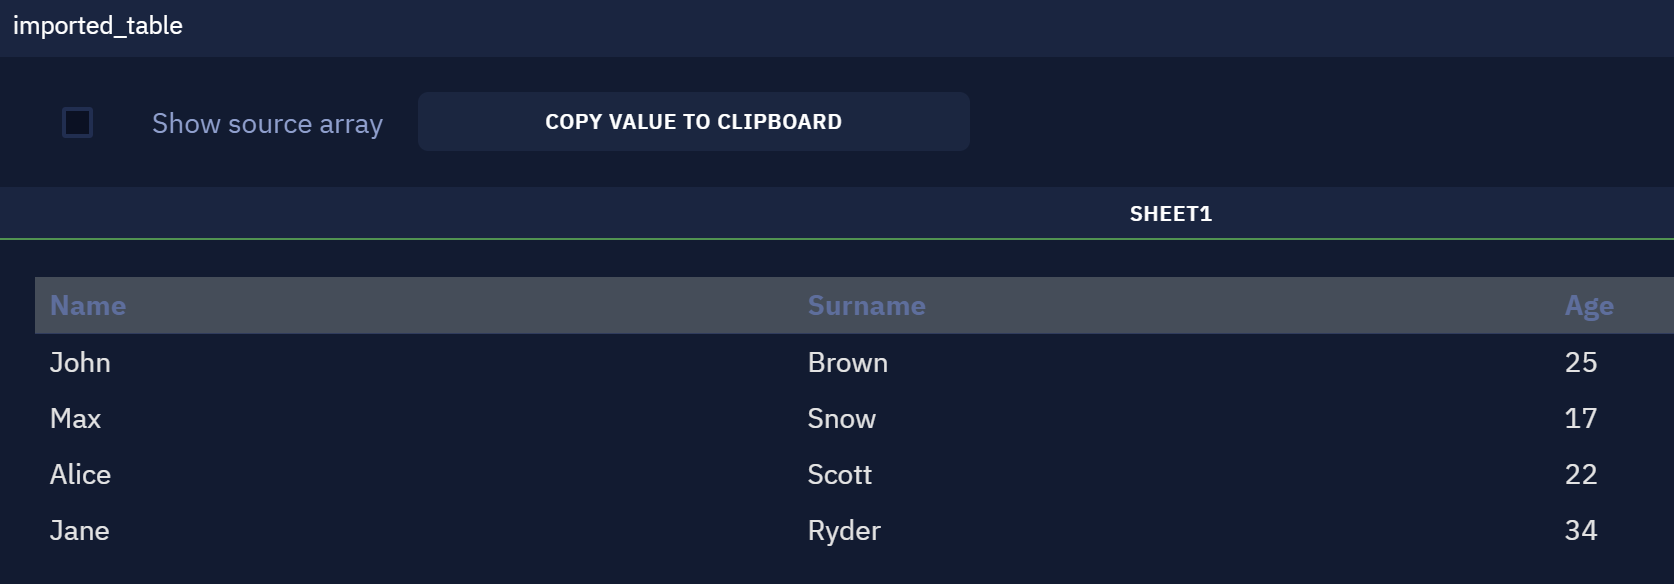
The contents of the source table
These 'Console log' blocks are responsible for displaying the output. Each block displays one column of the table. Here is an example of how they are set.
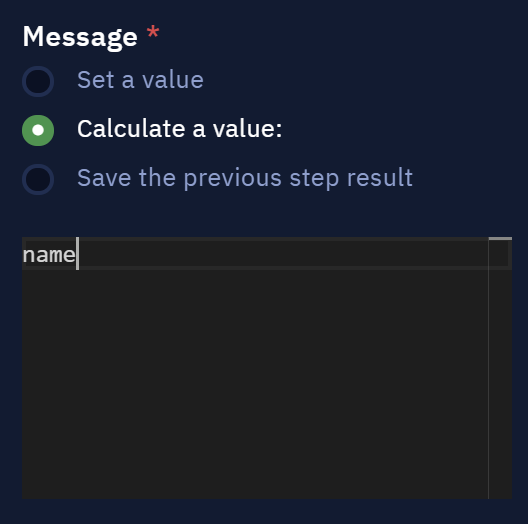
This 'Console log' block outputs the contents of the 'Name' column. Others display 'Surname' and 'Age' columns and are set similarly
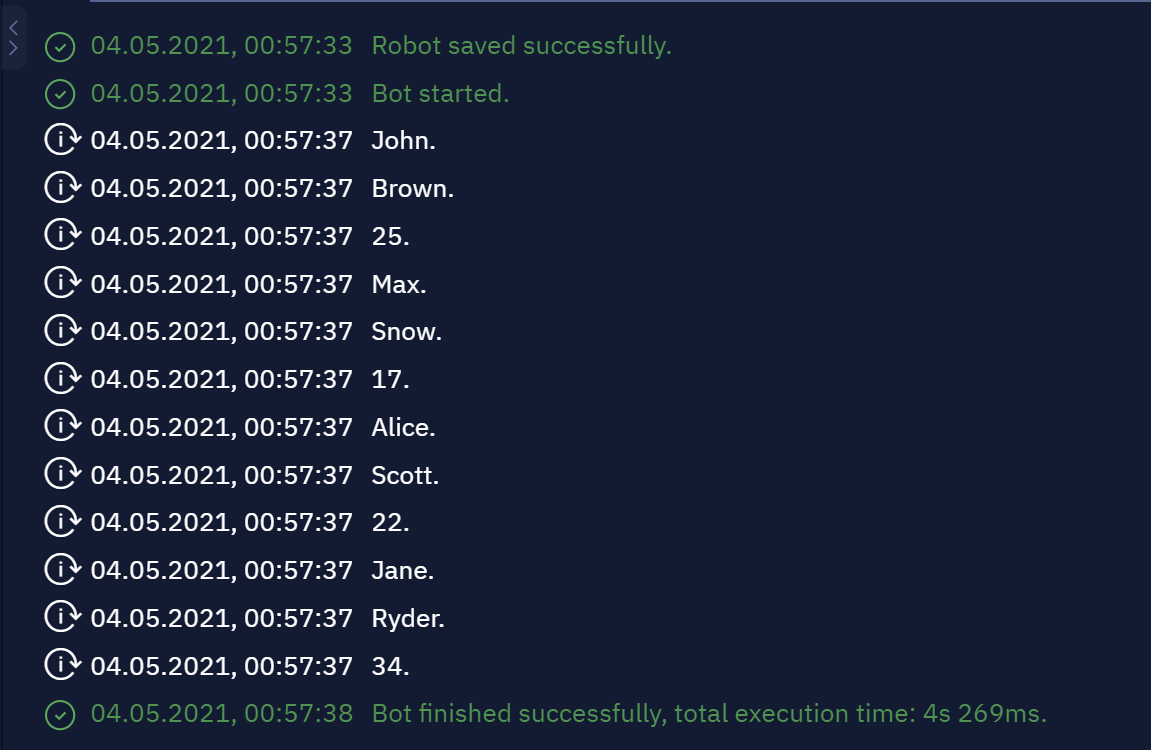
As a result the contents are displayed by each column
Parameters
Now let us review the parameters of the activity based on the shown example.
Table parameter defines the source table itself. imported_table is the name of the table that we have read.
It is worth mentioning that this activity is best to use in conjunction with 'Read table'. In that case, if 'For each row' is placed right after the 'Read table' activity, then you do not need to save the table content to a variable and you can leave the Save the previous step option enabled.
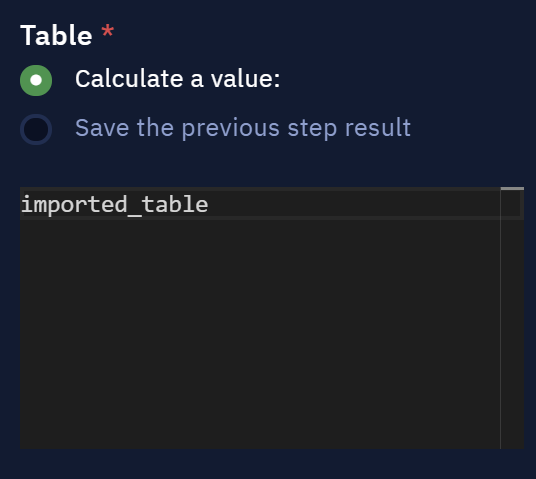
Table parameter
Template table defines the table (an .xls or .xlsx file) that will be used as a template to automatically generate the column variables. It is possible to either pick the same table you have already read or create a separate one. This is done to just generate the variable names for the columns.
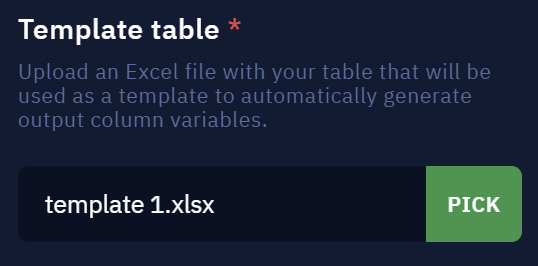
Template table parameter
This is how the template table looks in our case:
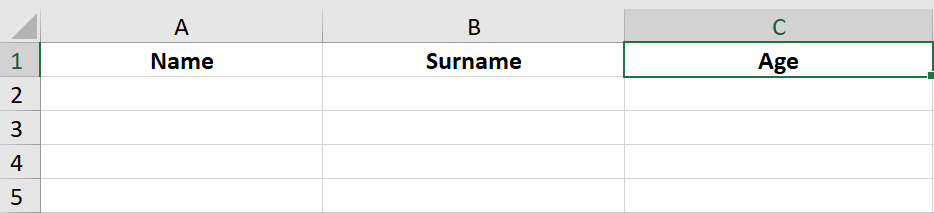
The template table only contains the column names
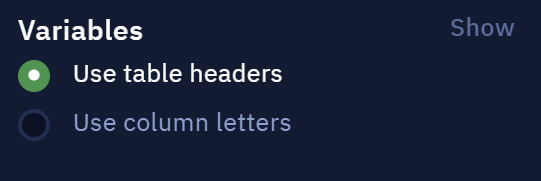
Variables parameter defines what will be used for the names of the column variables: table headers as specified in the template table or plain letters.
Variables parameter
Here we can view them. Column header and column name are the same because we have chosen the Use table headers option. The variable names are editable.

Click the 'Show' button to see the details
If the Use column letters option is selected, then the Name, Surname and Age headers will be replaced with A, B and C respectively.
Results
Here is the output we have received. Each 'Console log' block displays one column (name, surname and age variables).

The table contents displayed in the console log
Remove empty rows
Description
Removes all empty rows from a table.
Parameters
Table
- Save the previous step result: take the previous step result to get a variable that contains a table.
- Calculate a value: use JS to get a table.
Condition
- Each cell in a row is empty: removes all rows with all empty cells.
- At least one cell in a row is empty: removes all rows with at least one empty cell.
Usage Examples
This activity helps to filter your table and remove all empty rows.
Save table
Description
This activity saves the table in Excel, Google Sheets or CSV format.
A possible usage example is to read a table and save its contents into a different table. This is what this workflow does. Save the previous step result option is used.
This bot reads the table and saves the contents to another table
Parameters
The first parameter is Table. It is required. The table you are going to save is specified here. Note that it does not have Set a value option - it is intended for use either with Calculate a value option where you set the table dynamically or Save the previous step result option which is the most convenient for use with variables.

Table parameter
The Calculate a value option lets you form the value dynamically. Here is a usage example:
{
    "My List": [
        {
           "Country": "Russia",
           "Capital": "Moscow"
        },
        {
           "Country": "USA",
           "Capital": "Washington DC"
        }
    ]
}
"My List" is the table sheet name, "Country" and "Capital" are columns, "Russia", "USA", "Moscow" and "Washington DC" are the respective values that will be written to the columns.
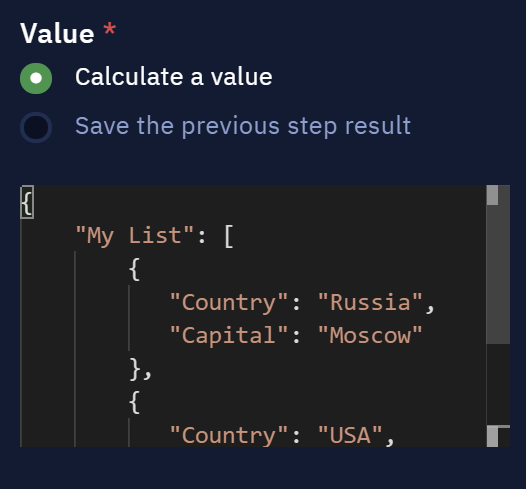
An example of setting up the value using the Calculate a value option
This is how the result would look like.
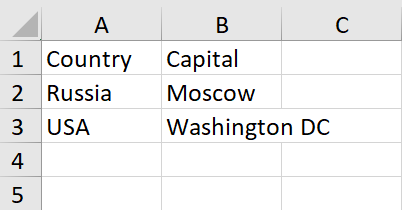
The new data was written to the Excel file
The next parameter is Save table as. It is required. Here you can choose Excel, Google Sheets or CSV format. Each format has a different set of options.
This is a set of options for Excel format. It is also possible to select a specific table sheet.
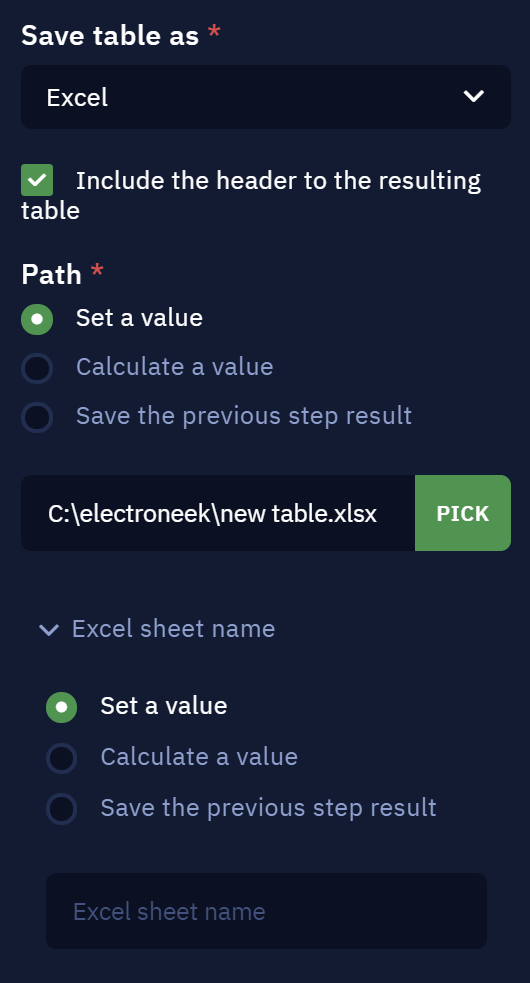
Options for Excel format
Options for Google Sheets are different. Also do not forget that it requires a connected Google account. It can be added in 'Settings' - 'Services Connection' menu.
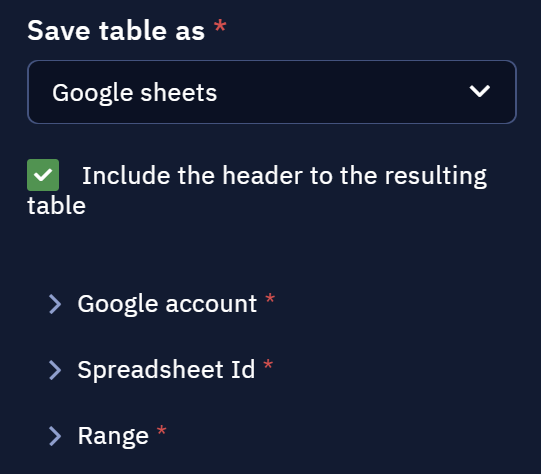
Options for Google Sheets
And here are the options for CSV format. Its unique feature is Delimiter. Commas, semicolons or tabs can be used.
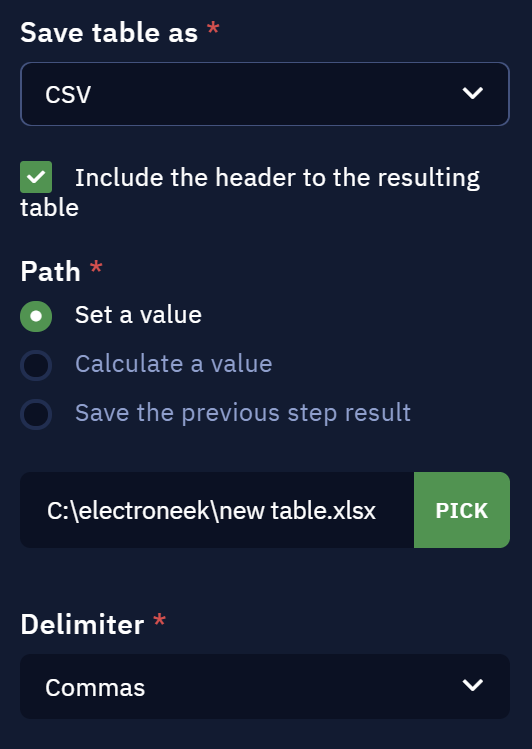
Options for CSV format