
Studio Pro
RPA Bot Orchestration > Studio Pro overview.
Overview
Automation has become a game-changer in today's fast-paced world, streamlining tasks, saving time, and enhancing overall efficiency. ElectroNeek Studio Pro is at the forefront of this automation revolution, harnessing the power of Artificial Intelligence to offer a suite of AI-powered tools accessible to everyone, from experienced developers to newcomers.
ElectroNeek Studio Pro is a no-code/low-code development environment that empowers IT Service Providers to create bots using a visual programming approach. It features an intuitive drag-and-drop interface, enabling quick and easy creation of advanced automation workflows without the need for complex coding or development work.
By utilizing Studio Pro, you can save time and money while enhancing accuracy and productivity. Its automation capabilities also enable IT Service Providers to scale their operations and expand the range of services offered to clients, leading to potential revenue growth and business expansion.
Studio Pro Top Capabilities
- AI Workflow Assistance
- AI Code Assistance
- AI Activities
- Visual Process Designer
- Web Automation
- Desktop Automation
- IntelliDocs and OCRs (Optical Character Recognition)
- Debugging and Testing
- Excel data processing
In summary, Studio Pro offers a powerful automation tool that simplifies your processes, allows for business scalability, and enables the delivery of high-quality services to clients.
To download Studio Pro, go to User Portal → RPA Bot Orchestration → Studio Pro.
Introduction
When you create a bot in Studio Pro, you start by creating a project. In a logical sense, the project contains all the files that can be compiled into an executable bot. Those files can include workflow, images, data files, and so on. By default, your project also has a configuration file that contains platform settings (browser settings, etc.) and user-defined settings (variables, etc.).
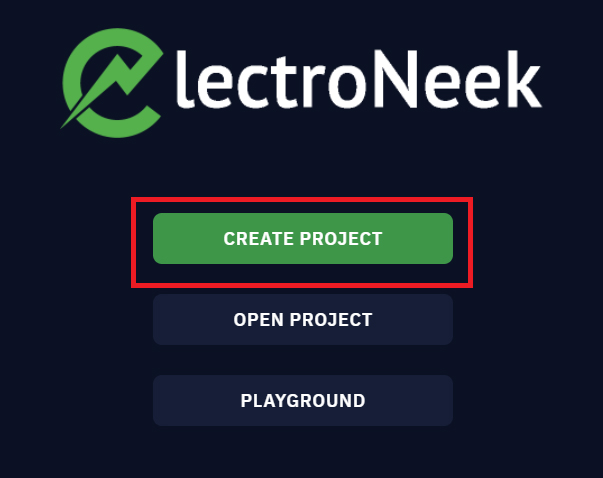
Create project
In order to create a New Project, you need to click on the "Create project" button as shown below:
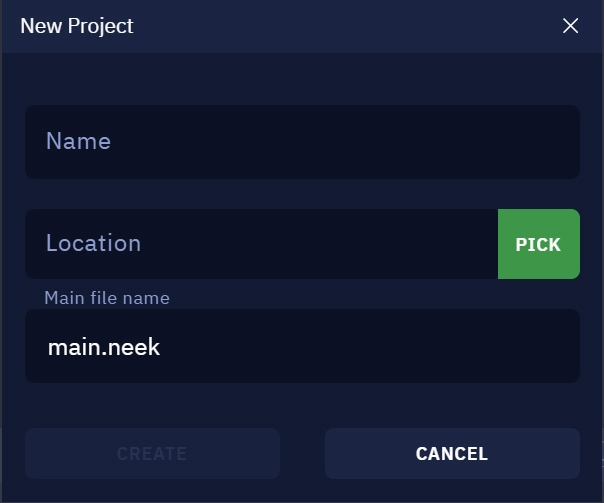
After you have clicked on the button, a window will appear with the following parameters:
- Name: the name of your project, you can choose any name.
- Location: the location of the new project on your computer.
- Main file name: the name of your main file in the
.neekformat.
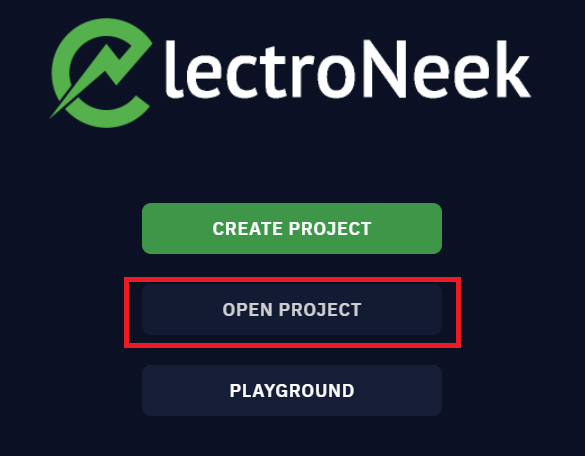
Open project
In order to open the existing project, you need to click on the "Open project" button as shown below:
After you have clicked on the button, you should specify your project folder on your computer and click the "Select folder" button as follows:
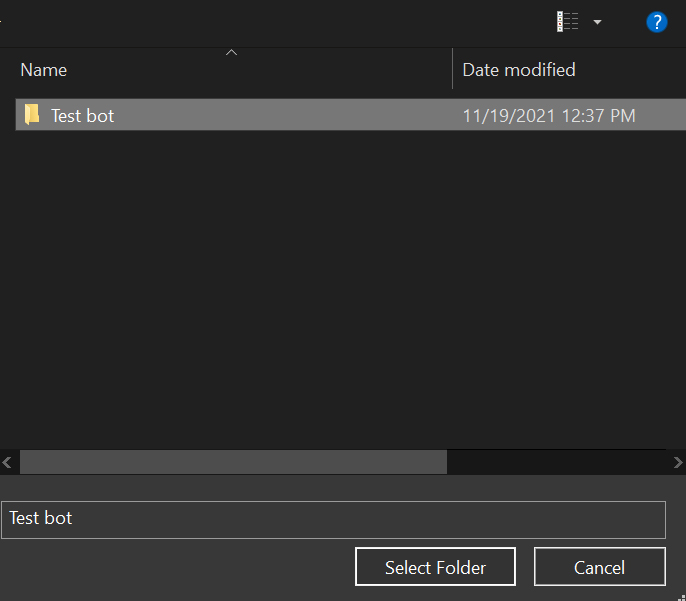
NoteDouble-clicking on the main
.neekfile will not open the project, but the workflow contained in this file.
Playground
There is a special mode in Studio Pro, which you can see on the start screen:
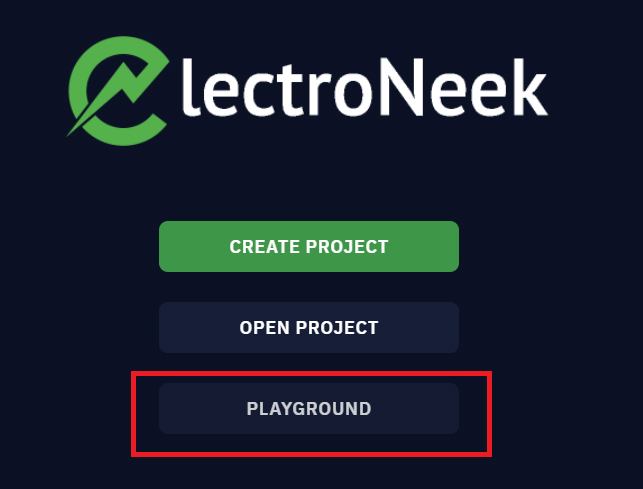
This mode can help you when you would like to quickly check the functionality of all activities or even implement a bot. Also, you can save your bot to a single .neek file. However, you cannot use the configuration file, convert to your bot to the.neex format, and upload it to Orchestrator SaaS.
Project structure tree
In Studio Pro, your project is organized in a hierarchy of subfolders — a project tree. The highest folder of your project is the project folder itself. By default, the tree structure is subdivided into eight parts:
- elements — this subfolder contains activities that interact with desktop elements.
- execute_js_code_scripts — this subfolder contains the JS scripts used by your bot.
- screenshots — this subfolder contains activities that interact with images.
- logs — this subfolder contains logs. You can learn more about logs in this article.
- termelements — this subfolder contains activities that interact with terminal elements.
- webelements — this subfolder contains activities that interact with web-elements.
- main.neek — this executable file is the entry point of the bot, you can choose it yourself.
- project.json — this is a project configuration file.

You can add folders or.neek files, and rename .neek files using the context menu if you right-click in the Project tab.
Also, you can drag-and-drop files and folders.
Interface and features
Let's begin by examining the program interface.
First of all, let us have a look at the program interface in general and then we will move to the breakdown of its main parts.
The key sections are as follows:
- Toolbar and control buttons (located in the top left corner)
- Activities and elements list (positioned to the left)
- Canvas (the large workspace in the middle)
- Activities, properties, variables and output data sections (situated on the right)
- Console with its control elements (located below the canvas)
Toolbar and Control Buttons
This section enables users to manage files and access various features and settings. Let's examine its elements more closely.
Buttons
Here you find the following options:

Toolbar and control buttons
- New workflow - creates a new empty workflow.
- Open File - Opens a specific file (.neek).
- Open Project - Opens a specified project.
- Save - Saves the current workflow, overwriting the previous one if applicable. If used with a newly created file, it triggers "Save as" instead.
- Save as - Provides options for saving the workflow. You can overwrite the existing file, save changes as a new project, or choose a different save location.
- Publish to Orchestrator SaaS - Uploads the current workflow to Orchestrator SaaS. Refer to Orchestrator Admin Guide and Orchestrator SaaS Overview for more information.
- AI Code Assistance - an artificial intelligence automatic code creator. This allows you to freely provide the instructions and an optional starting point input data to the Artificial Intelligence.
- Run - Launches the bot in normal or debug mode.
- UI scale - Adjusts the interface scale.
- Undo/Redo - Reverses or repeats the last change.
- Process Recorder - Records actions performed in a desktop or browser activity and saves them as an algorithm for implementation in the workflow.
- Auto layout - Automatically aligns activity blocks on the canvas.
- Grid drops- Displays grid drops on the canvas.
Menu items
- The File menu allows you to create, save, and open workflow files, export your workflow to .neex format for Bot Runner, publish your bot to Orchestrator SaaS, and import elements from .elm files.
- The Edit menu facilitates block management on the canvas, including actions such as undo/redo, copy/paste/delete blocks, and finding, selecting, and removing unconnected blocks.
- The Run menu is used to run the bot in normal or debug mode and manage debug options.
- The Debug menu provides access to the debug mode.
- In the Tools menu, you can access the Process Recorder and open the logs folder.
- The Settings menu offers various options related to workflow execution, browsers, connections, specific actions, and more.
- The Account menu allows you to check your license details and log out of your current account.
- The Help menu provides access to the Help Center, checking for updates*, and contacting technical support.
NoteTo check for updates, go to 'Help → Check for updates'. You will see a pop-up window with your current version of Studio Pro and the available one. If the available version is higher than yours, press "Install" to update Studio Pro.
Settings
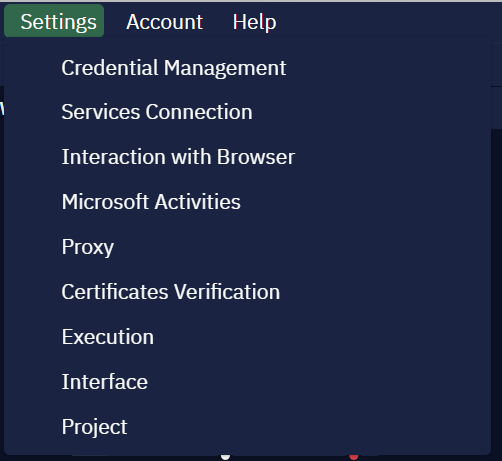
Credential Management
This section provides information about accounts. You can add new accounts, manage existing ones, or delete them. Refer to the relevant article for more details on working with credentials.
Services Connection
If you want to log in to third-party platforms for your bots to interact with them, use this tab. It enables resource utilization, such as Google Sheets, Microsoft Office 365, or ABBYY OCR.
Interaction with Browser
In this section, you can select which Web Browser will be used for the Web Automation activities. The options are:
- Chrome Native (Recommended) - uses your own Chrome session
- Edge Native - uses your own Microsoft Edge session
- Chrome Selenium - creates a new "blank" Chrome session not tied a specific user
- Internet Explorer - creates a new Internet Explorer session
Microsoft Activities
This section contains the options for how Studio Pro will carry out MS Excel activities:
- Generic: uses built-in libraries to interact with Excel spreadsheets, without the need for the Excel application to be installed on the machine. Some MS Excel activities may be disabled if you use this option.
- Microsoft Native: relies on the interoperability libraries included within the MS Excel application, which must be installed on the machine for this option to be used. Some MS Excel activities require this option to be enabled.
Proxy
In this section, you can enable the use of a proxy server and specify its address. For more information on working with proxies, refer to the associated article.
Certificates Verification
Here you can enable or disable E-mail or HTTPS certificate verification. Disabling these resources may reduce network security, so consult with your system administrator if it might have any negative consequences in your case. The option for Client certificates is also available, which may be necessary for sending HTTP requests requiring user authentication.
Execution
Access this section to activate logging for each bot run. Further details on logs can be found in the corresponding article. The Status display option allows you to customize the amount of information shown in the bot execution status window.
Interface
This section allows you to choose between a Light or Dark theme that suits your preference, as well as changing Studio Pro's language.
NoteStudio Pro's interface is currently available in English, Spanish, German, French and Portuguese.
Project
This section, which is only enabled while working within a Project, allows you to specify Project Settings. The same sections described above will be available, but these Project Settings will override general Studio Pro settings when executing the workflow.
Activities and elements list
This section encompasses all the available activities (under the Activities tab) and user-developed elements (under the Elements tab).
Activities are organized into groups based on their functions. Clicking on a group name expands a drop-down list that displays the related activities.
Canvas
The canvas is a crucial component of Studio Pro as it visualizes the workflow development and contains your current algorithm. It serves as the workspace where you construct your bot.
New activity blocks added to your workflow are displayed on the canvas. It features tabs that allow you to switch between opened workflows and a search window. For more information, refer to Workflow Composition.

NoteYou can right-click on any activity and use the copy, cut, and delete options from the menu. If you right-click on the canvas you can select the paste option to add the already cut and copied activities.
Properties and Variables Tabs
This section allows you to configure activity parameters and manage variables created during development. The tabs change based on the selected activity block.
The Properties tab offers a range of options specific to the selected block. The Variables tab stores user-created variables for use in the workflow. The Output tab enables you to manage data collected from your workflow.
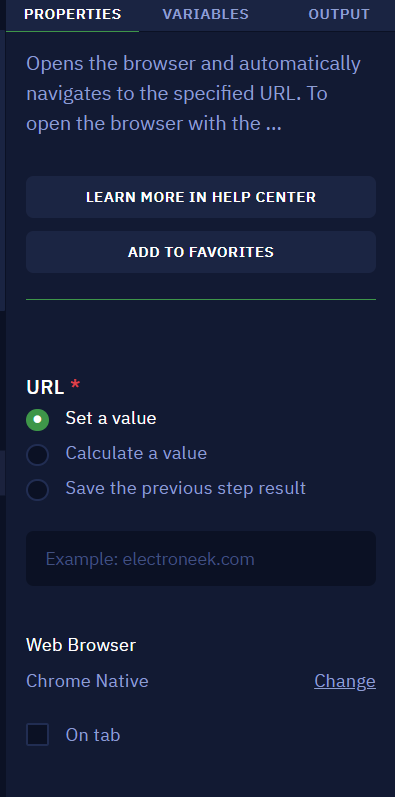
In the screenshot, you can observe properties related to browser-related blocks. The available options vary depending on the selected block's nature.
Console
The Console stores various types of output messages and can be used with certain activities. It also includes control buttons for clearing the console, changing its position, and opening the logs folder.
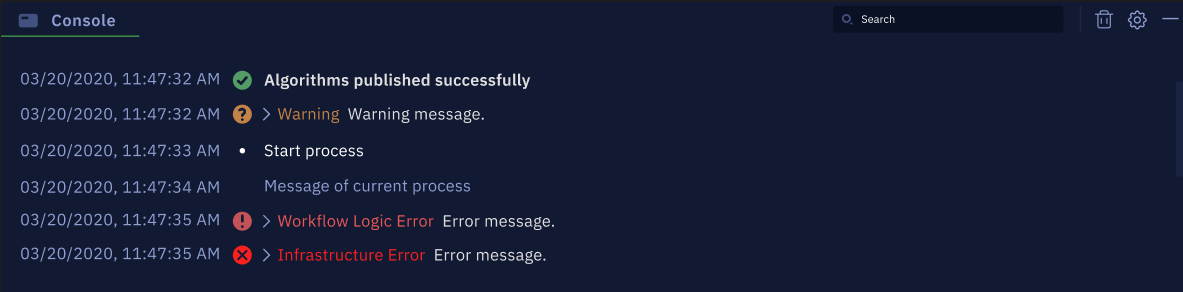
Console window with examples of different types of messages
The colored titles and specific messages help improve your workflow. Here's what they mean:
- Red icon - Error message (Workflow logic errors + Infrastructure errors)
- Yellow icon - Warning messages
- Green icon - Information messages
NoteWorkflow logic errors refer to unexpected behavior within the workflow structure/elements.
Infrastructure errors pertain to phenomena independent of workflow execution, such as corrupted files, third-party service issues, extension problems, etc.
The "Refresh" option next to the colored icons allows you to reset the counter. Clicking it turns all messages in the expanded console gray. The same occurs when running a new workflow. This makes it easy to identify messages from the last executed workflow, as they are highlighted with colors.
By clicking on the "Settings" icon, a menu appears with the following options:
- Open Log Folder - Takes you to the log folder.
- Maximize All - Expands all messages in the console.
- Minimize All - Collapses all messages in the console.
- Error - If checked, the console displays error messages.
- Warning - If checked, the console displays warning messages.
- Info - If checked, the console displays information messages.
Clicking the square icon expands the console, allowing you to view detailed messages and utilize the search bar to find specific words in the message history.
These are the main features of the Studio Pro interface. Now, let's provide an overview of the system requirements for using this tool on your machines.
System Requirements
NoteTo ensure optimal performance in production automation tasks using Studio Pro, we strongly recommend meeting the recommended system requirements.
Recommended System Requirements
- Operating System: Windows 10 or 11; Windows Server 2019 or 2022;
- user account must not be a guest account
- local admin rights required
- CPU: Dual-Core 1.8 GHz
- System type: 64-bit
- RAM: 8 GB
- Available disc space: 5 GB
- Minimum internet connection speed: 512 KB/s
- Maximum ping to electroneek.com: 15 ms
- .NET Framework v4.8 installed.
TipIf the ping command doesn’t work, we recommend using the curl request command such as:
curl -o /dev/null -s -w "\nTime Connect: %{timeconnect};\nTime Start Transfer: %{timestarttransfer}; \nTime Total: %{time_total}\n" https://electroneek.com
Minimum System Requirements
- Operating System: Windows 10 or 11; Windows Server 2019 or 2022;
- user account must not be a guest account
- local admin rights required (local rights are required to install the platform and work with files that require such access).
- CPU: 1.4 GHz
- System type: 64-bit
- RAM: 8 GB
- Available disc space: 5 GB
- Minimum internet connection speed: 256 KB/s
- Maximum ping to electroneek.com: 100 ms
- .NET Framework v4.8 installed.
NoteIf you are using Windows 8 OS, you need to install .NET Framework version 4.6 or higher.
Network requirements
In order to use the ElectroNeek platform on your computer, you need to allow Studio and Bot Runner to communicate within the 5000-5005 port range (localhost).
You should also allow ElectroNeek to the following URLs at port TCP 443:
- .electroneek.com/ - This is required for the ElectroNeek products to operate;
- https://sheets.googleapis.com/ - This is required for the Google Sheets activities to function;
- https://accounts.google.com - This is required to authenticate the Google account for Google-related activities.
Please get in touch with your network administrator for more information.