
Hello World!
In this article, we are going to build the first bot that produces some actual results. This example will help you try Studio Pro in action.
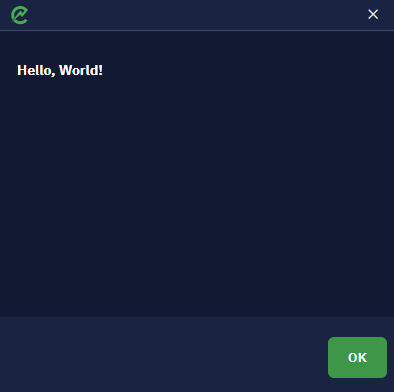
Our goal here is to create a bot that shows a simple notification with ‘Hello, World!’ text. In this example, we are going to use the User notification activity located in Human in the loop section.
Now let us start diving into RPA development!
Getting Started with Studio Pro
Creating a project
Launch Studio Pro. You will see this window. You have two options that let you start the development of the bot: CREATE PROJECT and PLAYGROUND. The "Create project" option allows you to create a bot in project structure. The "Playground" mode gives you all the same capabilities apart from publishing bots to Orchestrator. Choose the "Create project" mode to create your first bot.
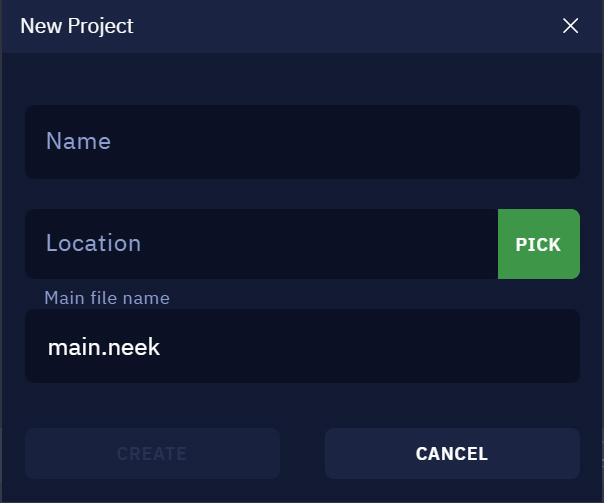
After you have clicked on the button, a window will appear with the following parameters:
- Name: the name of your project, you can choose any name.
- Location: the location of the new project on your computer.
- Main file name: the name of your main file in the .neek format.
Adding activity
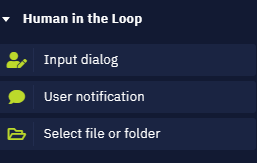
In the left part of the program window, you can see a list of all the available activities. User notification is what we need to start. Scroll down a bit, find the Human in the loop button and click it to open the drop-down list, and find this activity here.
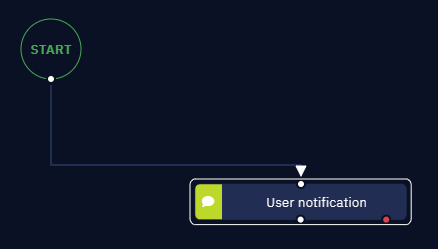
Drag and drop this activity onto the canvas or double click it. It should automatically connect to the START block. If it did not connect to it automatically, place your cursor at the small white circle on the START block. Your cursor will turn into a cross icon. Hold your left mouse button and drag the appeared button onto the activity block. It should look like this:
Configuring its properties
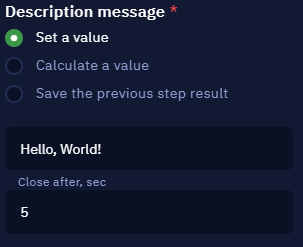
Next, left click the User notification block. You will see the activity parameters in the right part of the interface. Type Hello, World! text in the Description message field. This is the message that will be displayed. Also, let us set Close after, sec to 5. This means that the notification will be shown for five seconds. Other parameters can be left untouched in this case.
Press "Save" in the toolbar. Your bot is ready now!
Launching the bot
Launch it by clicking the Play button in the toolbar or by pressing the F5 key. Studio Pro will be minimized and in a few seconds you should see the result:
This is it, you have just created your first bot! This simple example only shows the most basic capabilities of the platform. Be sure to check other articles with detailed explanations of what can be achieved with it!