
Web Browser
Studio Pro Activities > Web Automation > Web Browser. Includes "Open URL", "Close browser", "Find iframe" and more.
Activities
| Open URL | Close browser | Find IFrame |
|---|---|---|
| Open a new web browser window | Close the browser opened | HTML element that is able to load another HTML element |
| Execute JavaScript | Scrape structured data | |
| Execute separately written JavaScript code | Extract data according to a given structure |
Open URL
Description
This activity has quite a simple purpose: it opens a new web browser window and then automatically navigates to the specified page. Steps necessary to define this page will be described below in the ‘Parameters’ section.
This activity is necessary for interacting with browsers by using other more advanced activities.
Choosing a browser to use
Before using this activity, you might want to choose the browser that will be opened by using it. There are two ways to do it:
Go to the ‘Settings’ tab and then click ‘Interaction with browser’.
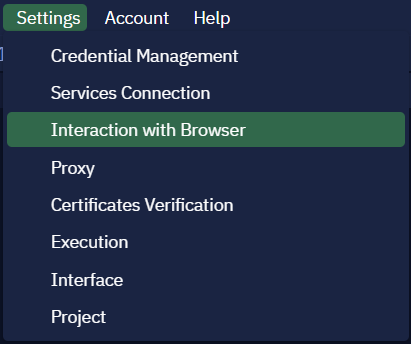
Studio Pro Settings tab
In the activity properties section, click the ‘Change’ button. The same menu will be opened.

This button also opens the 'Interaction with browser' menu
This is what you will see:
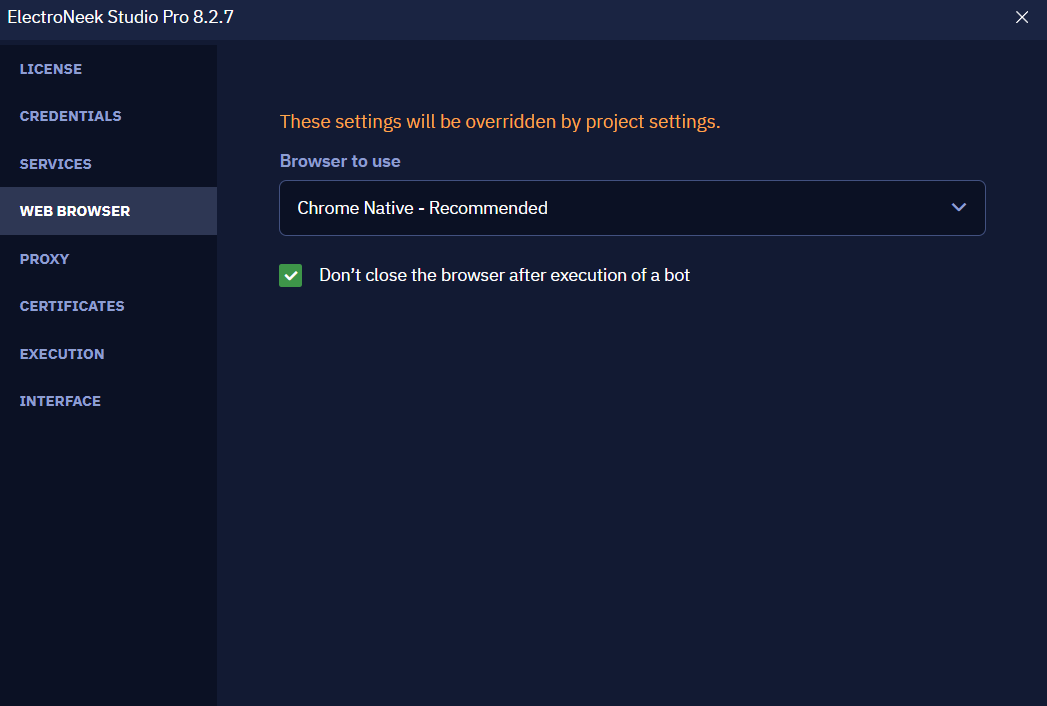
Web browser settings menu
This menu has the following options:
- Browser to use. It defines the browser that will be used with this activity. Currently Google Chrome, Microsoft Edge, and Internet Explorer are supported.
- Load user profile with cookies, extensions etc. This option indicates whether the data associated with the profile will be loaded.
- Don’t close the browser after execution of a bot. If it is checked, the browser window will not be closed after the execution process is finished.
- Command line arguments.
Parameters
Now let us have a look at the parameters of this activity. In this case they define the page to open, browser to use and the browser tab.
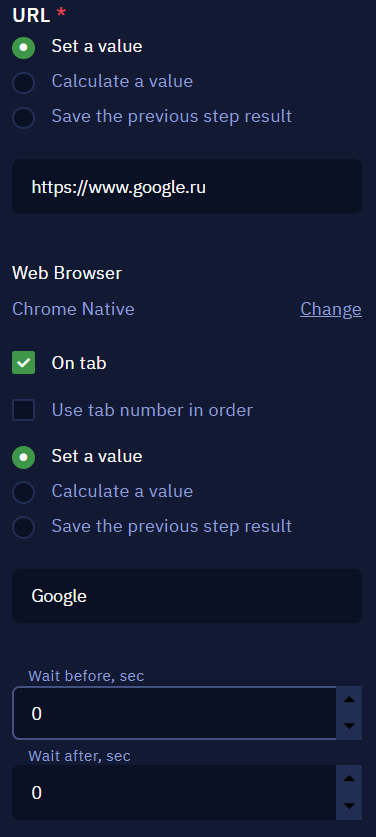
URL
This parameter defines the page to open. This is a required parameter.
- Set a value option lets you input the page address manually. In most cases this is the most practical way.
- Calculate a value enables you to use available JS methods to form a URL. It is useful when it is required to form a URL dynamically
- Save the previous step result picks the previous activity result and defines it as a URL here.
Browser to use
This is a required parameter. We have already described its details above.
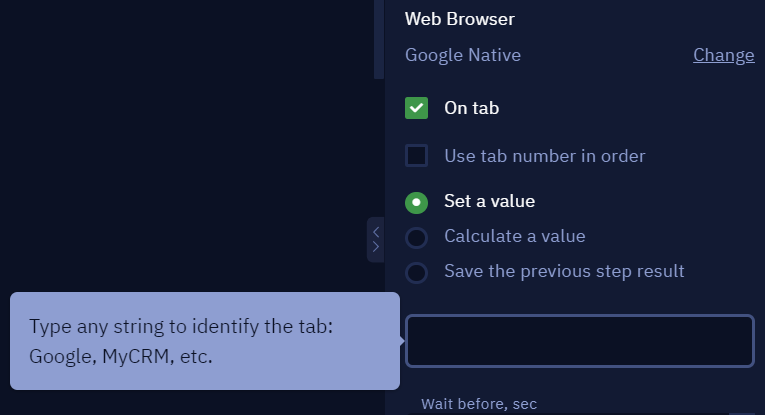
On tab
This parameter allows you to specify a name or ID of the tab that you want the bot to interact with. The name of the tab is assigned in the "Open URL" activity.
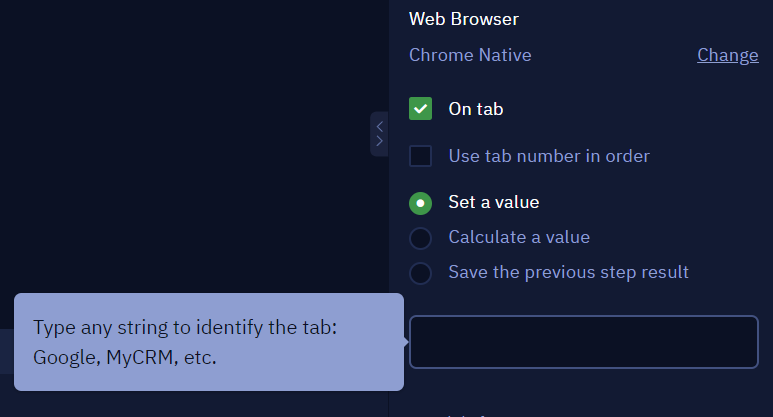
- Set a value allows you to manually specify the name of the tab.
- Calculate a value allows you to use a special formula or a special method to determine the name of the tab.
- Save the previous step result takes the result of the previous workflow action as the name of the tab.
Use tab number in order
This checkbox allows you to specify a sequential number of a tab in the browser. It is worth using if a new tab opens not manually, but automatically after clicking on some element.
Wait before, sec and Wait after, sec parameters simply indicate how much time will pass before or after executing this activity.
Close browser
Description
Closes the browser opened via Studio Pro.
Parameters
Comment
Contains an annotation to the activity. The input text will be displayed above the activity name.
Find IFrame
Description
When interacting with web pages in your workflows, you need to identify some types of elements you may face. A good example is an iframe: an HTML element that is able to load another HTML element within a page.
NoteIframes can be either visible or not to users. So, if your bot struggles to interact with an element on a web page, you may be dealing with an iframe.
Your Studio Pro workflows can interact with these elements. You just need to make sure you are dealing with an iframe, then tell your workflow how to work with it. You can do that in two different ways using the "Find iframe" activity.
1. Using the "Pick New Element" functionality
To make it easier, follow these steps in your Studio Pro, so your bot identifies an iframe within a web page (make sure the URL is open in your browser):
- Click "Web Automation" → "Web Browser"
- Double-click or drag & drop "Find Iframe" to add the activity to your workflow
- Click on the activity block
- Click on "Browser element" → "Pick New Element" on the Properties tab
- When Studio Pro minimizes and the browser appears, select the iframe you want your bot to identify
- With the cursor over it, press Ctrl + x to pick the element
- When the pop-up appears, click on "Save".
As an alternative, you can also inform the Iframe attribute manually, as we show next.
2. Getting the XPath or CSS selector
The alternative is to manually get the iframe's XPath or CSS selector. To do that, open the web page on your browser, then open the developer tools to view the source code of the page's elements - then focus on the iframe.
Once you have identified the desired iframe, its source code lines will be highlighted. Right-click on those selected lines and use the "Copy" menu to copy the XPath or CSS selector.
Next, you can create a new Browser Element in Studio Pro, changing the default Attributes option into either "CSS selector" or "XPath".
Advanced options
As soon as you pick an element, this Browser Picker window opens. This indicates that the element was found and recognized. You can set the element name here as well.
Expand the "Advanced options" menu or the selector of the indicated element. It contains the iframe tab with its own attributes and values which represent the hierarchy of how the interface element is developed. You can check or uncheck the attributes to achieve better accuracy or stability of interaction with the element.
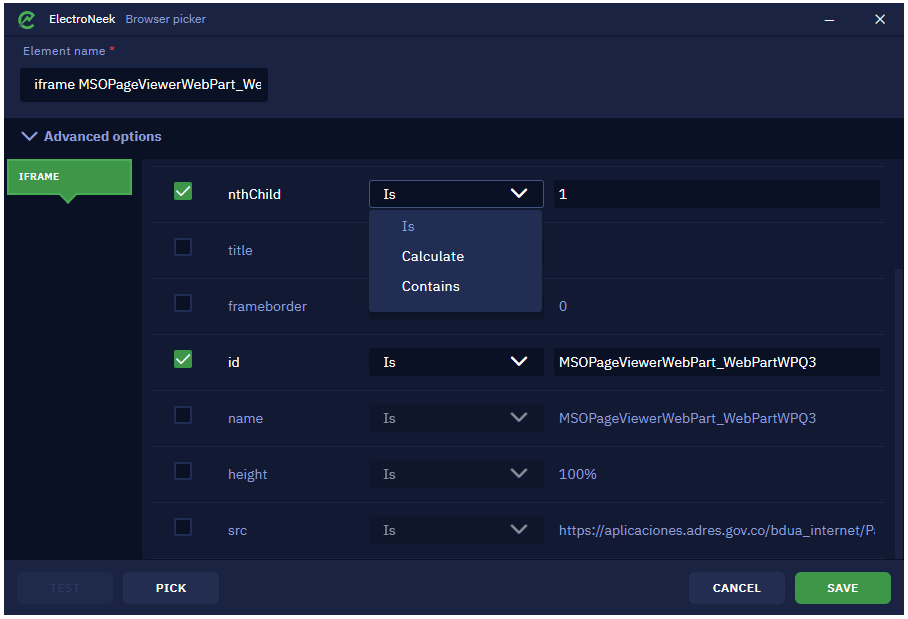
For each of the iframe attributes you can select one of the following options: "Is", "Calculate", or "Contains" using the Browser Picker. They work as follows:
- Is — allows you to define the attribute with the declared String or Number as its value.
- Calculate — allows you to pass the value through a previously declared variable.
- Contains — allows you to define the attribute that contains the string as part of the value.
Comment
Parameters
Browser element
The iframe's Browser Element, created using one of the methods described above.
On tab
In this parameter you can specify the name of the tab that you want the bot to interact with. The name of the tab is assigned in the "Open URL" activity.
- Set a value allows you to manually specify the name of the tab.
- Calculate a value allows you to use a special formula or a special method to determine the name of the tab.
- Save the previous step result takes the result of the previous workflow action as the name of the tab.
IFrame
Select an "IFrame slot" to save the current iframe into. This will later be used to identify an element that exists within an iframe, enabling the "In iframe" parameter.
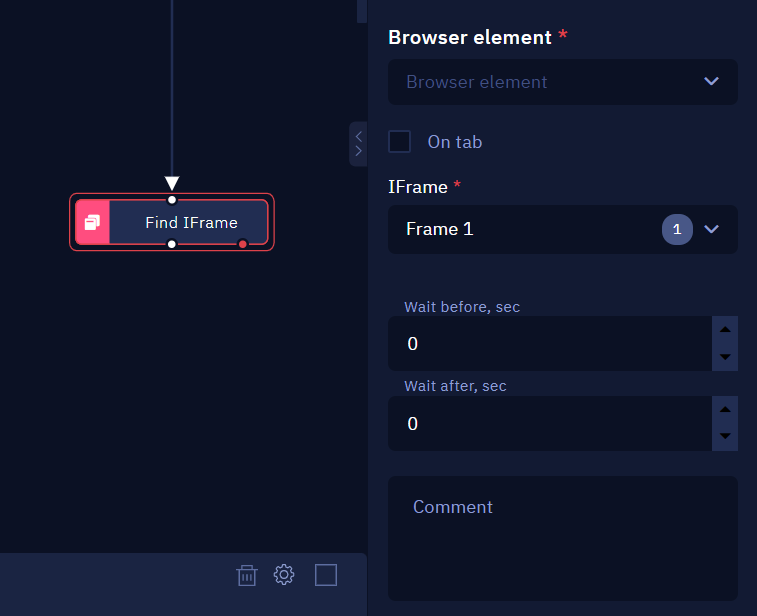
NoteIframes can be tricky to work with, since there may be an iframe inside another. If so, make sure you pick the specific element you need, instead of the bigger iframe.
Comment
Contains an annotation to the activity. The input text is displayed above the activity name.
Execute JavaScript
Description
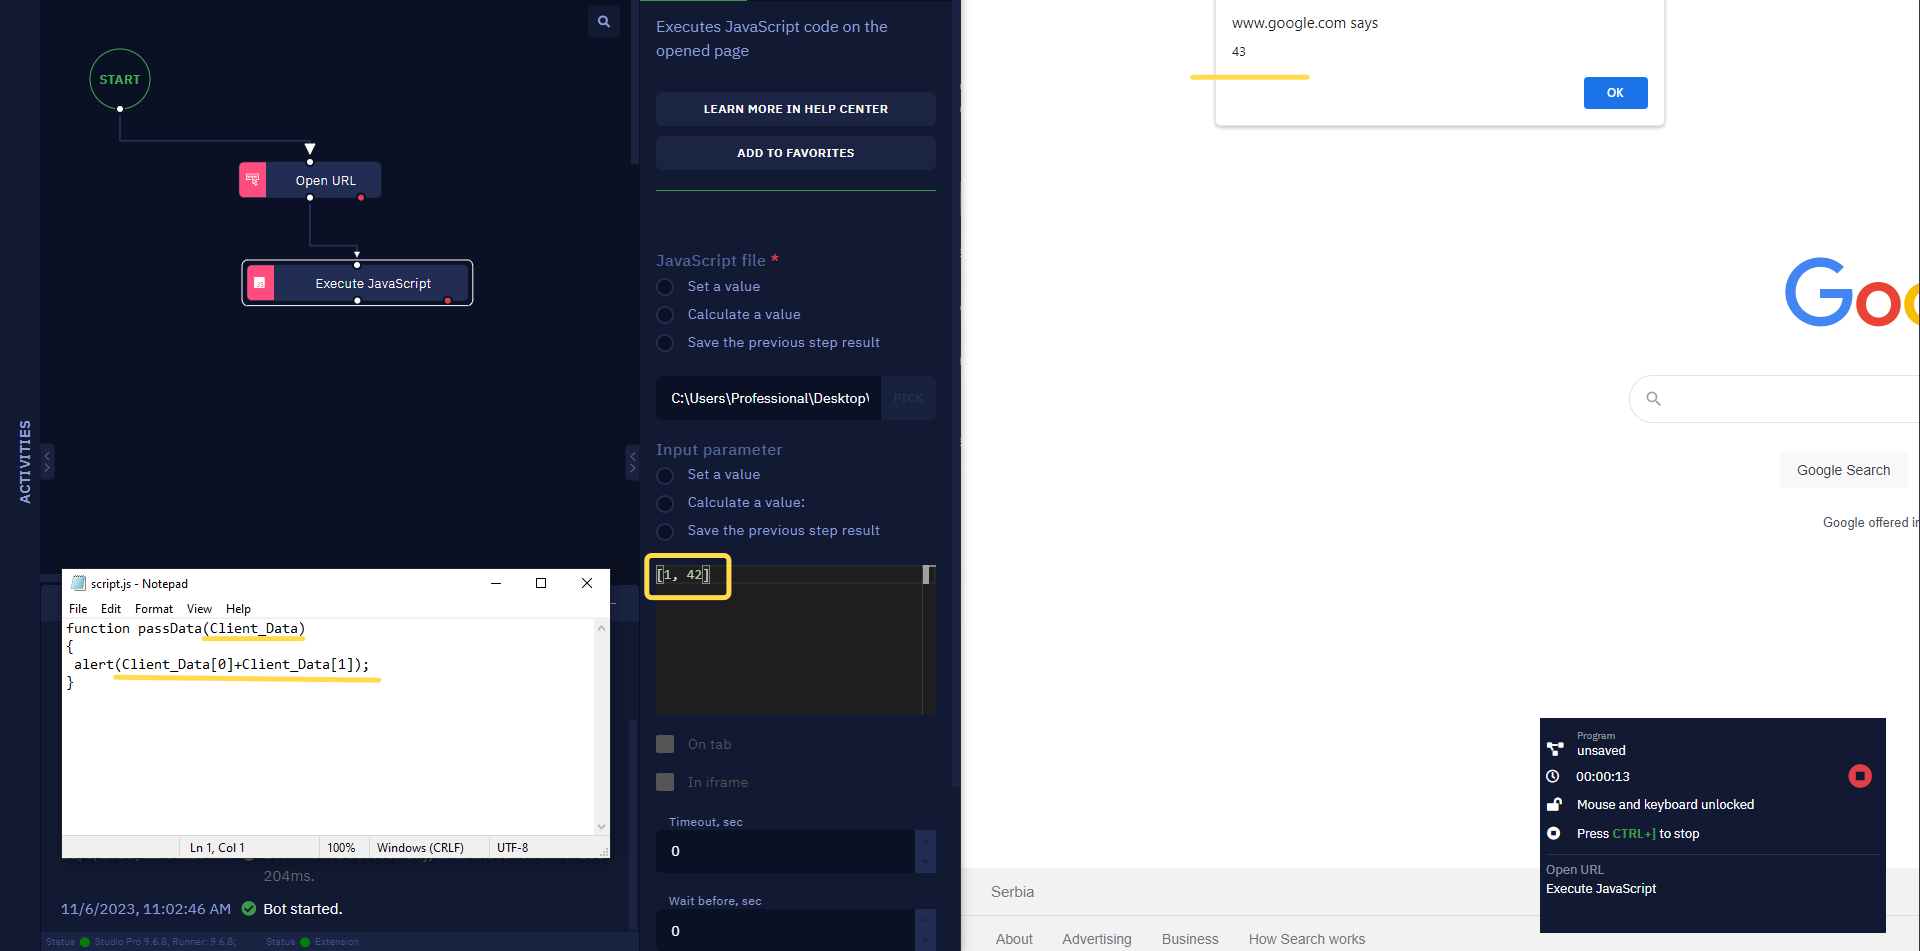
This activity allows you to execute separately written JavaScript code in relation to the currently opened page in the browser. In some cases, using JavaScript code makes it much easier to develop a workflow. You can debug the code separately in your preferred IDE and compare versions.
The code itself should be a single function with no more than one argument of any type and, if necessary, return some value.
NoteIt is preferable to use
UTF-8encoding in the .js file. Other encodings, such asUTF-16 LE, may cause errors.
Parameters
JavaScript file
- Set a value option allows you to set a path to the .js file manually. By clicking PICK you can find the desired file using file explorer.
- Calculate a value option lets you use a special formula or method to set a path to the .js file.
- Save the previous step result option takes the path to the .js file from the result of the previous step in the workflow.
Input parameter
This parameter allows you to pass a single argument as a string or integer. Use an array or a JSON object to pass multiple arguments.
- Set a value option allows you to set the input parameter manually.
- Calculate a value option lets you use a special formula or method to set the input parameter.
- Save the previous step result option takes the input parameter from the result of the last step in the workflow.
This activity supports having async functions in the JavaScript code:
async function () {
  // here goes your code
}
On tab
This parameter allows you to specify the name of the tab that you want the bot to interact with. The name of the tab is assigned in the "Open URL" activity.
- Set a value allows you to manually specify the name of the tab.
- Calculate a value allows you to use a special formula or a particular method to determine the name of the tab.
- Save the previous step result takes the result of the previous workflow action as the name of the tab.
Use tab name in order
This checkbox allows you to specify a sequential number of a tab in the browser. It is worth using if a new tab opens not manually, but automatically after clicking on some element.
In iframe
This parameter allows you to select a specific iframe on a page where the JavaScript code is to be executed.
Timeout, sec
This parameter allows you to set the timeout for the activity's execution.
Wait before, sec
This option allows you to set the delay before the execution of the activity. The delay is set in seconds.
Wait after, sec
This option allows you to set the delay after the execution of the activity. The value is set in seconds.
Comment
This parameter allows you to create an annotation of the activity. The input text will be displayed above the activity name.
How to use it?
Using the JavaScript code activity on a particular webpage allows you to extend your automation capabilities, and make the best out of the power of JavaScript and interaction with DOM elements. This will make it possible to handle some tricky scenarios pretty easily.
Scrape structured data
About the Feature
This feature is currently in the beta stage.The purpose is to conduct testing and receive feedback. The final version may dramatically change as well as the sales policy with respect to this feature. Should you encounter any bugs, glitches, lack of functionality, or other problems with the beta feature, please send an email to our technical support.
Description
This activity extracts data according to a given structure. It is especially useful for scenarios that require extracting table data from a website, extracting search results, or, for example, extracting product prices from online-shops pages. Follow this link to find a detailed tutorial on how to work with this activity.
Parameters
Data structure
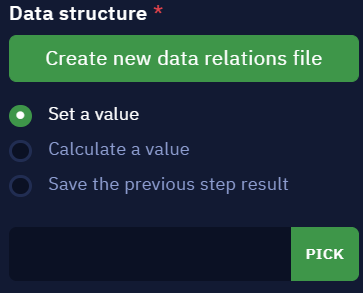
This option allows you to create a .rel file that will contain the extracted data structure, or set the path to an existing .rel file.
The button "Create new data relations file" allows you to create a .rel file.

Clicking on it will open an empty canvas. Note that when you save a .rel file created by clicking the "Create new data relations file" button, the path to it will be automatically substituted in the "Data structure" parameter.
If you already have a .rel file created, you can set the path to it manually in the input field or click the "PICK" button to find the file through explorer.
There are three ways to manually set the path to the .rel file:
- Set a value allows you to manually specify the path.
- Calculate a value allows you to use a special formula or a special method to determine the path.
- Save the previous step result takes the result of the previous workflow action as the path.
On tab
This parameter allows you to specify the name of the tab that you want the bot to interact with. The name of the tab is assigned in the "Open URL" activity.

- Set a value allows you to manually specify the name of the tab.
- Calculate a value allows you to use a special formula or a special method to determine the name of the tab.
- Save the previous step result takes the result of the previous workflow action as the name of the tab.
NoteStudio Pro supports two ways of working with the browser - through the ElectroNeek Chrome Automation extension and through Selenium.
Depending on the selected method, the bot will search for the item in the browser tabs differently:
- Chrome Native - if you don't specify a tab number, the bot will search for the item on all tabs.
- Edge Native - works the same way as Chrome Native.
- Chrome Selenium - if you don't specify a tab number, the bot will search for the item in the tab that was opened using the "Open URL" activity. In other words, the absence of a labeled tab is the tab ID for Selenium.
Use tab name in order
This checkbox allows you to specify a sequential number of a tab in the browser. It is worth using if a new tab opens not manually, but automatically after clicking on some element.
In iframe
This option allows you to select a specific iframe on a given page in which to perform an activity.
Timeout, sec
This parameter allows you to set the timeout for the activity's execution. By default it is 30 seconds.
Wait before, sec
Allows you to set a delay before the activity is performed.
Wait after, sec
Allows you to set a delay after the activity is performed.
Comment
Contains an annotation to the activity. The input text will be displayed above the activity name.