
How-tos: Orchestrator SaaS Management
How to transfer data to an API request
Introduction
In this article, you find everything you need about the mechanism of API request generation and data transfer through it.
NoteTo send output data from your workflows to Orchestrator SaaS, you can work with the Output tab in Studio Pro. To retrieve this data via API requests so you can use it in other applications, check this article.
Prerequisites
Before working with API requests, it is important to make sure that:
- The workflow is published in Orchestrator SaaS. You can learn more about publishing workflows here.
- Orchestrator SaaS has at least one Bot Runner connected. Learn more about connecting Bot Runner to Orchestrator here.
- At least one active Bot Runner is assigned to a workflow. Learn more about assigning Bot Runners to workflows here.
Sending an API request and transferring data through it
Testing requests using ElectroNeek API documentation
An API request can be tested using the tool available in our documentation or using external tools.
If you choose our API Documentation site to test a request, follow these instructions:
-
Navigate to the ElectroNeek API documentation portal.
-
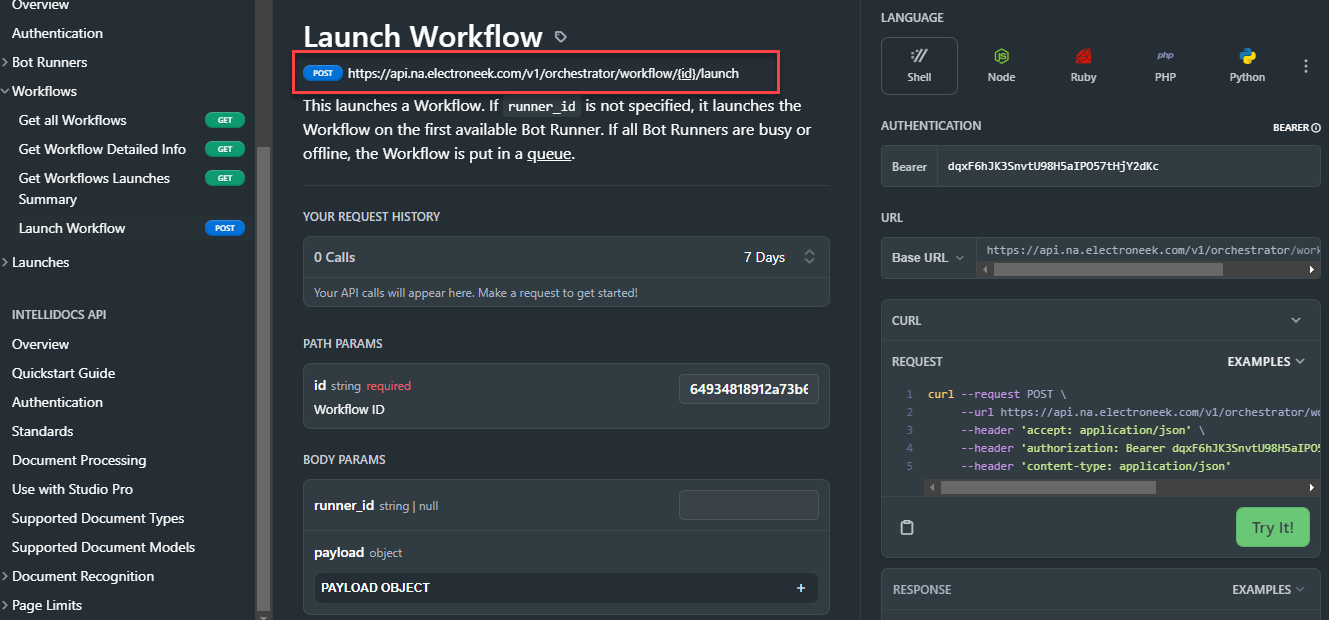
Select a Request Type.
-
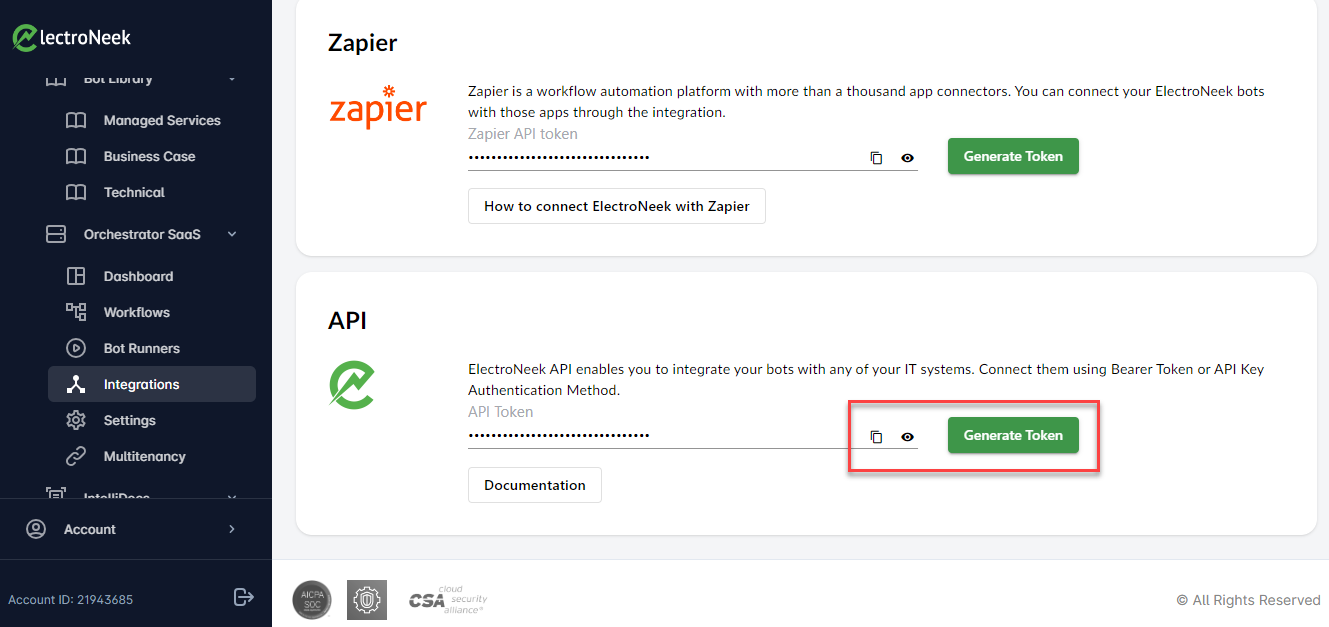
Generate and copy a Token from Orchestrator SaaS → Integrations.
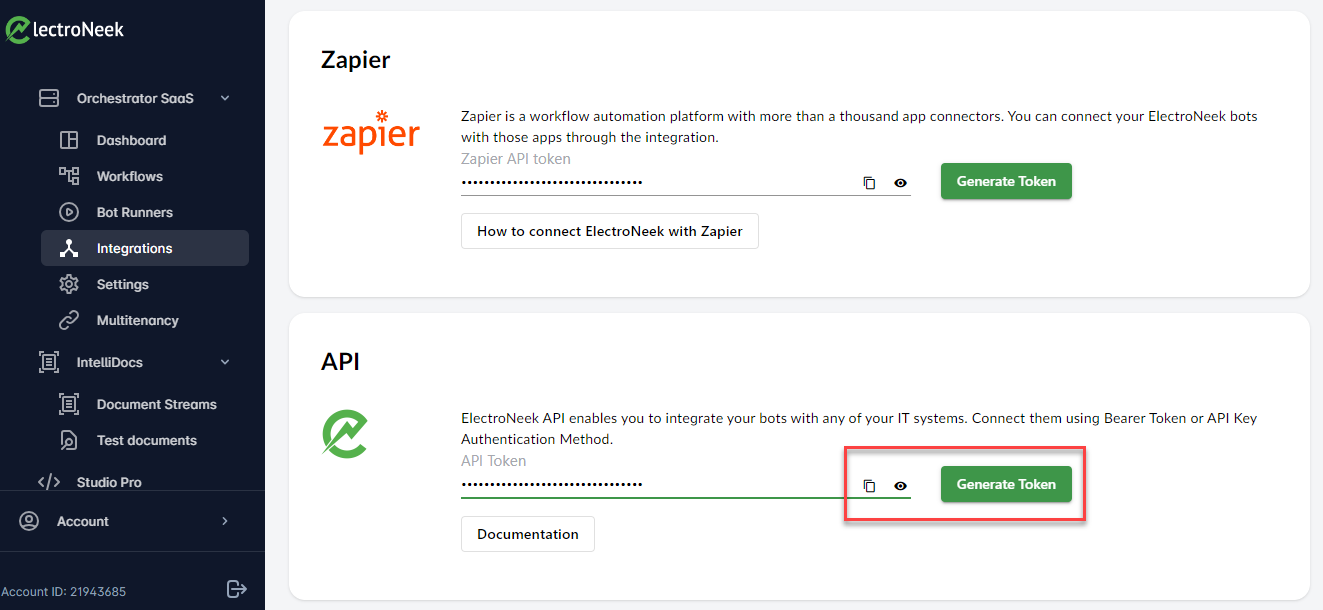
- Paste your Token into the Authentication Bearer field.
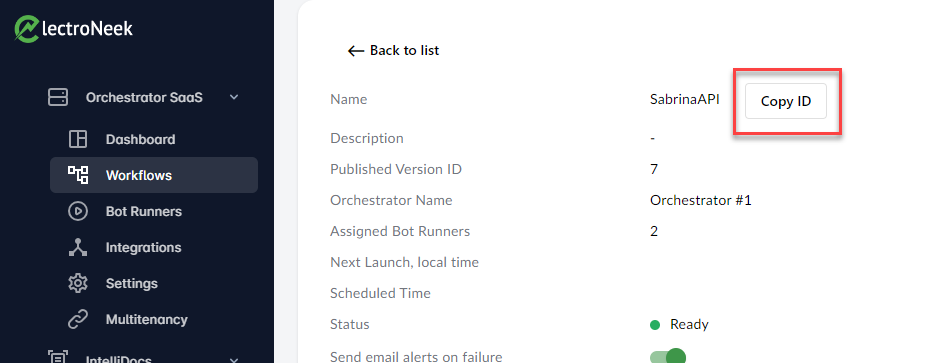
- Copy your Workflow ID.
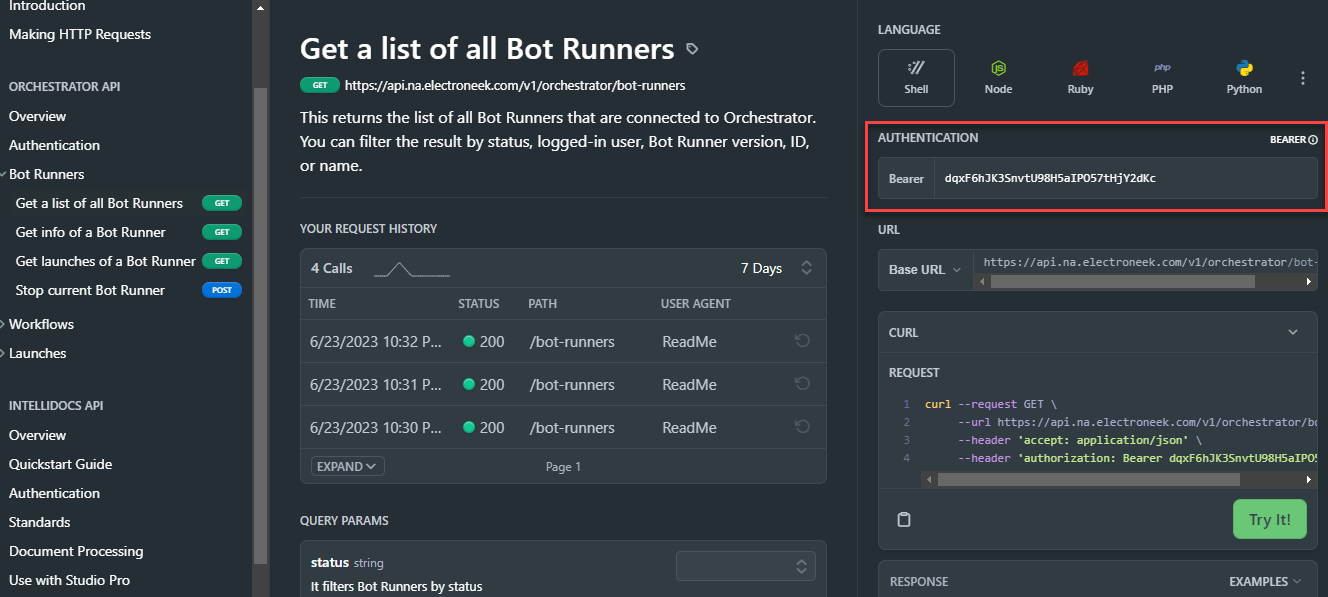
- Paste the ID into the Path Params**.
- Complete the Body with any desired information.
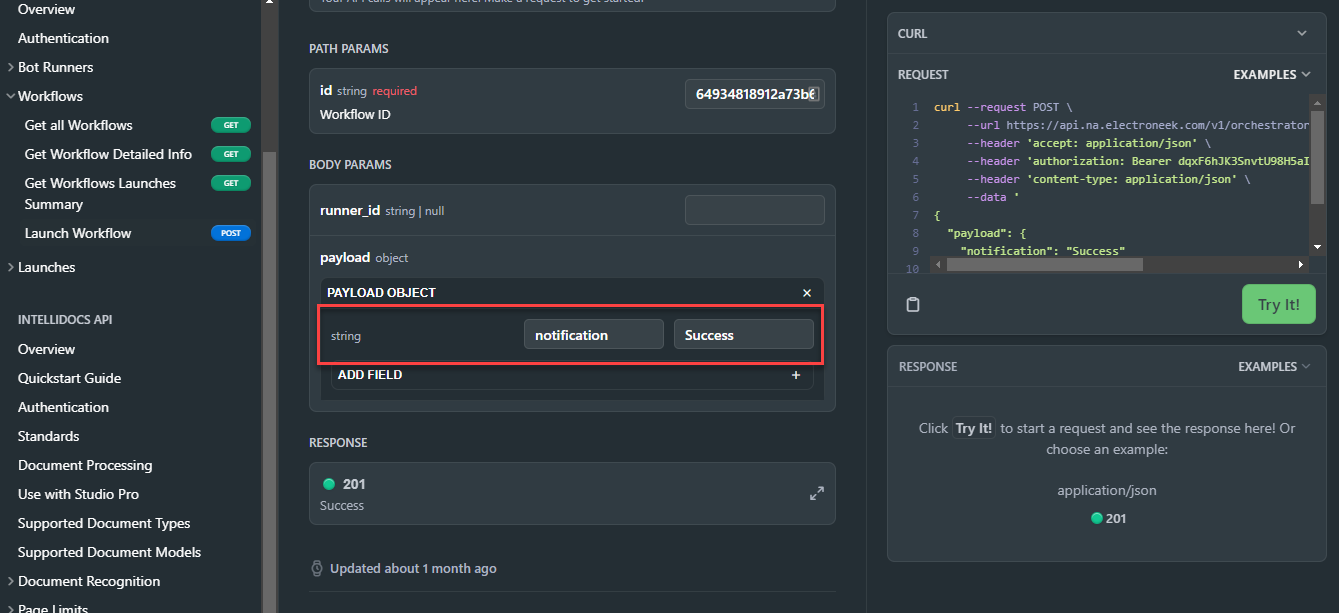
- Click on Try it! and see the result.
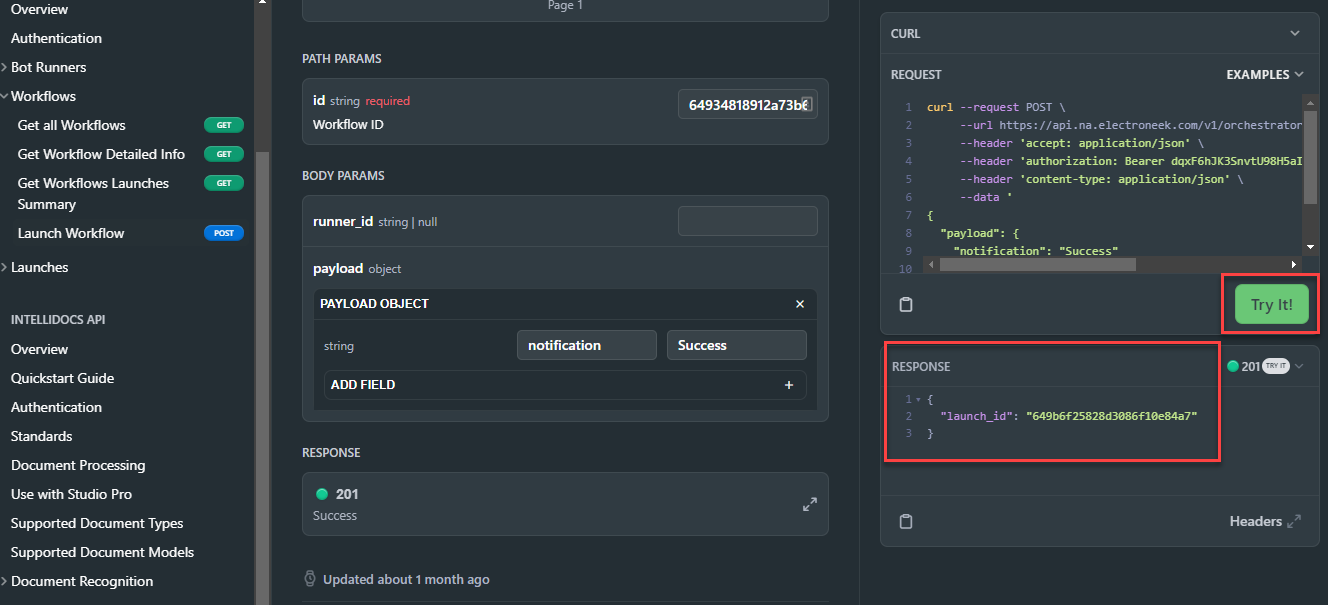
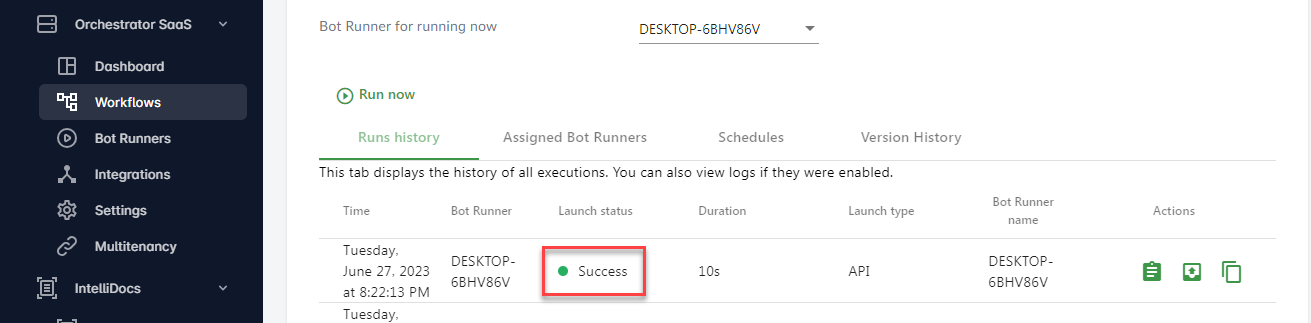
- You can also check that it was launched correctly in the Workflow's Run History.
Testing requests using other tools
Another possible way to test a request is by using another tool. Look at the steps you need to follow if, for example, you use Postman.
Bearer Token method
-
Navigate to the ElectroNeek API documentation portal.
-
Select a Request Type and copy this link.
- Go to Postman and paste that link.
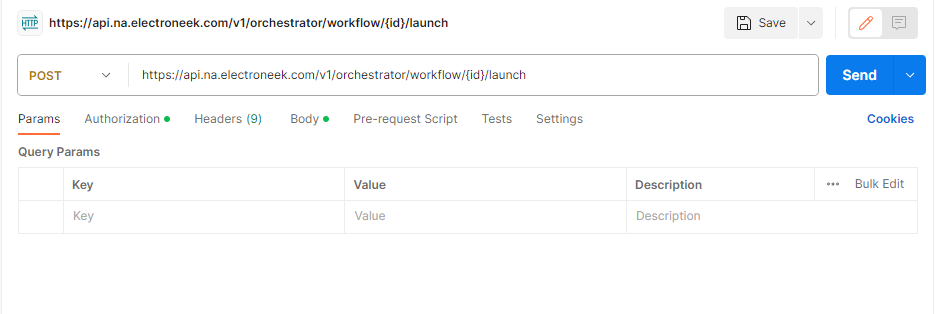
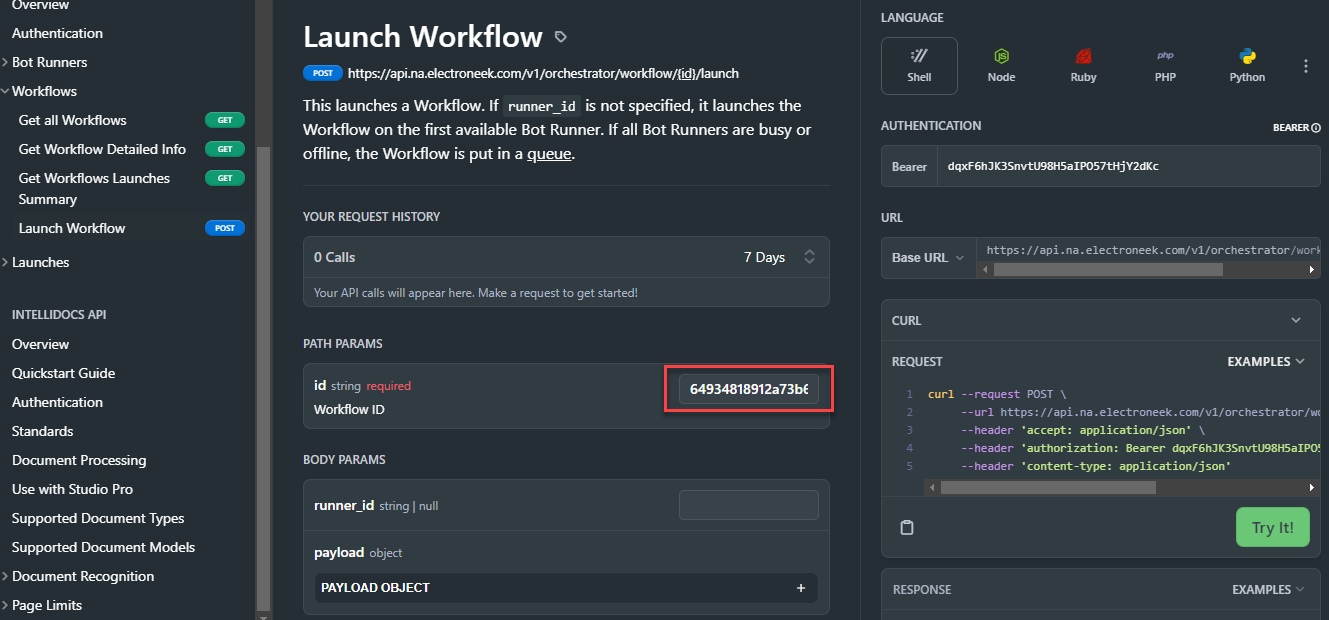
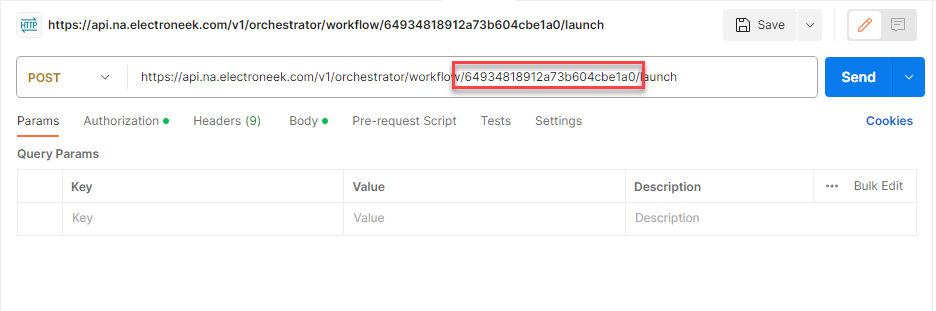
- Copy your Workflow ID.
- Paste this ID in Postman's URL, replacing the
{id}.
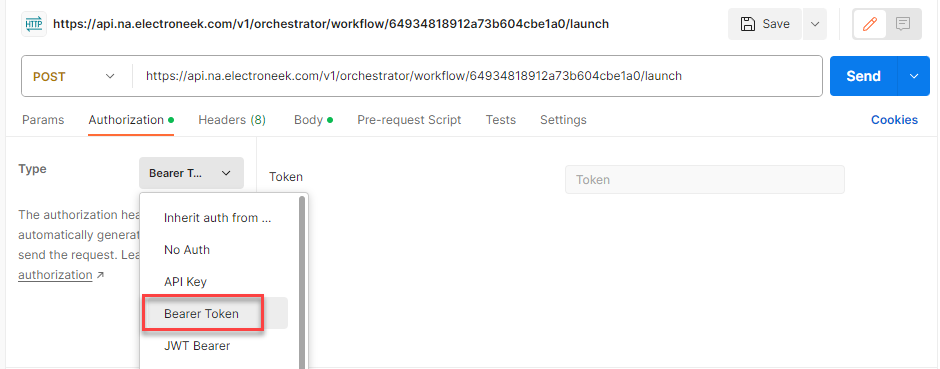
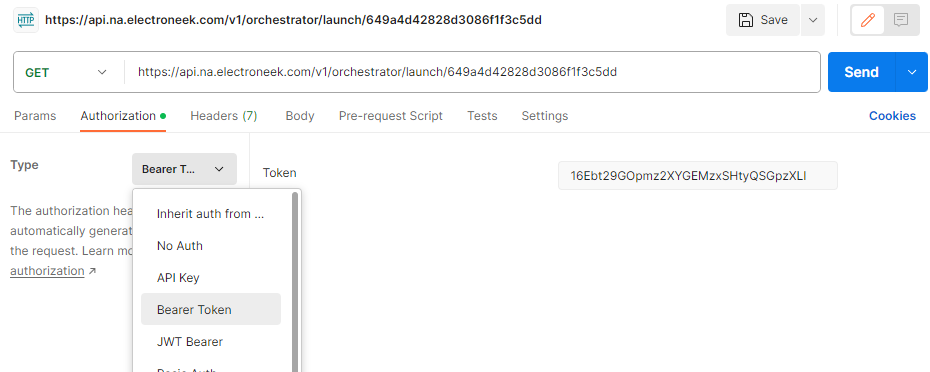
- Go to the "Authorization" tab and select the type "Bearer Token"
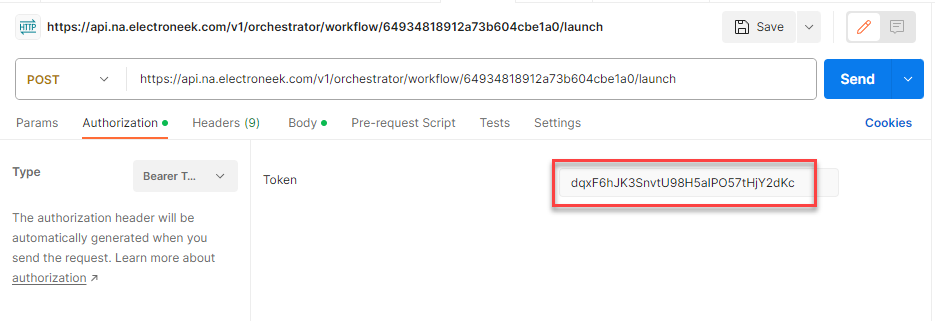
- Generate and copy a Token from Orchestrator SaaS → Integrations.
- Paste the Token in Postman.
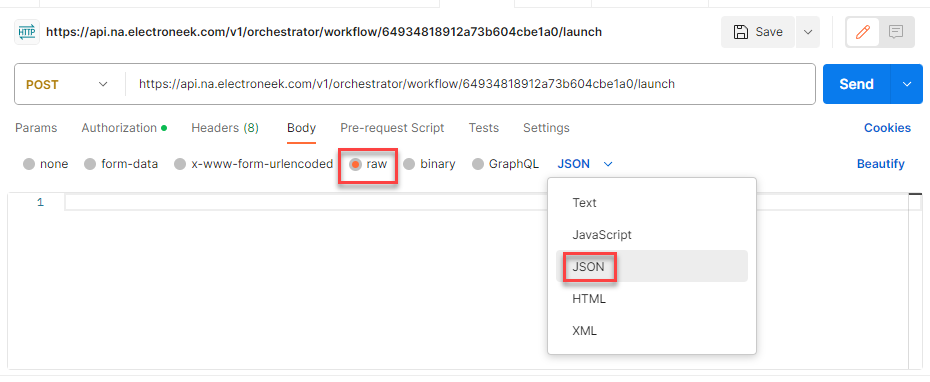
- Go to the Body tab. Select the data type raw and the format JSON.
- Fill in the body with any desired information.
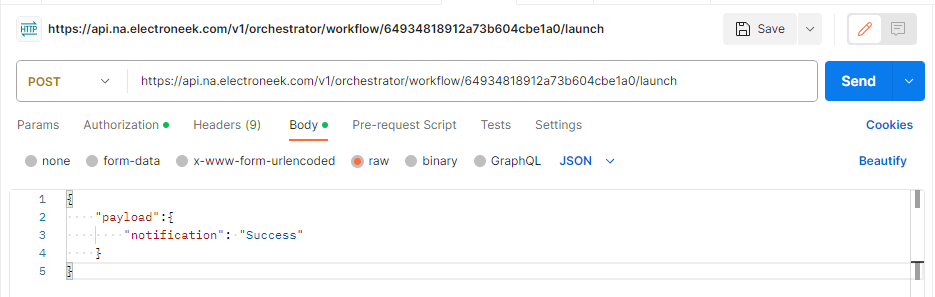
- Click on Send and receive the response.
- You can also check that it was launched correctly in the Workflow's Run History.
How to work with input/output data in your workflows
Introduction
There are scenarios where we want to use data from our workflows in other applications — or vice-versa. This is the core of hyperautomation because it helps us connect processes across multiple applications and platforms.
In this article you find an overview of the whole journey:
- Selecting output data from your workflows (Studio Pro).
- Visualizing the output data on the cloud (SaaS Orchestrator).
- Retrieving this data from Orchestrator as input to other tools (API request).
ImportantThis feature is available as of version 9.2 of Studio Pro and Bot Runner.
How to choose and set up your workflow output data?
Make sure you read this article beforehand to learn how to work with the Output tab.
Once you're ready, assign a Bot Runner to the workflow in ORC and execute it with any launch type (Manual "Run Now" button, Schedules, API, Zapier, Webhook, etc.)
Done! You have just executed your bot and SaaS Orchestrator now has the outputs.
How to see the output data?
Once you execute the workflow — triggered from SaaS Orchestrator — the output data is available for you. To see it, follow these steps:
-
Go to User Portal → Orchestrator SaaS → Workflows.
-
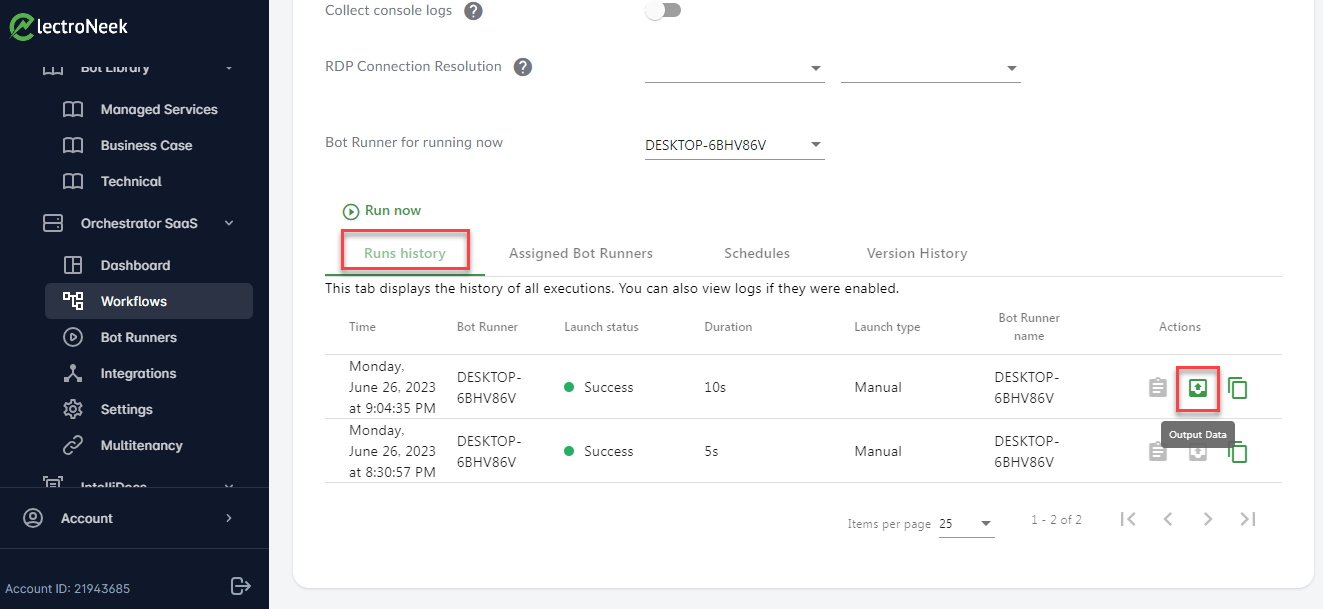
Click on the workflow and visualize the Runs History tab.
-
Click on the “Output Data” action.
On this page you can see a tab with all the output data you have collected from the workflow. The tab is also available in case you open the Console logs or Automatic logs tabs.
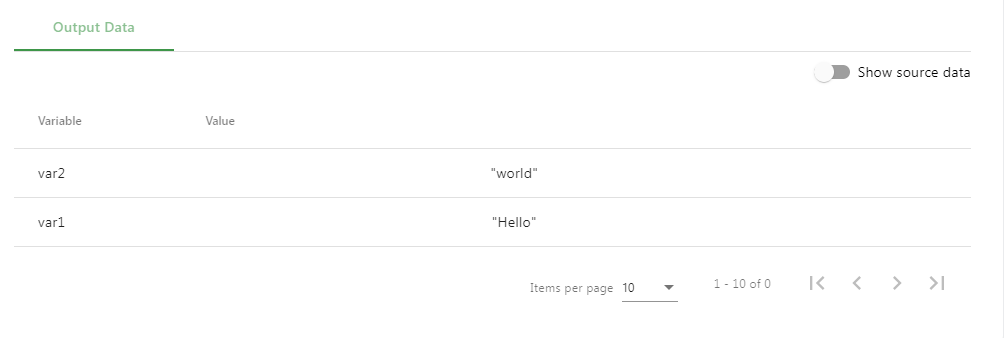
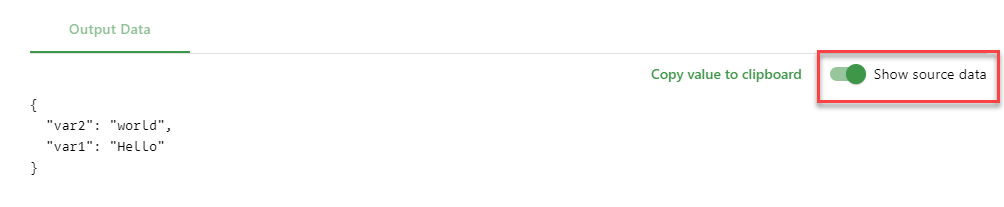
As you can see, the variables are organized in rows. To see this data structured in JSONformat, toggle the "Show source data" option on the right side. Your screen now shows this "raw" view and you can see the "Copy value to clipboard" option on the right side.
How to transfer this data?
Having this output stored on SaaS Orchestrator, you can get it by sending API requests from other tools, so you can use this data as input in other applications or tools! To do so, follow these steps.
- Get the launch ID:
First, you need the launch ID: the identification number of a specific execution of a workflow. The idea is that you can use it to get all launch information, including the output data. You have two ways of getting it, and the simplest one is:
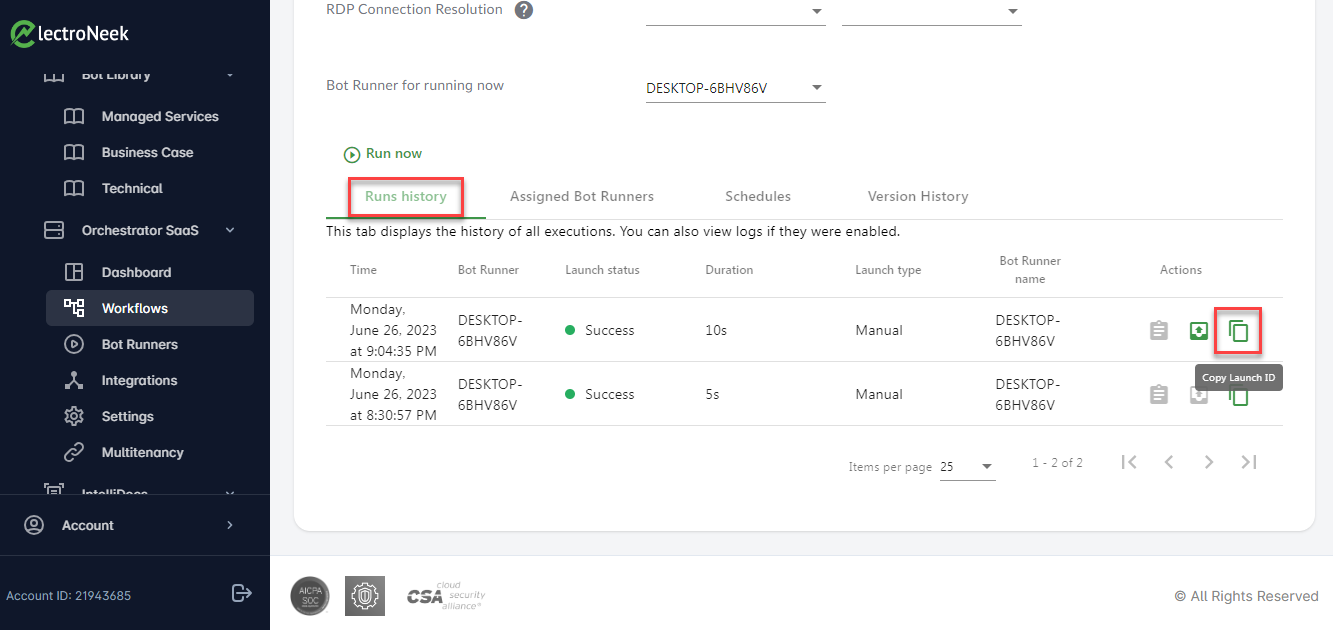
- Go to User Portal → Orchestrator SaaS → Workflows → Click on a workflow
- On the “Runs history” tab, you have the list of executions. For each of them, you find the “Copy Launch ID” button on the “Actions” column. Click on it.
NoteAnother way for you to get the launch ID is using this API method: Get Workflows Launches Summary. Each ID from the IP response corresponds to a Launch ID.
- Send an API request: Get launch info
With the launch ID you can send an API request to SaaS Orchestrator. In this example, we use Postman, but you can do it with any similar tool. Create a new request and set the parameters as below. In the URL field, replace the {id} with your launch ID.
- Type or request: GET
- URL: https://api.na.electroneek.com/v1/orchestrator/launch/{id}
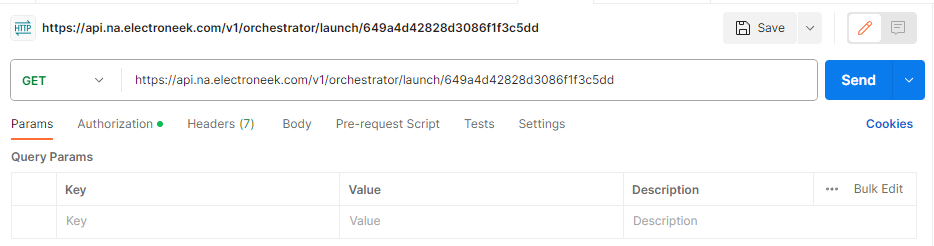
- Authorization tab:
- Type: Bearer Token
- Token: [Insert the token generated in SaaS Orchestrator]
NoteIf you have doubts about how to generate your Bearer Token, please check this article.
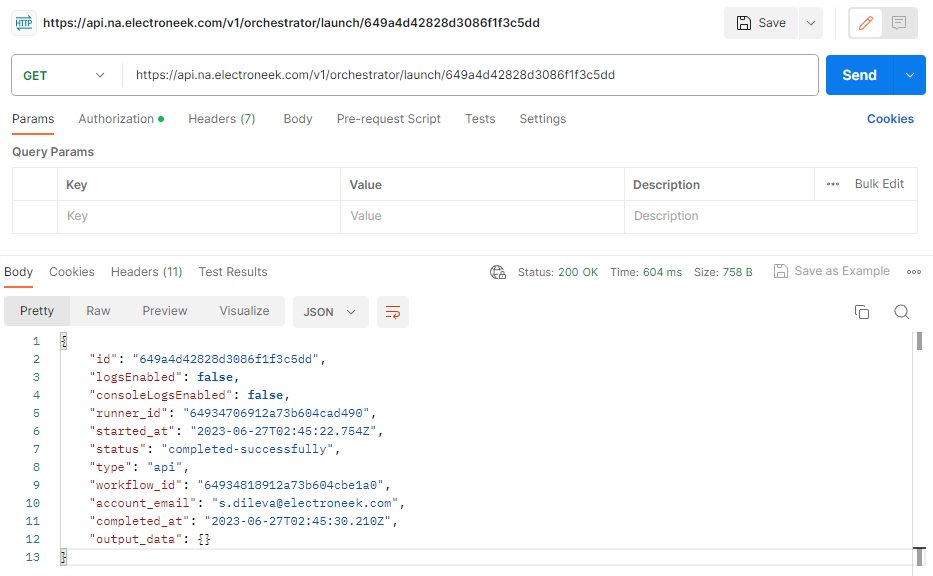
Also, make sure the body of the request is blank.
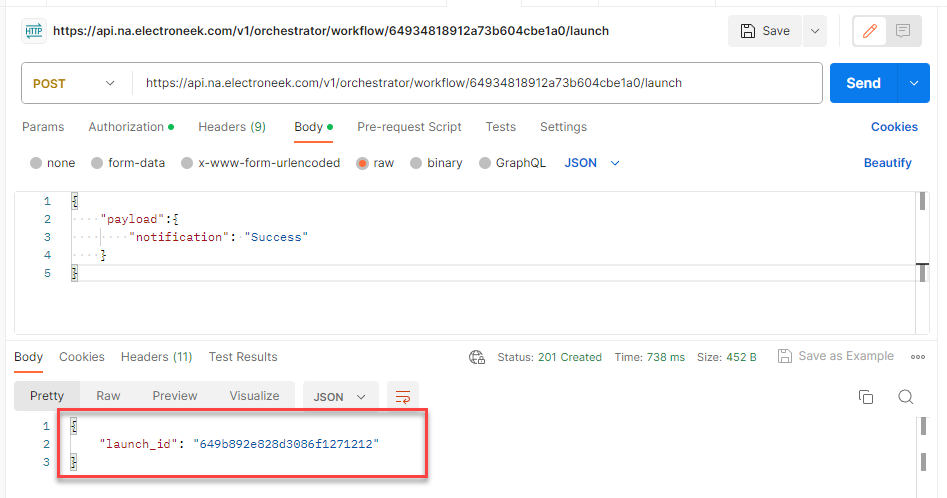
Is everything set up? Click Send and check the result: the information related to the execution is included at the end of it — including the output data variable, as you can see below:
NoteFor more information about API requests, please check our API documentation page and this article.
How to publish your workflow in Orchestrator SaaS
Once a bot is developed and tested, you may want to publish it to Orchestrator SaaS so that you can manage this bot remotely, set schedules, and more. This is the instruction on how to do it with Studio Pro.
NoteYou need to have an Admin role in Orchestrator to publish bots.
We assume that you have prepared your bot and are ready to publish it. In order to do that:
- Open Studio Pro. Log in under your account. If you exist in multiple Teams, select a Team under which you want to log in.
- Open your workflow.
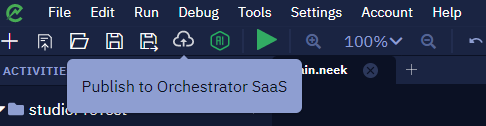
- Click "Publish to Orchestrator SaaS" in the menu bar.
- You will see a window where you need to fill a few parameters:
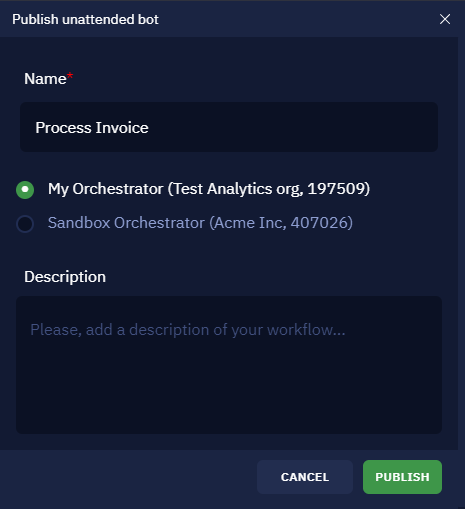
- Name - you can write a descriptive name so you can easily find it in a list.
- Orchestrators - if there is an Orchestrator connected to the Orchestrator of your Team, you will see it in the list. You will be able to choose where to publish the bot: to the Orchestrator that belongs to the account you're logged in under at this moment or to one of the connected Orchestrators.
- Description - give a description if needed.
- Click "Publish". Once you've clicked "Publish", Studio Pro will upload it to Orchestrator. The bot will be stored there.
NoteWhile publishing a bot to Orchestrator, our system will publish everything that is located in the same folder where the .neek file is placed and in the subfolders. If the size of the whole package is more than 20 MB then the publishing will be cancelled.
- You will see the workflow in Automation Hub → Orchestrator SaaS → Workflows. Assign Bot Runners to the workflow so that you can run this bot now or schedule them.
Important facts
- If you exist in multiple Teams and you want to publish a bot under the other team you belong to, you should log out from Studio, then enter your credentials to log in, and then select the desired Team. Then you can publish the bot to the Team's Orchestrator.
- If you have made changes to the bot, you need to repeat the publishing process so that Orchestrator works with the latest version of the bot. Orchestrator will not need to reconfigure bot launches: settings such as APIs, webhook links, or schedules will be saved.
- If you make changes to the bot and republish it to Orchestrator, it will replace the previously published workflow with its latest version. If you need to publish multiple versions of the workflow, you need to save each of them as a separate file and publish them to Orchestrator separately.
Multiple Orchestrators in a team
Introduction
This functionality allows you to have multiple Orchestrators within one organization, choose which one to publish bots to, and manage those bots independently of each other. The ability to have multiple Orchestrators is useful, for example, for MSPs for which the separation of work environments of different clients is an important aspect. Also, multiple Orchestrators allow you to have a production and test environment in the same organization, which in turn simplifies the process of developing and maintaining RPA technology in a company.
Setting up multiple Orchestrators
Adding multiple Orchestrators to one Team
There are two ways you can have multiple Orchestrators in the same team:
Multiple Orchestrators can be part of your plan.
Additional licenses can be requested as an Add-on.
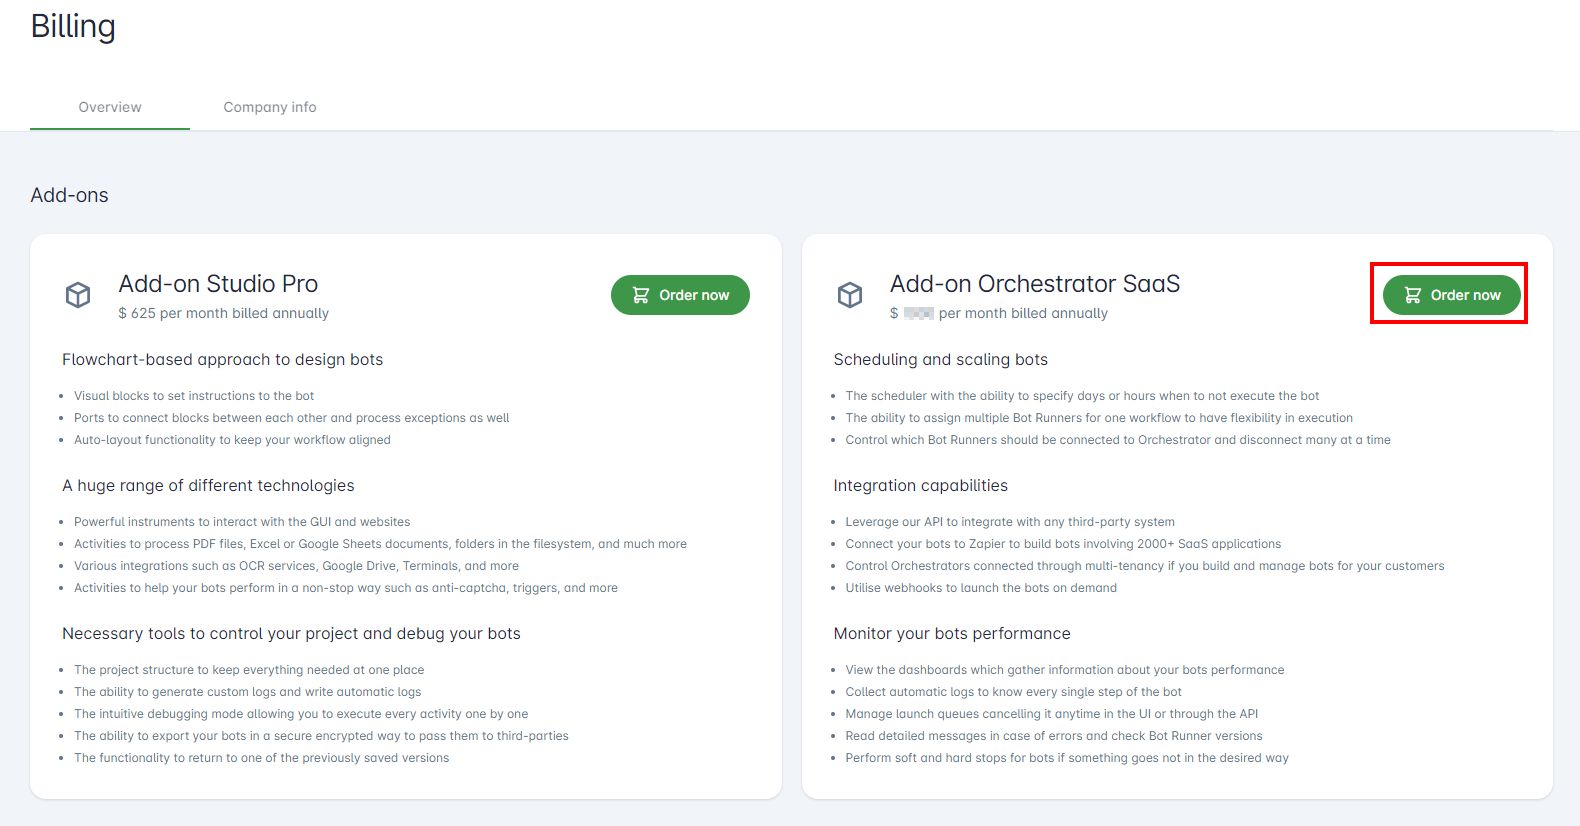
To add multiple Orchestrators, you must have the "Administrator" role and order an extra Orchestrator Add-on. Follow these steps:
- On the User Portal, go to the "Billing" page → "Teams"
- Scroll down to the "Add-ons" tab
- Click on "Manage Add-ons"

- On the right side, click on the "Order now"* button to request an extra *"Add-on Orchestrator SaaS"**.
Managing multiple Orchestrators
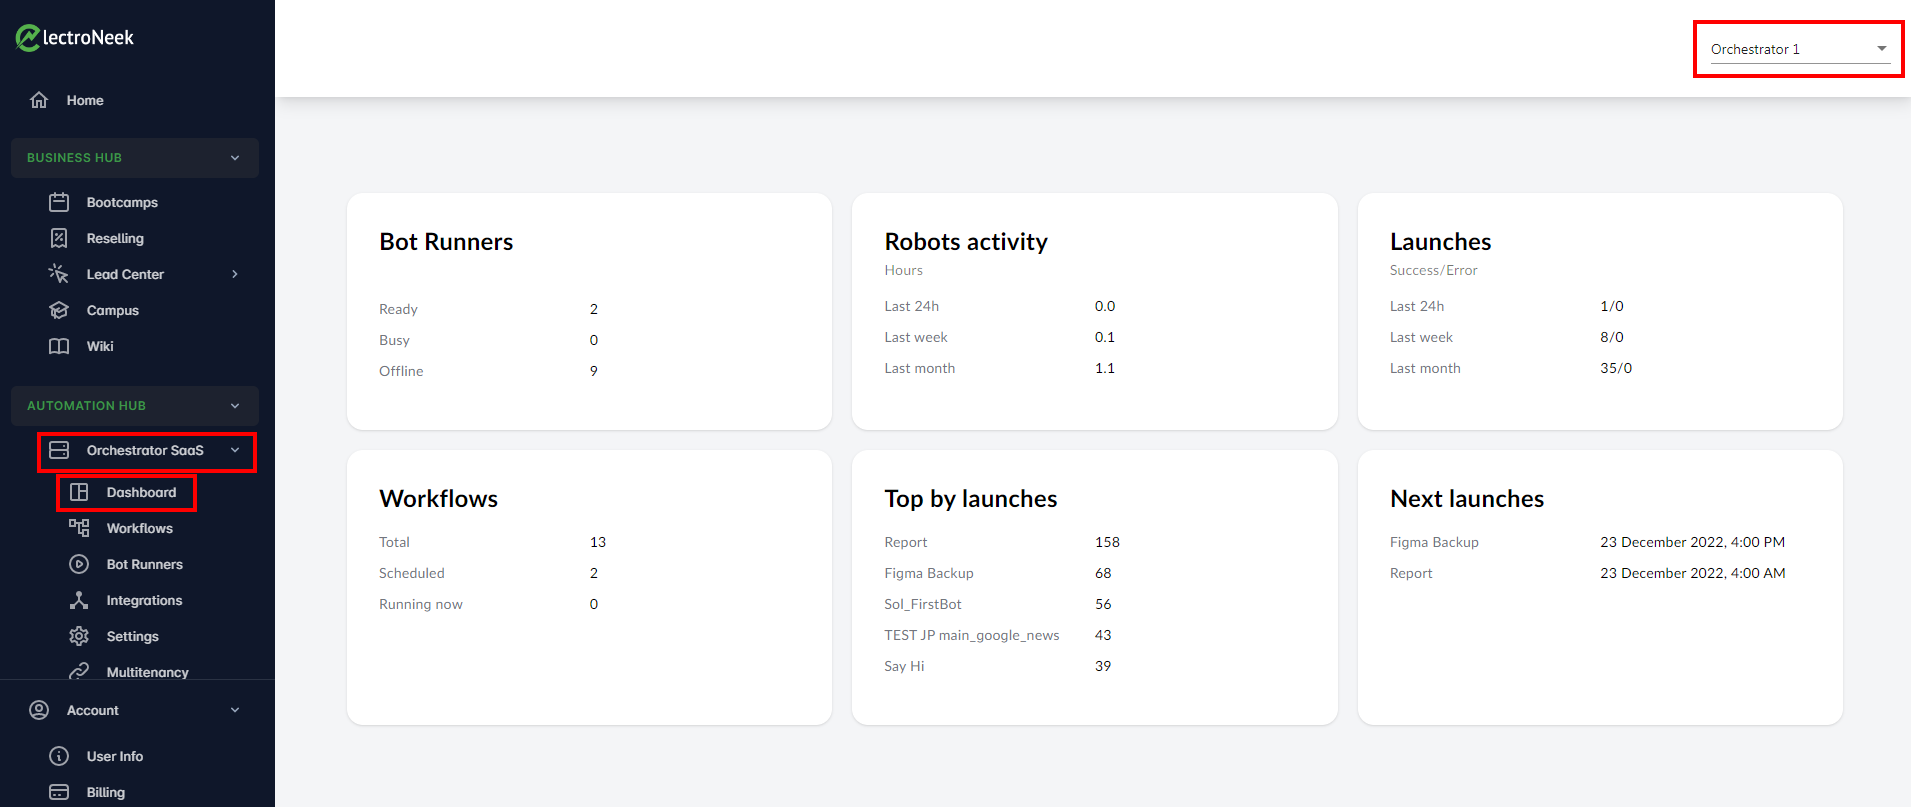
How to use another Orchestrator:
- On the User Portal, navigate to "Orchestrator Saas" → "Dashboard".
- On the upper right side of the screen, you can see the drop-down list where you can change the Orchestrator you are using.
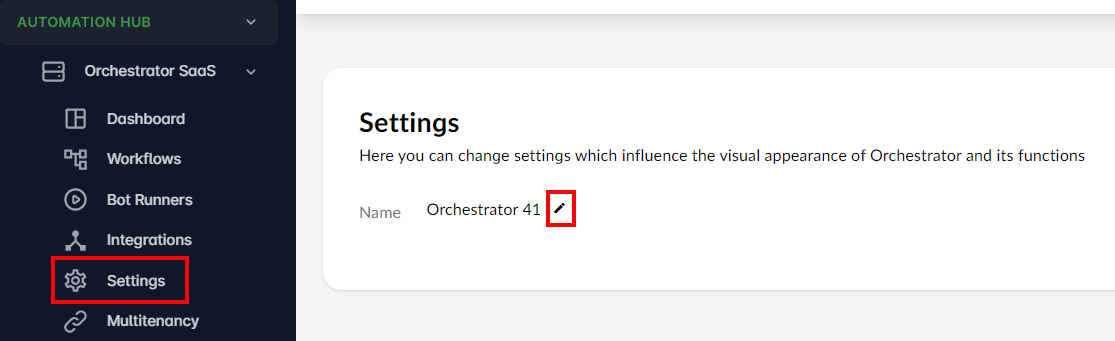
- To rename an Orchestrator, go to "Settings". Click the pencil icon to edit directly in the field.
Operating multiple Orchestrators
Publishing bots
After creating a bot or opening an already existing one, you can select the desired Orchestrator when publishing the bot via Studio Pro.
Connecting a Bot Runner
Suppose your organization has three Orchestrators. Thus, to connect Bot Runner, a user with access to Orchestrator must:
- Generate a token in Orchestrator 1.
- Insert the token into Bot Runner.
The result is as follows:
- The user sees the Bot Runner in Orchestrator 1.
- The Bot Runner does not appear in Orchestrator 2 or Orchestrator 3.
- A Bot Runner connected to Orchestrator 1 can be assigned to bots published to Orchestrator 1.
- A Bot Runner connected to Orchestrator 1 cannot be assigned to bots published to Orchestrator 2 and Orchestrator 3.
You can also publish the bot to all purchased Orchestrators at once. Learn more about publishing bots in this article.
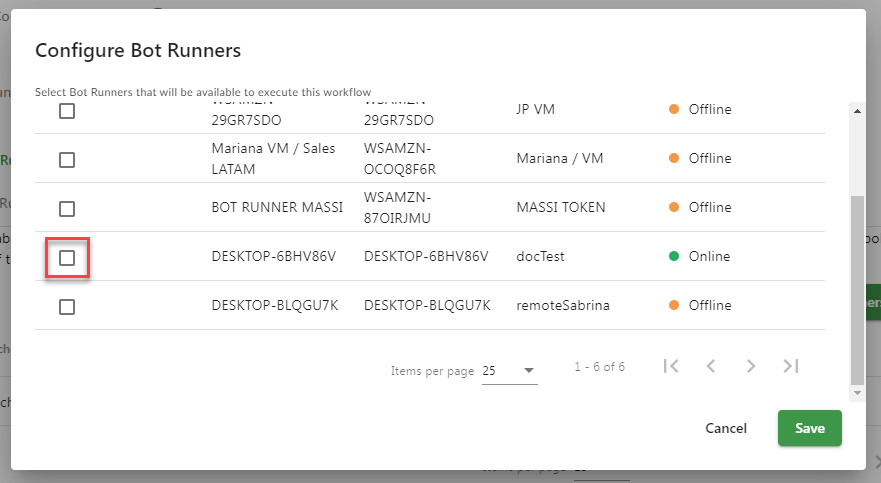
How to assign Bot Runners
To run a workflow through Orchestrator, you must first load a bot into Orchestrator and assign one or more Bot Runners to that bot. To do this:
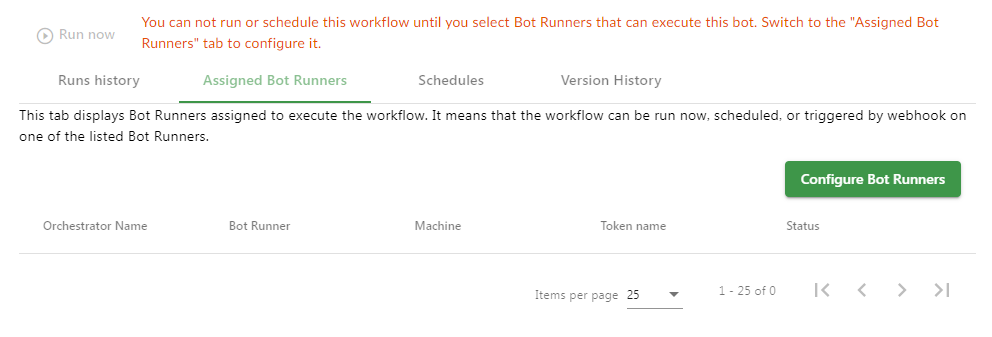
- Go to the "Workflows" page in your Orchestrator product and select a workflow.

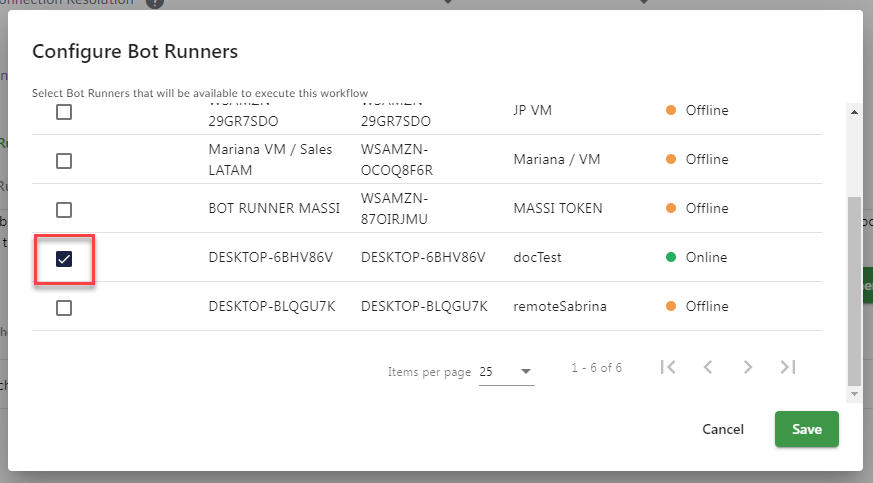
- Go to the Assigned Bot Runners tab and click on Configure Bot Runners.
- Choose a Bot and Save.
- Select the same Bot in the dropdown menu at Bot Runner for runnung now.
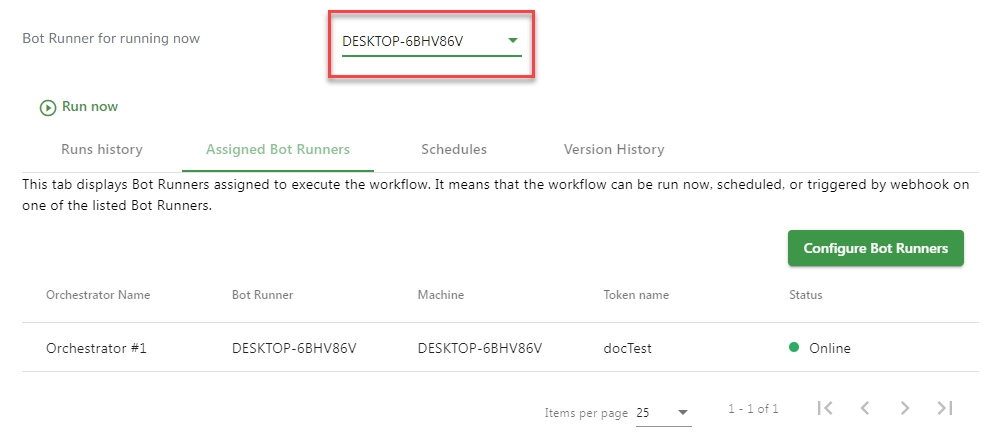
- Your Bot is ready to run.
Launching a Bot
There are three ways of launching bots:
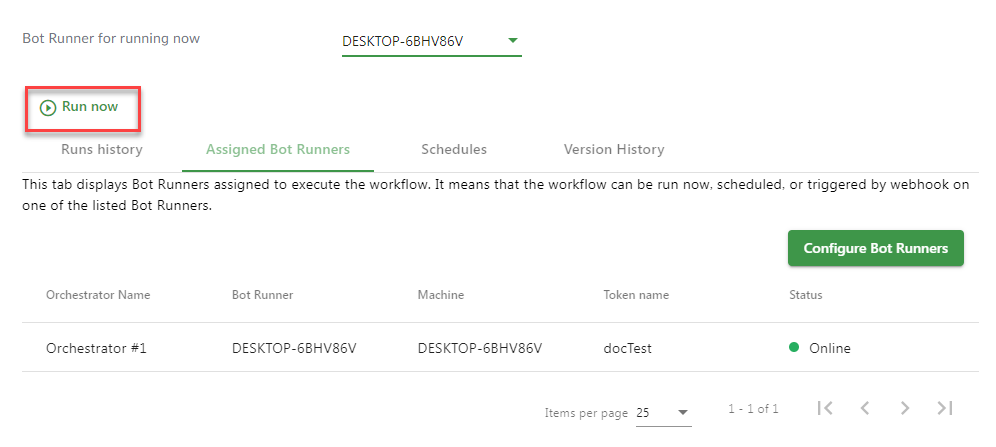
- The "Run now" button in the Workflow page. Use this option to run the bot right here right now.
- "Scheduling". You can set a schedule for launching bots.
- Weebhook-link. This way allows you to run workflow by HTTP-request.
Deleting Bot Runners
- Navigate to the workflow page, click on the "Configure Bot Runners" button.
- Untick the previously selected Bot and Save.
Queue in Orchestrator
Introduction
Workflows connected to Orchestrator can get into a queue. For example, you may have one Bot Runner assigned to multiple workflows, and those workflows, in turn, may have the same scheduled start time. Multiple workflows cannot be run simultaneously by the same Bot Runner, so they will get into the queue.
Principles of queueing
-
If the workflow is scheduled:
- The system looks for all the Bot Runners with an "online" status, which are assigned to this workflow.
- The first "online" Bot Runner executes the workflow.
- If all of the Bot Runners are busy, the workflow goes into a queue. If the workflow already exists in the queue, it won't be put into the queue again.
-
If the workflow is run by a click on the "Run now" button:
- The selected in the drop-down list Bot Runner executes the workflow.
- It is impossible to select a "busy" or "offline" Bot Runner in the drop-down list.
-
If the workflow is run by the webhook-link:
- In this case, the principle will be the same as in the case of the schedule, with the only difference that if the same bot is already in the queue, and some parameters are passed to the new bot to be launched, that new bot will still be added to the queue.
-
If the workflow is run by the API:
- In this case, the principle will be the same as in the case of the webhook-links.
Launch management
Workflows in the "In queue" and "In progress" statuses can be seen on the "Run history" page in the "Workflows" and "Bot Runners" tabs. If you want to cancel the execution of the workflow, you can perform the following actions:
- Delete the workflow from the queue. To do that, click on the symbol by the corresponding workflow:

- Perform a "soft-stop" or a "hard-stop" of the workflow. To do that, click on the required symbol:

The soft-stop finishes the execution of the bot alowing it to complete the action (or activity) and stop after that. The hard-stop forces the bot to stop without executing any further actions. It's better to use the hard-stop only when it's absolutely necessary, for example, when the system is frozen or a critical error has occured. The reason for that is that the hard-stop may disrupt files or system fucntions, the bot interacts with.
Using the "?forceRun=true" Parameter
Adding "?forceRun=true" to the webhook link or API URL is crucial. It ensures that subsequent API or Webhook calls are correctly queued. Without this parameter, Orchestrator may only process the first two consecutive API or Webhook calls, leaving subsequent ones unqueued.
How to Use "?forceRun=true":
- Upload your workflow to Orchestrator.
- Trigger consecutive API or Webhook calls, making sure to include the "?forceRun=true" parameter in the URL.
By adding this parameter when necessary, you can effectively manage the queue in Orchestrator and ensure that all API or Webhook calls are processed in the desired order.