
How-tos: Studio Pro
How to work with the Output tab
Introduction
To transfer data through different tools, you need to collect and organize the output data generated by your workflows. After that, you can use this data as input to any other application obtaining it through an API request.
Good news: you can do that using Studio Pro — and in just a few clicks. In this article you will learn how to work with the Output tab to manage data generated at any stage of your workflows. Also, you will find a realistic example of the whole process: from collecting output data to sending it to SaaS Orchestrator.
ImportantThis feature is available as of version 9.2 of Studio Pro and Bot Runner.
The Output tab
You can find the Output tab on the right side of Studio Pro interface, next to Properties and Variables tabs.

How does it work?
Keeping in mind what output data you want to send to other applications, you can use them in 3 easy steps:
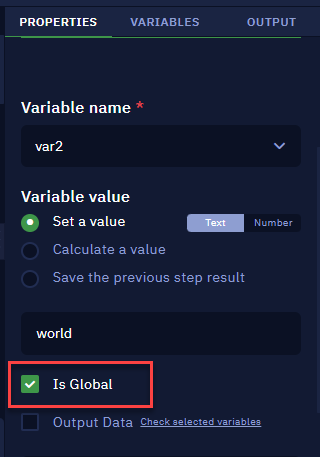
- Make sure they are saved as global variables. So, make sure you toggle the Is Global parameter when creating them. Read more in our article about Variable scope.
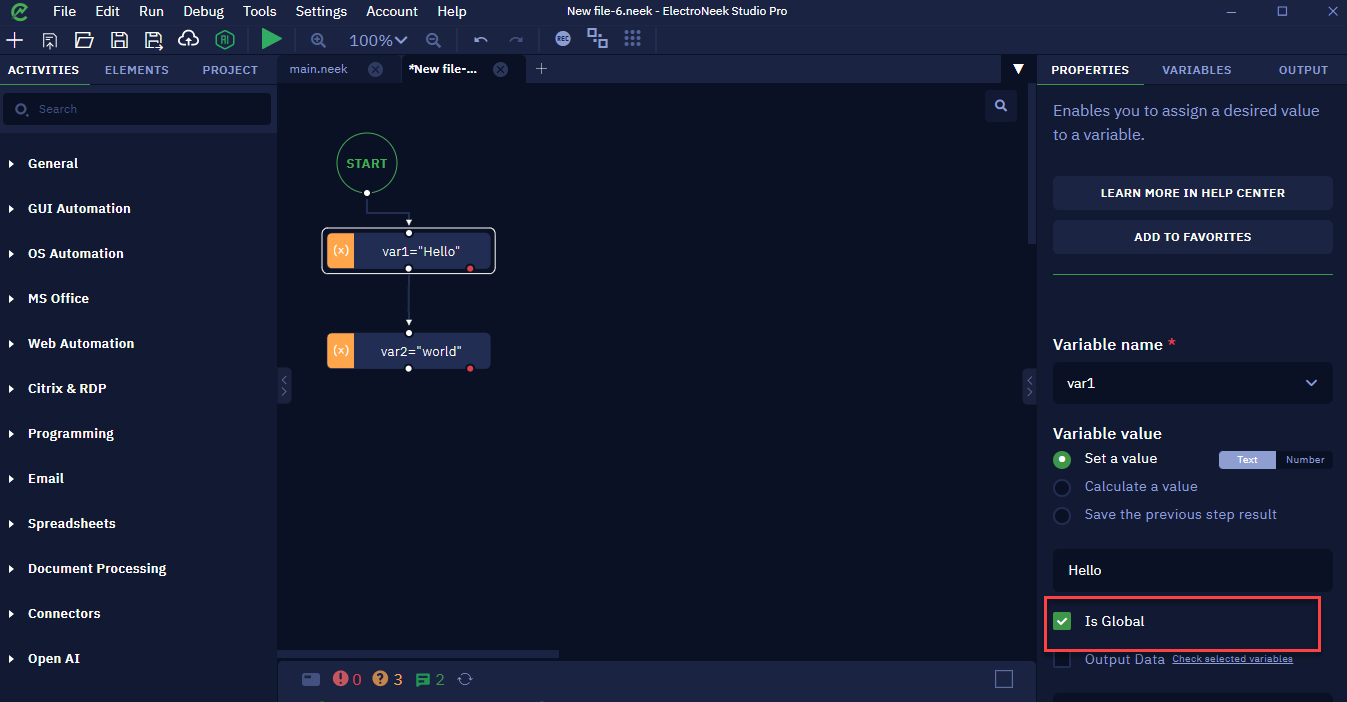
NoteThe limit of the output data is 2,000 characters. If you select variables whose data are big enough to exceed this limit, an error message is displayed on Studio Pro console.
Bear in mind that if we publish this workflow to SaaS Orchestrator, no data is sent during the execution of the bot. So make sure you keep your output data under the 2,000 characters limit.
- On the Output tab, check the “Send variables data to SaaS Orchestrator” option.
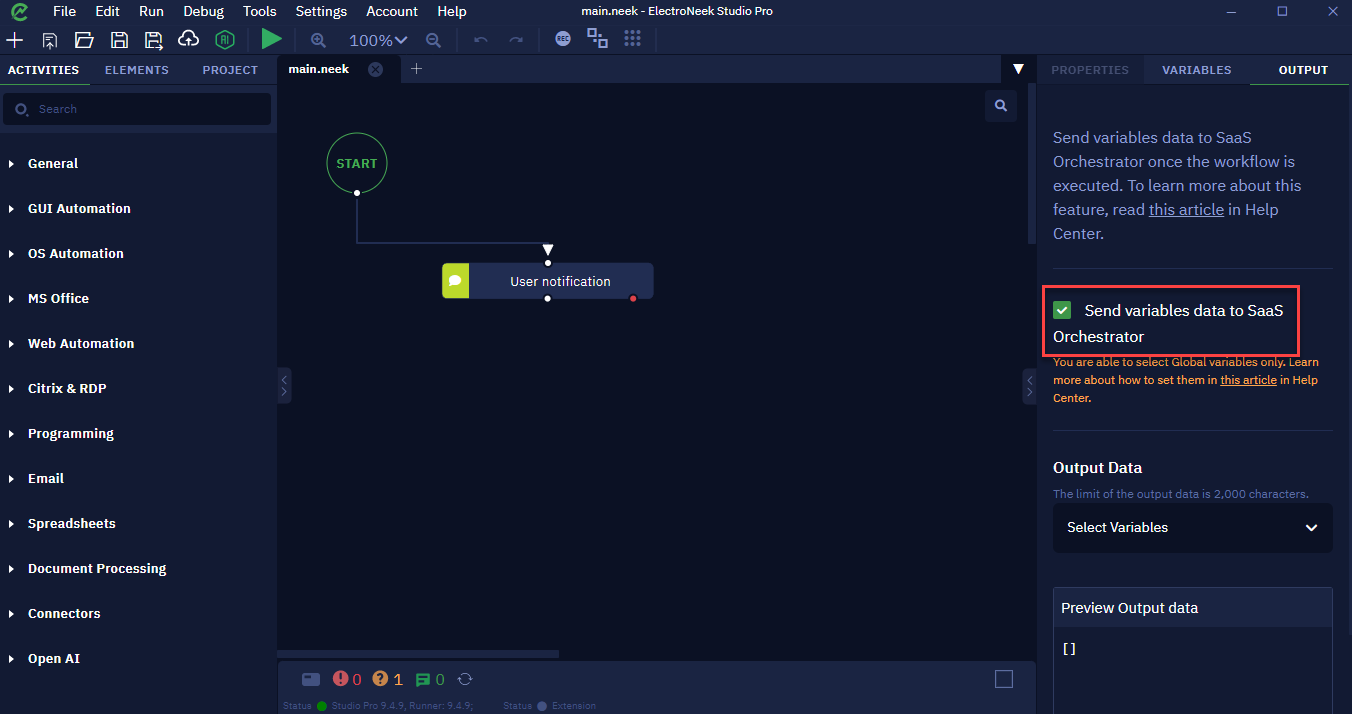
NoteBy collecting and transferring your output data to SaaS Orchestrator, you can easily get them by sending API requests from other tools. This way, you are able to create a wider, integrated network of applications and expand your hyperautomation activities.
- Below, open the drop-down list and select the variables from which the output data must be generated.
Done! Now you are able to collect output data when running your workflows. Read more about how to use it as input to other applications in this article.
NoteBear in mind that you need to run the bot from SaaS Orchestrator in order to store its output data.
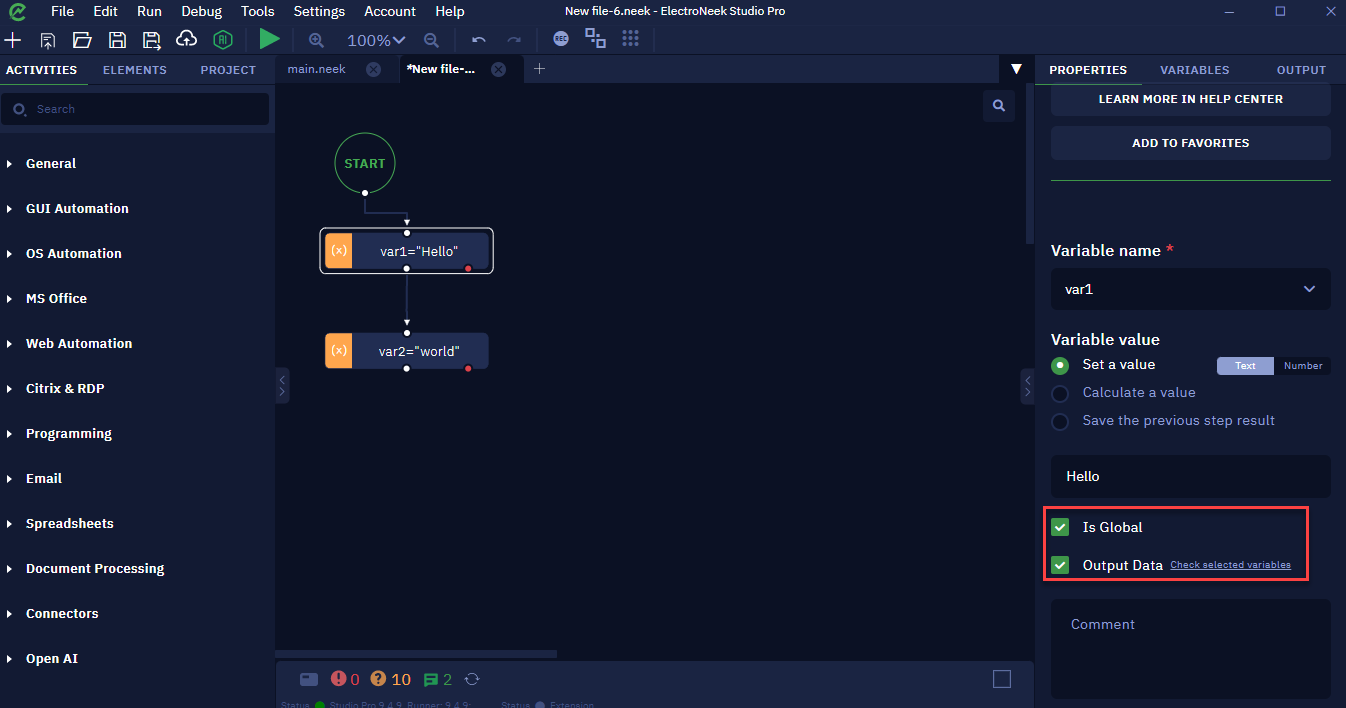
How to quickly choose a single variable?
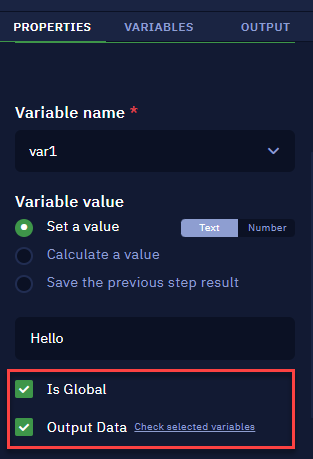
You have a shortcut if you want to set a variable as output data at the moment you create it. Once you click “Is Global”, you just need to check the “Output Data” option below it.
How to preview the output?
After selecting the variables to get their output, Execute the workflow in Studio Pro and go to the Output tab to check the Preview feature on the bottom. Click on the “View” icon to visualize how the output data looks like.
Variable scope
Description
Variables in Studio Pro can have two scopes - local and global. The global scope means that the variable will be accessible (you will be able to access and use it in any activity) from any .neek file running in Studio Pro. The local scope of a variable means that a variable created in a certain file can only be accessed within that file.
In the project settings, it is possible to initialize variables. To do this, go to "Settings" → "Project" → "Variables" and click on the "Add variable"button. Such variables can only be represented as Strings.
- The variables initialized in this way will not need to be initialized by a separate activity in the algorithm - to work with the variable within the algorithm, you only need to specify its name.
- Such variables will always be global, that is, they can be used in any part of the project. Variables will be preserved when the project is transferred to another machine.
NoteWhen you initialize a variable that has already been initialized in the project settings within the algorithm itself, the variable will adopt the value specified in the activity. This will create a duplicate variable, meaning there will be two variables with the same name but different values in the project. However, if you declare the variable initialized in the activity as global, it will update the value of the variable initialized in the project settings to the new value.
Parameters
Working with global variables is simple: no matter in which file you specify the name of the global variable, the last specified value of that variable will be substituted automatically. For example, if you set a global variable x = 100 in file a.neek, and create variable y = x in file b.neek, then y will take the value 100 (assuming that x has not changed its value before).
To make the desired variable global, select the "Is Global" option in the "Variable value" activity parameters.
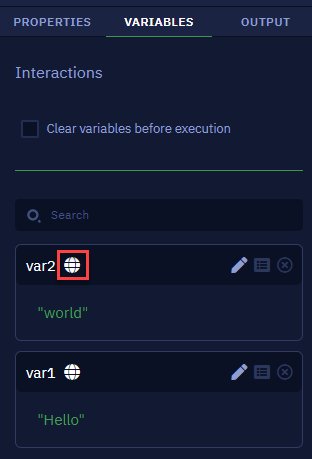
If the variable is global, the corresponding sign is displayed next to the name of this variable in the "Variables"section.
When you set the variable as global, you see the "Output Data"option. Mark it if you want to collect the variable's value, so you can send it to SaaS Orchestrator and use it in other applications.
Learn more about the Output tab and how to work with this type of data.
Local variables
The use of local variables imposes natural restrictions on their availability from other files. Similar to the example above, if you set variable x = 100 in file a.neek and set variable y = x in file b.neek, then the variable, y will no longer take on any value because the variable x does not belong to the b.neek file. In that case, you have to x with some value in b.neek and then use y = x.
Nevertheless in RPA-process development, it is often used to decompose one bot into several linked subprograms (especially if the process is large). Here the need to pass values from one subprogram to another as well as to return values from the subprogram appears (in the case of global variables there is no such need because variables are available in any file).
The examples below show how to explicitly pass values into a subroutine and how to return values from a subroutine.
Passing data into a subprogram
If you want to pass data from subprogram a.neek to subprogram b.neek, schematically it looks like this:
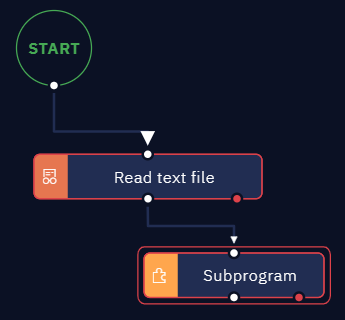
The screenshots above show subprogram a.neek and subprogram b.neek in a sequence.
Let's take a closer look at this algorithm. To transfer data from program a.neek to subprogram b.neek, make sure that the last activity before the "Subprogram" activity in a.neek returns a result. These activities can be, for example, "Assign value to variable", "Read text file", "Read table", and other activities that return a value (text of file read, button name, etc.). Note that if the last activity in a.neek is an activity that does not return a result (e.g. "Delay"), no data will be transferred to the b.neek subprogram.
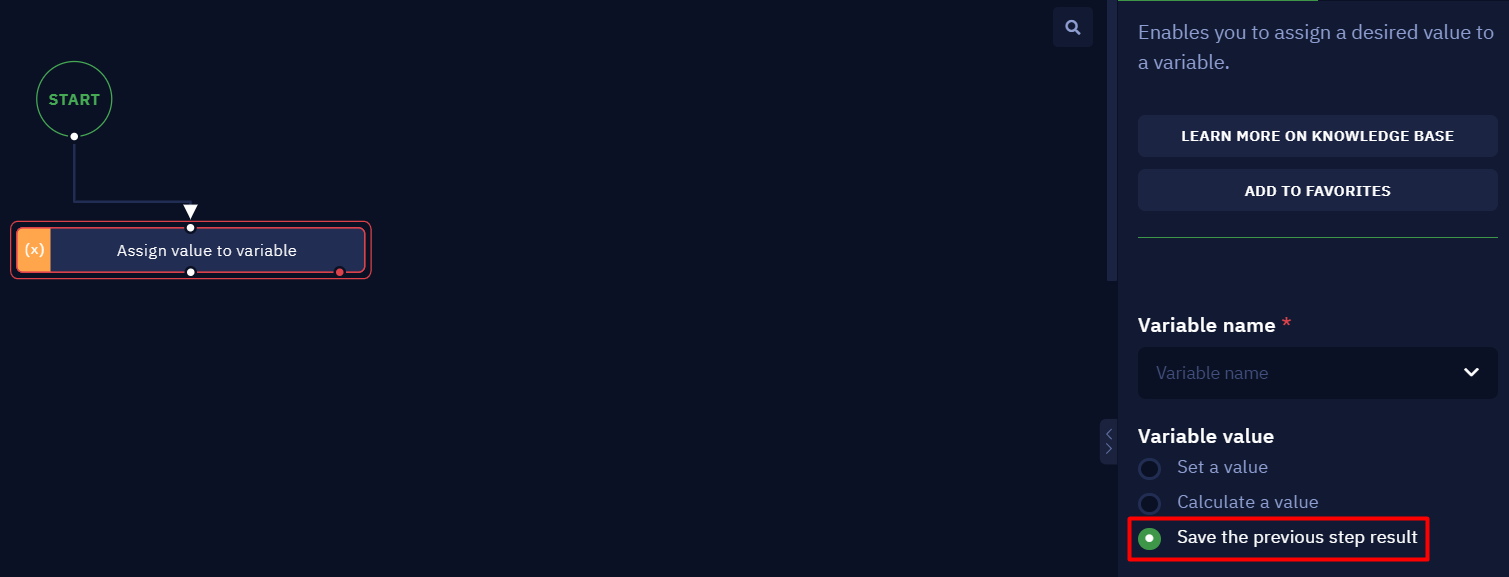
In the b.neek subprogram itself, you must create an activity block in which you want to use the data transferred from the main program. To do this, select the "Save the previous step result" option in the required parameter of this activity. The activity block itself must follow immediately from the "Start" block. In the picture above, in subprogram b.neek the data transferred from the external program a.neek is saved in a variable. Instead of a variable block, you can substitute the desired activity, for example, "Send email", in one of its parameters select the option "Save the previous step result".
Returning data from the subprogram
To return data from the subprogram (b.neek from the example above) to the main program (a.neek from the example above), construct the workflow so that the last activity in the subprogram returns some result. As described above, examples of such activities are "Assign value to variable", "Read text file", and similar activities that return a value. In the main program, after the "Subprogram" activity, you need to create an activity that accepts the result (see screenshot below).
Example of transferring and returning values
Let's build a simple workflow example where data is sent to and returned from a subprogram. The first step is to create a .neek file of the main program. The algorithm will look like this:
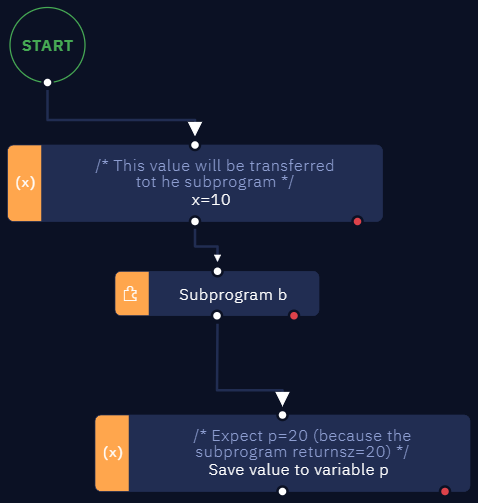
Here the variable x = 10 is created. Since the "Assign value to variable" activity returns the result, followed by the "Subprogram" activity, the value 10 will be passed to the subprogram.
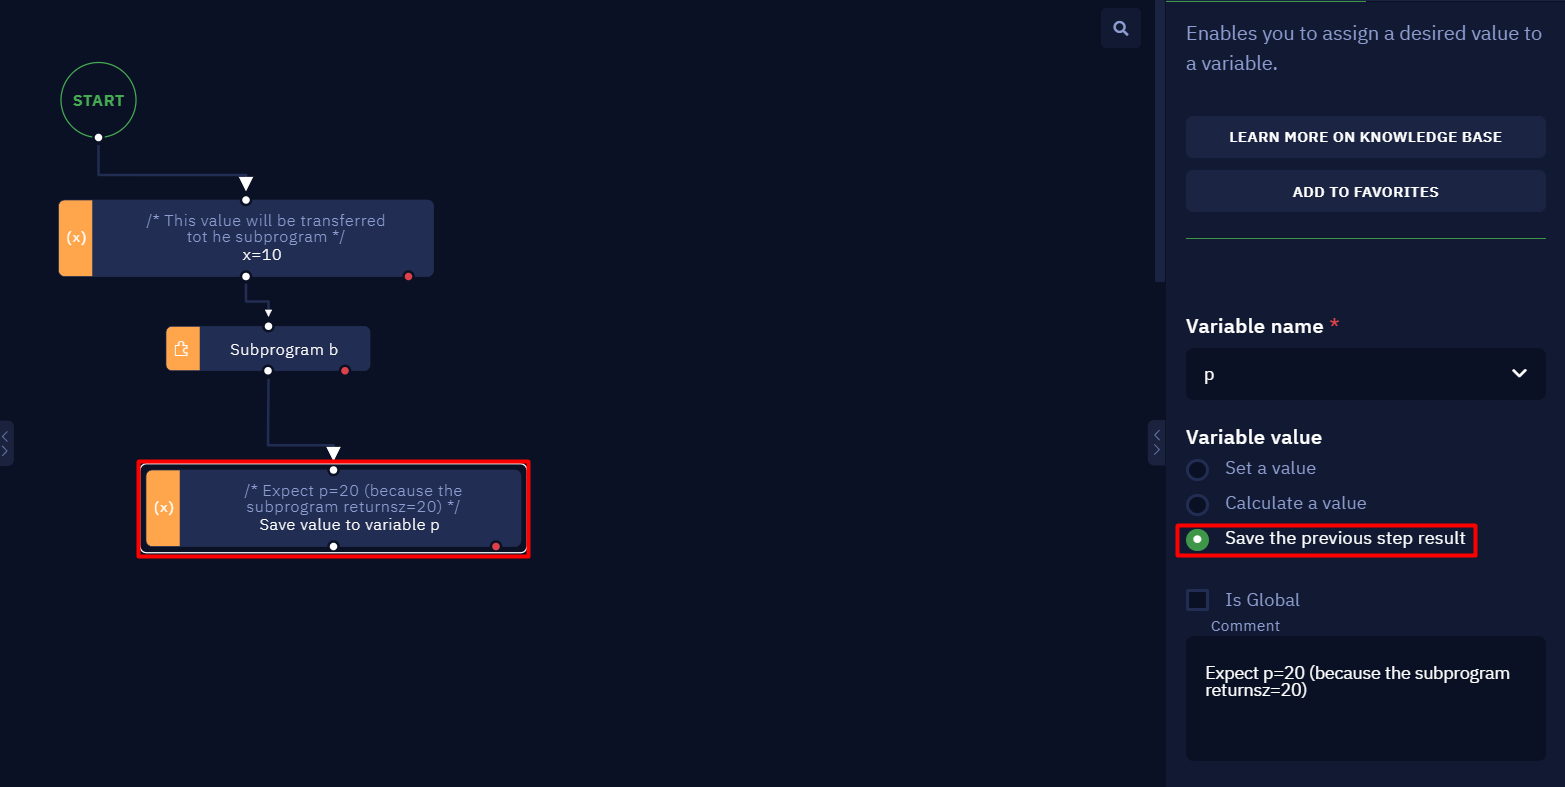
The subprogram file b.neek will look like this:
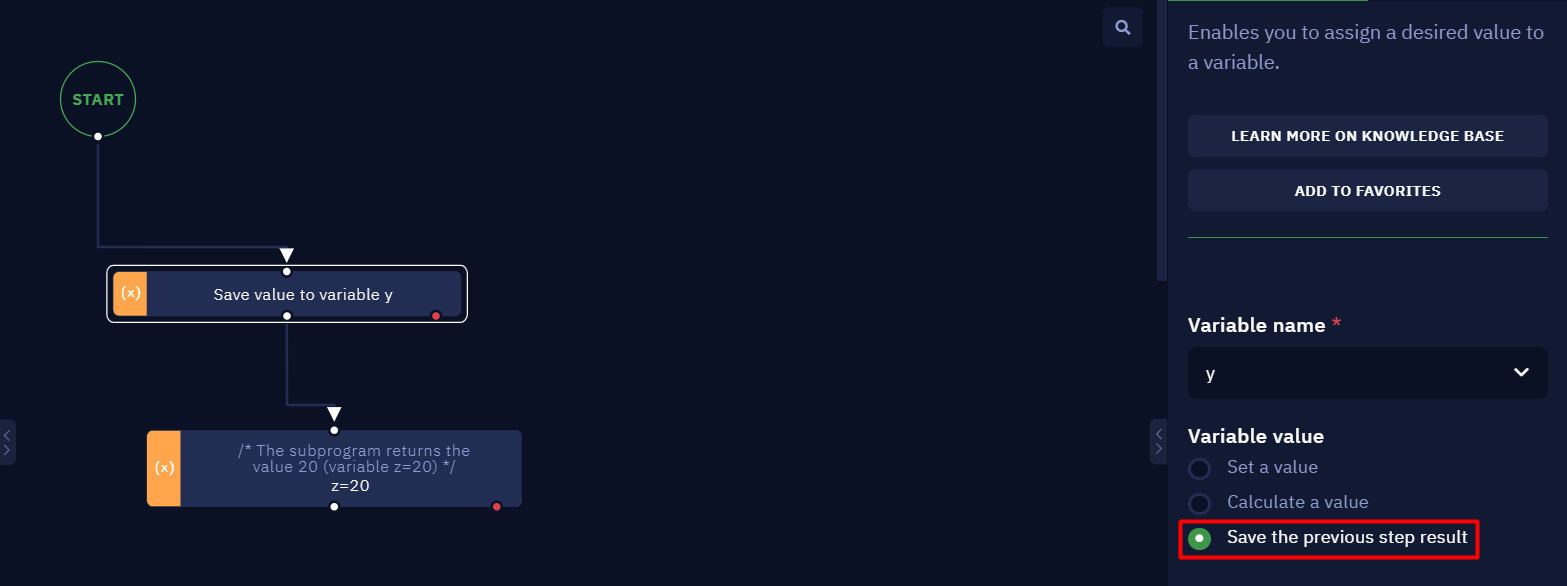
Here the first activity in the algorithm is to save the passed value into a variable. Thus, the variable y should get the value 10.
The last activity in the subprogram is to declare a new variable z = 20. Since this is the last activity and it returns the result, the value 20 will be passed back to the program a.neek. As you can see from the first screenshot in this example, after the "Subprogram" activity in a.neek, the result of the subprogram is stored in the variable p, which means it should equal 20.
Logging
Introduction
Studio Pro features different types of logging. Logs can reflect the system state and provide the information, necessary for debugging or analyzing the execution of workflows.
Studio Pro records logs in multiple places depending on whether the workflow is saved to a .neek file or not.
- Unsaved
.neekfiles save their logs inC:\Users\{username}\electroNeek\logs. - Saved
.neekfiles save their logs in{neek_file_location}\logs\{neek_file_name}.
For example: if your.neekfile is located atC:\Users\Administrator\Desktop\Test\Test.neekyour log folders would be atC:\Users\Administrator\Desktop\Test\logs\Test
The workflow logs are accessible through Studio Pro. It will open the correct location both if the workflow is saved or not.
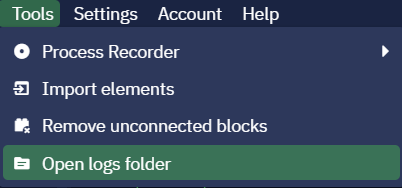
These are the folders that contain Studio Pro logs:
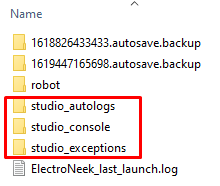
Types of Logs
Studio Pro maintains logs for the console (within Studio Pro), exceptions from running Studio Pro, autologs (when enabled) of your system’s information, Studio Pro configuration, and every step of the execution of bots.
Autologs
The autolog file is the main and the most important source of information that you can receive and send to the Support Team in order to solve a certain issue. It contains all the information in regard to your machine specifications, Studio Pro’s components versions, and every step of the workflow as well. Thus, it is the most detailed log file created automatically.
There is a certain structure of the file:
- Environment information (OS version, components versions, etc.).
- Information describing every step of the bot. The start and end steps of the bot execution are also recorded.
The information is displayed as: “Time of log-message - JSON”, for example:
16:26:46.328 {"programs":[{"program":"InternetExplorer","version":"11.789.19041.0"},

{"program":"Chrome","version":"91.0.4472.124"},

{"program":"1C"},{"program":"ElectroNeek Studio","version":"5.6.11.0"},

{"program":"ElectroNeek Robot","version":"5.6.11.0"},

{"program":"msedgedriver.exe","version":"79.0.313.0"}],"windows":{"caption":" Windows 10 Pro","version":"10.0.19042","csd_version":0,"os_architecture":"64-bit"},

"cpu":{"name":"AMD Ryzen 7 3700U with Radeon Vega Mobile Gfx","number_of_cores":4,"number_of_logical_processors":0,"number_of_logicalprocessors":8},

17:03:21.706 {"activity_name":"START","file":"C:\\Users\\owlyo\\Desktop\\Bot Text\\Text bot.neek
","script_id":"b8c90d98-e2a5-49c2-9ddd-28d77172bb59","memory_usage":117484,"version":{"launched_by":"5.6.11","created_in":"5.6.11","updated_in":"5.6.11"},"start_time_iso":"2021-06-29T12:03:21.692Z","activity_group":"General","end_time_iso":"2021-06-29T12:03:21.693Z","duration_ms":1,"status":"success","error_message":null,"output_result":null,"executed_branch":"next","parameters":[{"name":"version","value":"4.0.0"}
Studio Pro Autologs
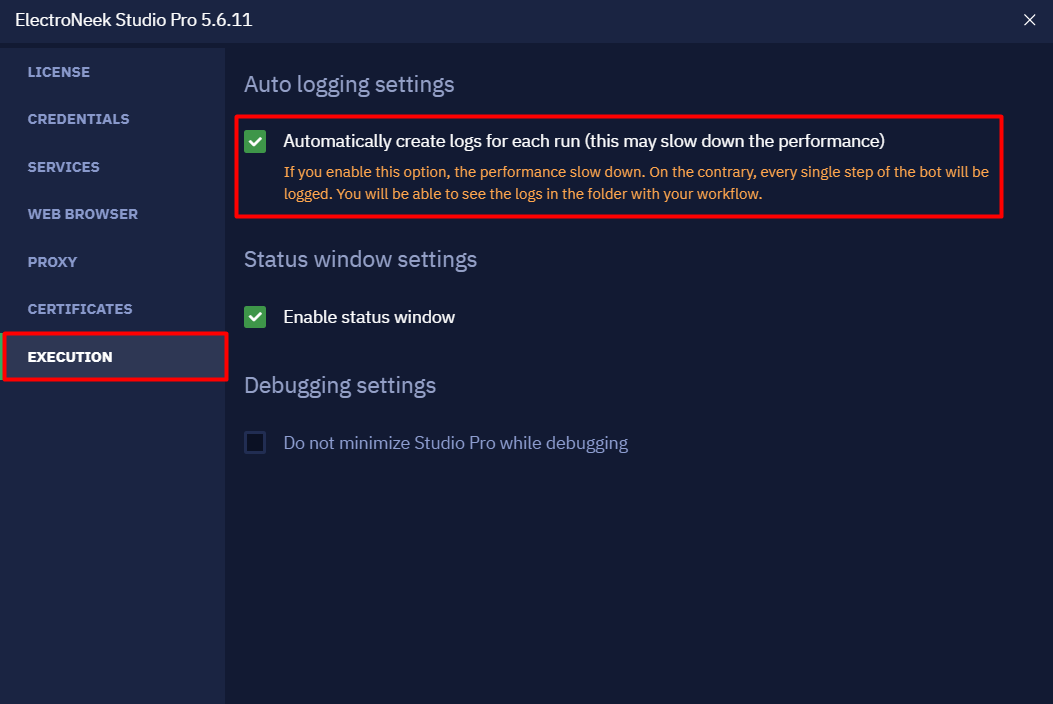
To enable that type of logging, navigate to “Settings” → “Execution” and enable the “Automatically create logs for each run” option.
The autolog file will be saved in the same directory as the workflow. For example: C:\Users\Username\Desktop\Project 1\logs\Project 1\studio_autologs
As of the 8.5 version, autologs contain the following information:
Environment information:
- Standalone or Dependent
- Application version
- Google Chrome/MS Edge version
- Webdriver version
- Extension's version
- User information:
- Region
- uID
- License
- Permissions
Events:
- Process flags
- Login - with a link to a .neek-file link
- Logoff
- Start workflow
- End workflow
- Messages from the Studio Pro console
Network events:
- Failed requests with URL, parameters, message
- Connection to sockets (with URL)
- Socket connection failures (with URL)
Bot Runner Autologs
The same can be applied to the ElectroNeek Bot Runner application. Navigate to this article to know more about logging in Bot Runner.
Console Logs
All of the information that is displayed in the Studio Pro console while working with the product and while the workflow is running is logged in a separate file. This can be convenient in situations where detailed logging of each action is not required, while the console displays explanatory texts for the user (for example, values of key variables), which allows you to immediately see this in the console log file, instead of searching for this information in the detailed autologs.
The structure of console logs looks like this:
[DATE and TIME] : [MESSAGE TYPE]: MESSAGE

Here is an example:

[2021-06-28T10:00:12.199Z] : [info]: ---------------------------------------------

[2021-06-28T10:00:26.728Z] : [success]: Bot started.

[2021-06-28T10:00:26.730Z] : [info]: Robot start

[2021-06-28T10:00:30.160Z] : [success]: Bot finished successfully, total execution time: 3s 427ms.
Exception Logs
Exception logs log the exceptions encountered by Studio when running. These logs typically refer to the environment issues or issues with Studio that do not necessarily coincide with the running of a workflow.
The structure of the Exception Log file displays the name of an error and the place where it occurred. For example:
Unhandled Rejection at Promise

      getaddrinfo ENOTFOUND account.electroneek.co

Error: getaddrinfo ENOTFOUND account.electroneek.com

    at PortalBackendApi.transformError (C:\Program Files\ElectroNeek\Robot\resources\app.asar\dist\main.js:1:701496)

    at C:\Program Files\ElectroNeek\Robot\resources\app.asar\dist\main.js:1:701043

    at runMicrotasks (<anonymous>)

    at processTicksAndRejections (internal/process/task_queues.js:97:5)
How to Install the Browser Picker Extension
Introduction
This page describes how to install and activate the "ElectroNeek Browser Automation" extension in the Google Chrome and Microsoft Edge browsers.
Installation
There are two ways to install the extension: through Studio Pro and directly from the extension store in the browser.
Installation through Studio Pro
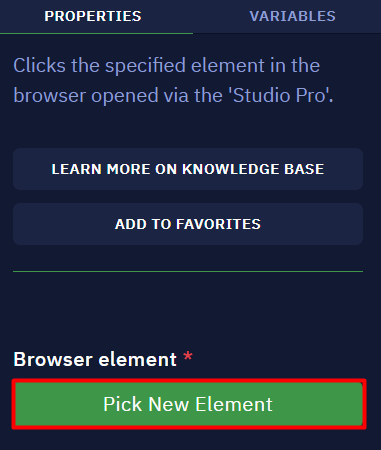
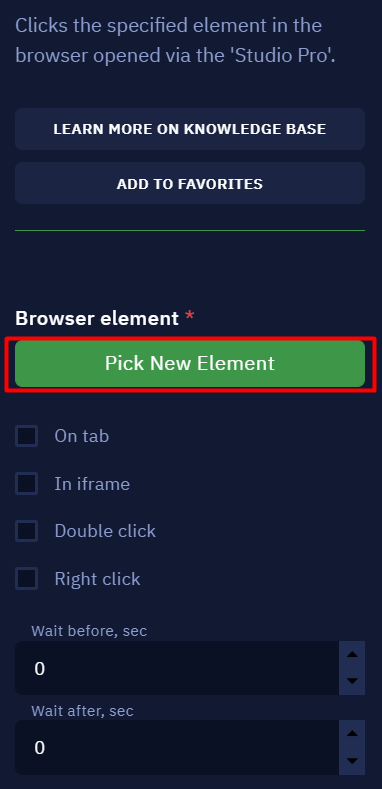
You can install the extension by clicking "Pick New element" in the "Properties" tab of one of the Web Automation group activities.
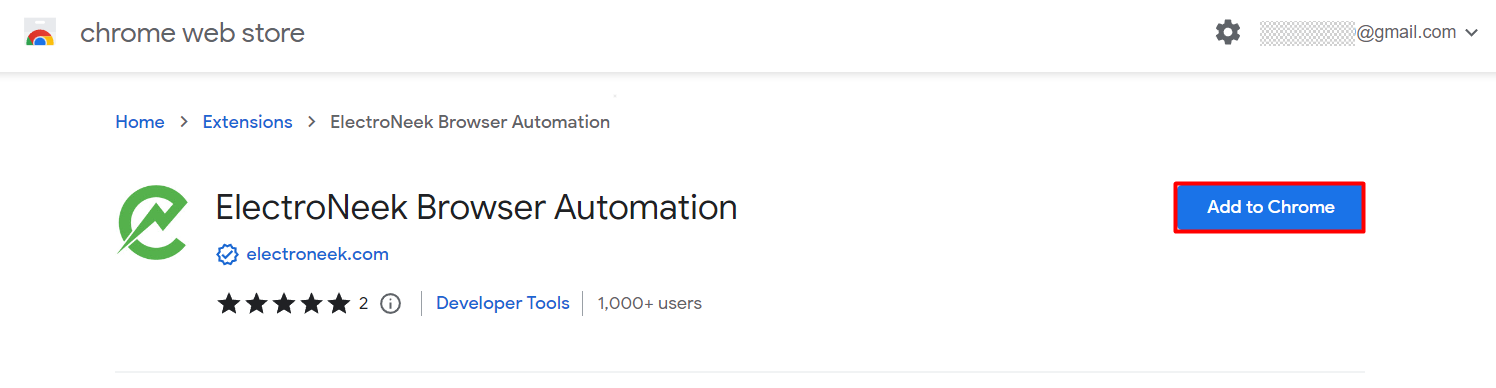
Direct installation (Google Chrome)
To install the extension directly from Google Chrome, follow this link and click "Add to Chrome".
Activation
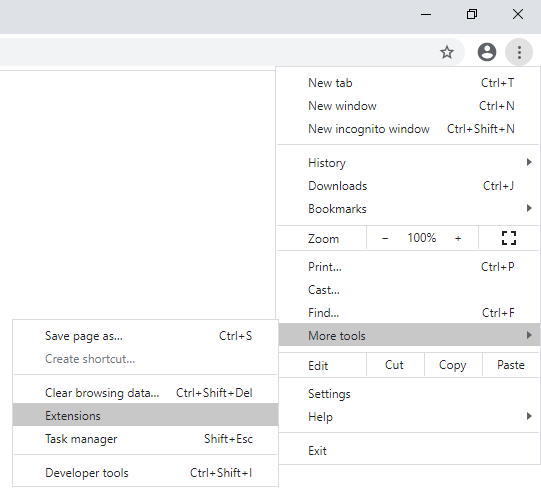
Google Chrome requires activation of the extension when it's installed. To do this, launch "Google Chrome" and navigate to "Settings" → "More Tools" → "Extensions".
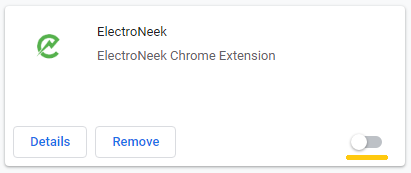
After that you will see a list of your extensions, find the 'ElectroNeek' extension there and turn on the switch.
Direct installation (Microsoft Edge)
Microsoft Edge can be installed the same way: by following this link and then clicking "Get" on the Microsoft Edge Add-ons screen.
Result
Restart your browser and try clicking "Pick New Element" on one of the Web Automation group activities again. If everything was done correctly, the Browser Picker window should appear.
How to interact with web-elements and desktop elements
Browser Picker
Browser Picker is a tool that allows you to determine which elements of the browser interface the bot needs to interact with.
There are three ways to open the Browser picker:
- Using the "Pick New Element" button in the activity parameters. When clicking this button a selection mode starts with which you can specify the desired item. After selecting the item, the Browser Picker window opens.
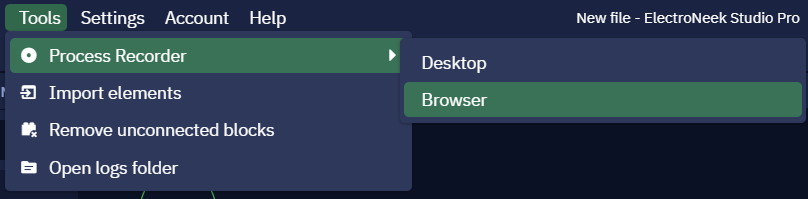
- Accessing Tools → Process Recorder → Browser. When you use this function, the selector mode starts, but the selector window does not open. In this mode, you can specify several browser items to click or enter, and then return to the Studio Pro window. New activity boxes display in the workspace.
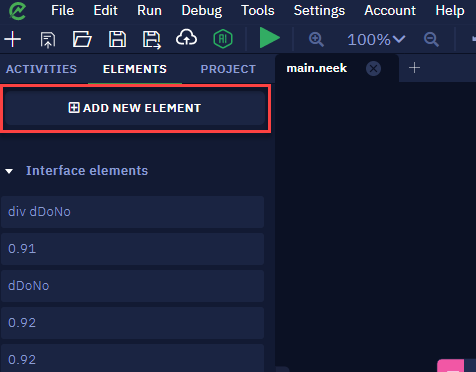
- Through the "Elements" toolbar. Within this panel, you have the option to either create a new element or select an existing one. You can choose a new element from the browser interface by clicking the "Add new element" button. And by clicking the "Change the element" button, you gain access to the editing functionality for the selected element.
Working with the tool is quite easy. When you click the "Pick New Element" button, Studio Pro minimizes and a browser will be opened. In the browser, you can select the element you want to work with. When you hover your cursor over an item, it is framed in red. Pressing the Ctrl+X key combination fixes the selected item. The Esc key allows resetting item selection mode.
After the item is selected, the "Browser picker" window opens.
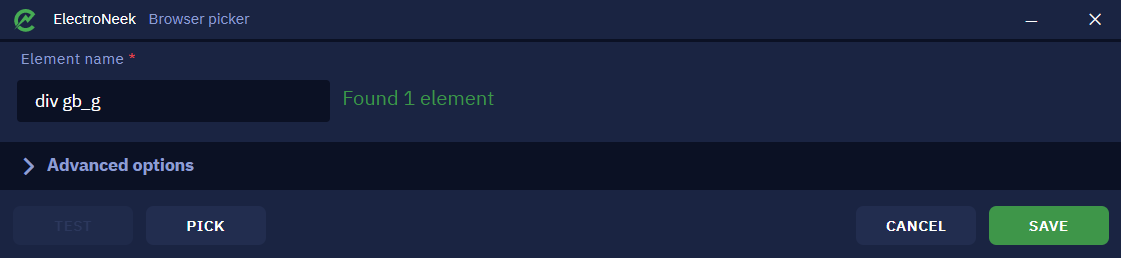
To the right of the item name, its status is displayed, showing whether the item was found or not.


Advanced options
The advanced options represent the structure (selector) of the selected element, which usually consists of tabs, and each tab consists of attributes and their values. This is how the hierarchy of how the interface element was designed is displayed. You can change, select or exclude attributes to achieve greater accuracy and stability in your interaction with the element.
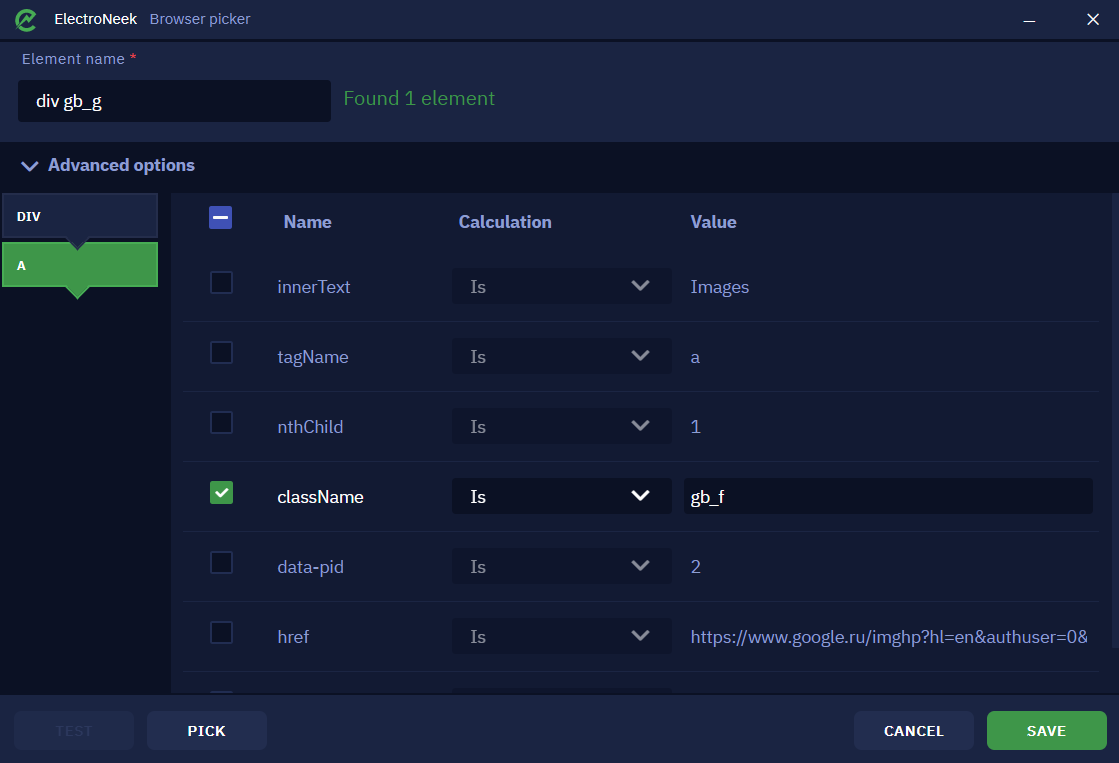
On the left side of this window, there are two tabs - "DIV" and "A" representing the hierarchy of the element's design.
Within each tab, there are three columns titled "Name", "Calculation", and "Value". Let's look through the example:
- Column Name shows
className, determining the class name of the element. In this particular case - gb_f. - Column Calculation shows
Is. This parameter allows you to specify how the attribute value should be defined. In this case, the class name must be exactly the same as the selector defines. We'll look at what each option means below.
- Column Value shows the content of that element.
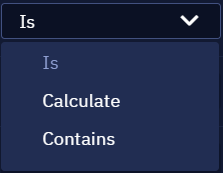
There are several options for defining an attribute value. Let's take a closer look at the Calculation options:
- The "Is" option means that the value of the attribute in the selector must be exactly the same as the value of the selected item. In the example above, the option "Is" means that the class name of the element should exactly match the value gb_f.
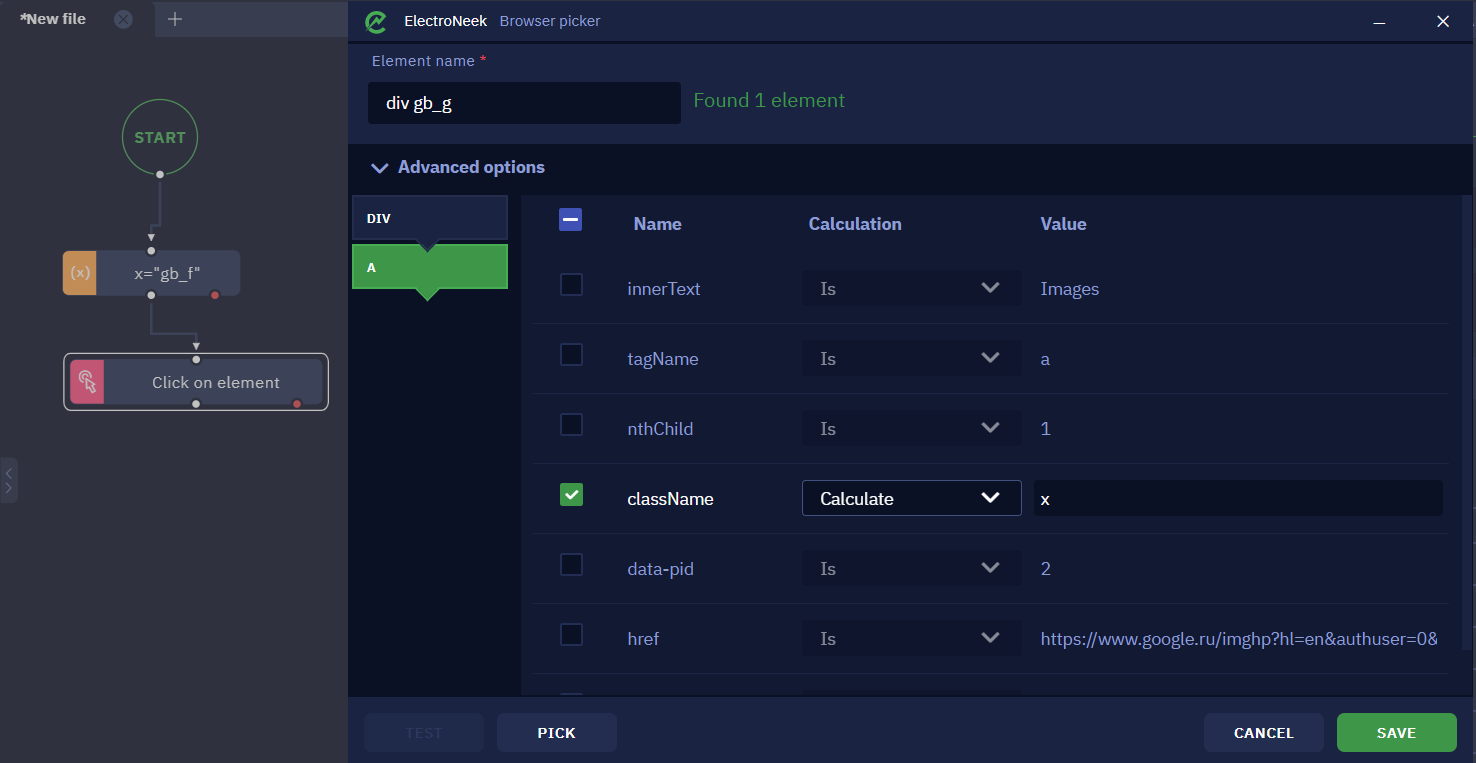
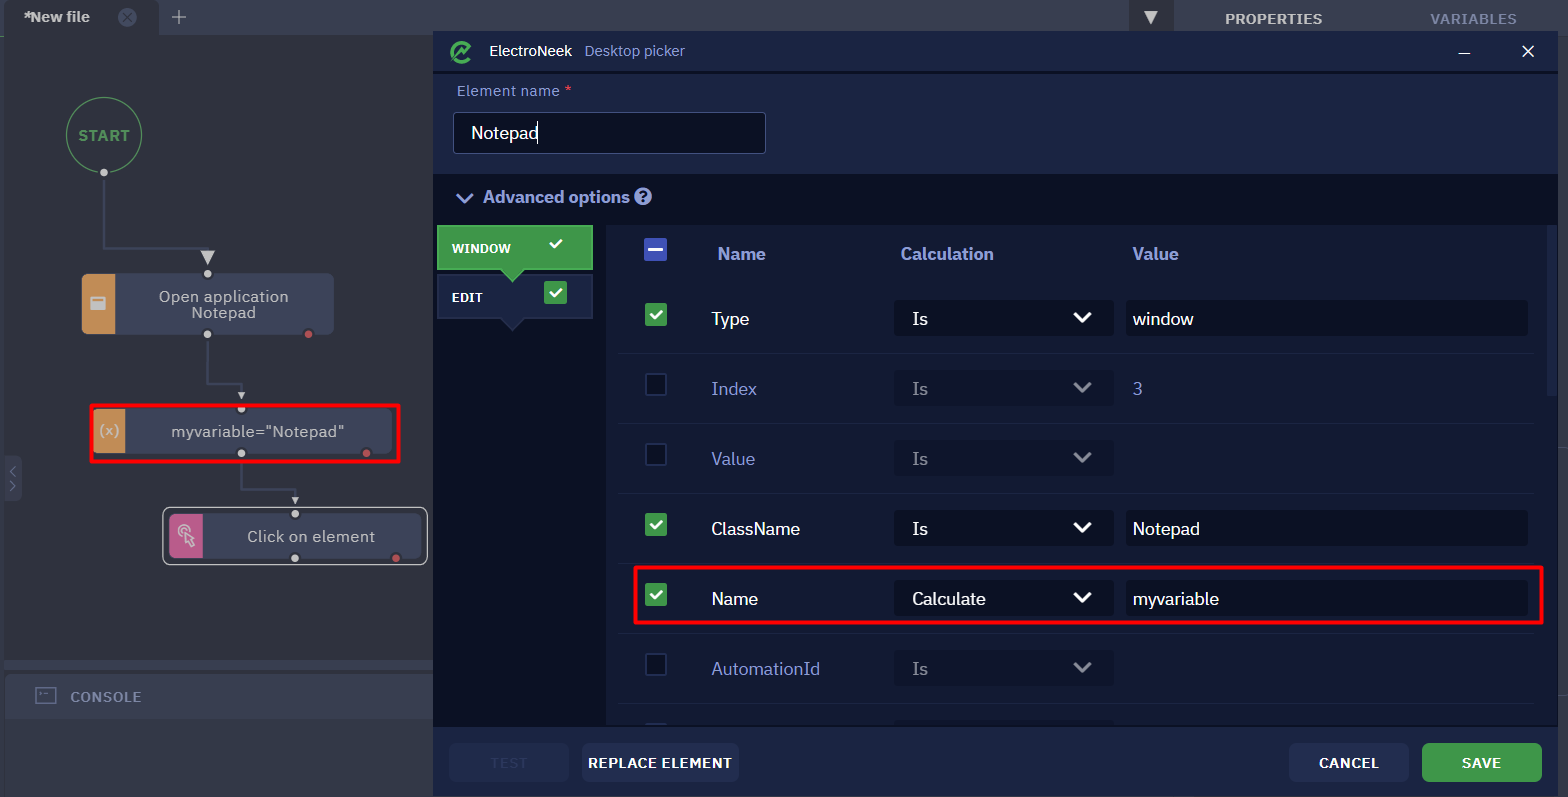
- The Calculate option allows you to substitute the variable used in the workflow as the attribute value. In this way, the attribute value can be determined by performing activities.
- The Contains option allows recognizing if a specified value is found in the defined attribute. For example, if the attribute Сontains - gb_f is specified in the selector, and the value of the className attribute is set to gb_fb, the selector will still be able to identify the element.
The "TEST" button in the selector window allows you to test if an element with the specified selector is detected correctly
Desktop elements
Desktop elements can be selected in the same way showed above.
Advanced options
The advanced options represent the structure (selector) of the picked element, which usually consists of tabs, and each tab consists of attributes and their values. This displays a hierarchy of how the interface element was created by the application developers. You can change, select or exclude attributes to achieve greater accuracy and stability in your interaction with the element.
Take a look at an example of a selector on the Notepad application.
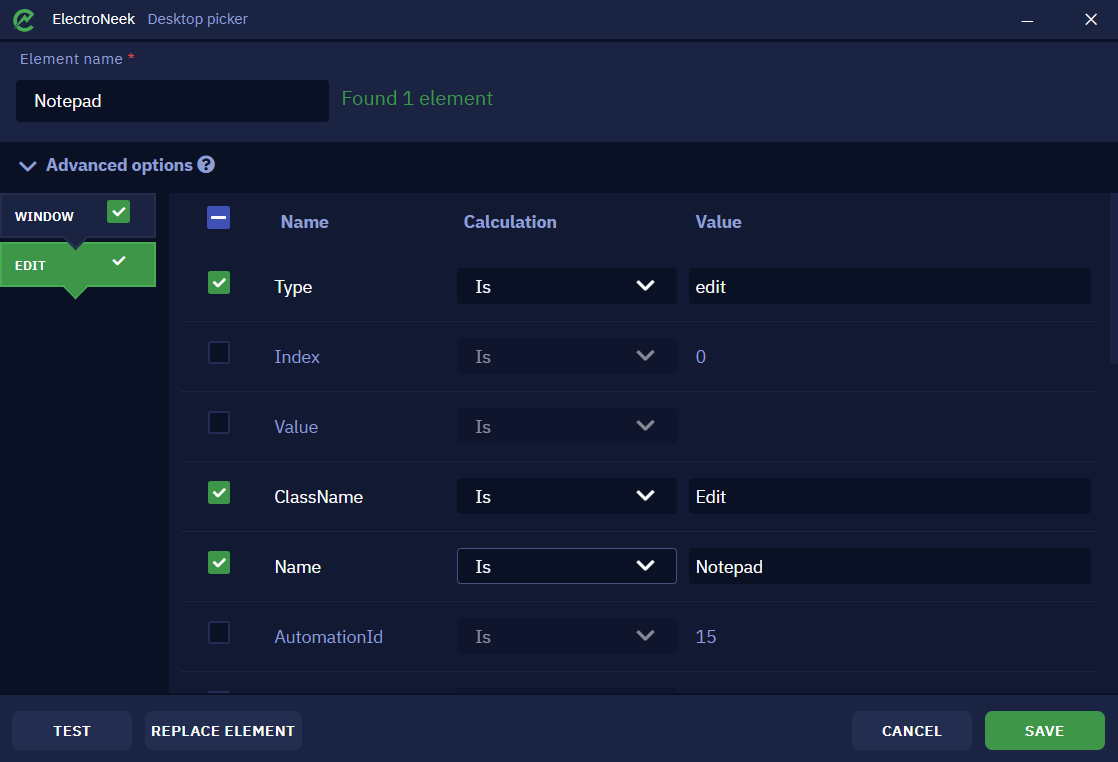
On the left side of this window there are two tabs - "Window", indicating the application window itself, and "Edit", indicating the selected input field in Notepad.
Note the checkboxes to the right of the tab names. These checkboxes allow you to exclude tabs from the selector. In some situations, the number of tabs can be quite large, which can make the selector less stable. At the same time, these tabs are not always necessary for the unambiguous definition of the item (as a rule, we mean "intermediate" tabs - tabs between the first and the last one). In this case, excluding these tabs from the selector may make the selector more stable and at the same time less cumbersome. However, keep in mind that excluding any tabs from the selector in some cases may cause the Desktop Picker to run slower.

Depending on the scenario of working with the selector, the values of some attributes can change dynamically. For example, if you start typing text in Notepad, the title of the window will change - a symbol "*" will appear before the title (which is true - look at the title of the Notepad window itself to see this). The same change will happen to the attribute in the Desktop Picker.
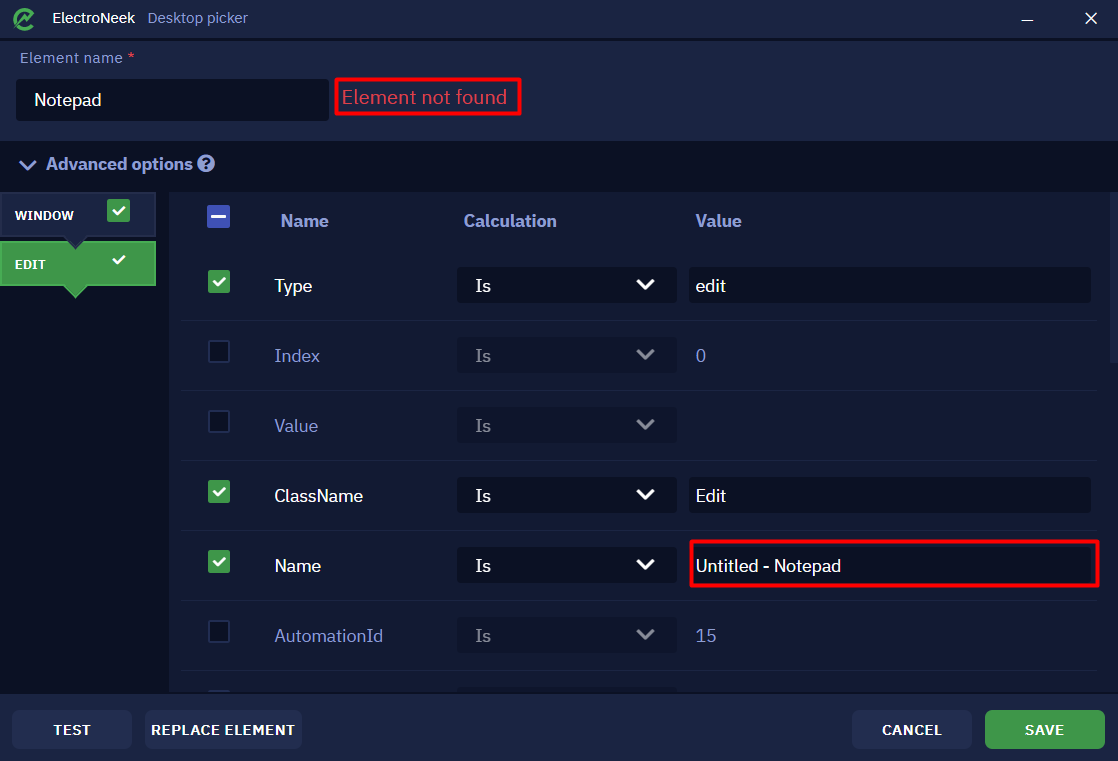
This means that the previous version of the selector (without the "*" in the Name attribute) is not adapted to the case when some text was initially written to notepad, which would lead to a bot error.
To avoid such errors, there are ways to adapt for dynamic attribute changes. These ways are embedded in the "Calculate" column in the table with the selector. Let's take a closer look at them:
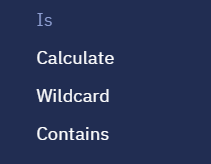
- Is indicates that the value of this attribute must be checked for strict equality when searching for an element. In the Notepad example, this means that the window title must be strictly equal to
New Text Document - Notepad. That is, an element that has a Name attribute equal to, say, Text Document - Notepad will no longer be taken into account by the bot. - Calculate allows you to set a variable defined in workflow as an attribute value. When searching for a selector with a computed attribute, equality is also strict (only the attribute value is no longer defined by fixed text, but by a variable).
- **Wildcard allows you to set a character substitution rule in the value string. This allows you to adapt to dynamic attributes. There are two characters with which you can set the wildcard rule:
- "*" replaces any number of characters. For example, if you set the value _Notepad, the bot will search for all items with the
Nameattribute equal to any character set, followed by a space, a dash, a space and the word Notepad. - "?" replaces only one character. Thus, if you set
?New Text Document - Notepad, the bot will search for all items that contain any character (one) and then exactly the phraseNew Text Document - Notepad.
- "*" replaces any number of characters. For example, if you set the value _Notepad, the bot will search for all items with the
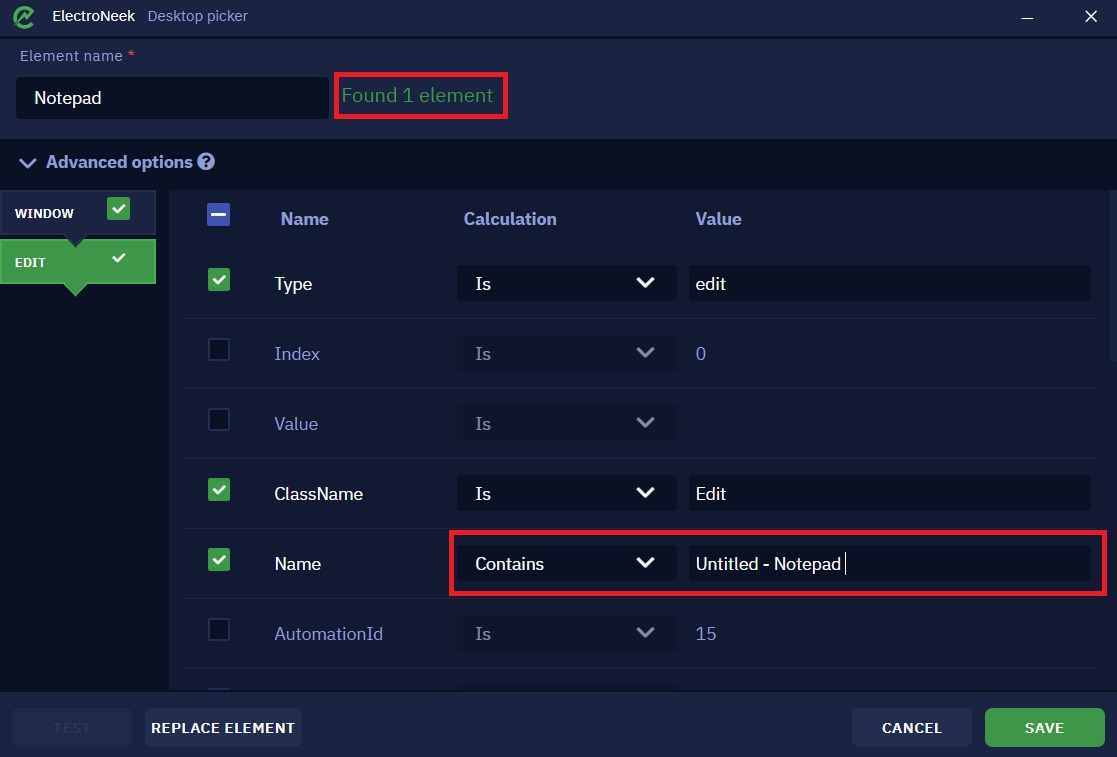
- Contains allows you to specify the part of the text that must be contained in the attribute value. That is, when searching the bot will search for items where the attribute exactly contains the specified text. For example, if the attribute Name is specified in the selector, which "Contains" the value
Untitled - Notepad, and the name of the Notepad window is*Untitled - Notepad, then such a selector will be found.

The "Test" button in the selector window allows you to test if an item is correctly detected with the selected selector.
Replace element
To understand how the replace element function works, let's analyze the basic scenario of its application. Suppose you select an element, run the bot - everything works as it should. After making some changes in the application, the bot, for some reason, stops working correctly (or doesn't start at all). Next, you are likely to try selecting the item again, repeating the same actions and launching the bot. But this may not work either. This situation can occur due to dynamic changes in the parameters of the application which the bot interacts with.
Let's take an example of such situation when working with the standard "Notepad".
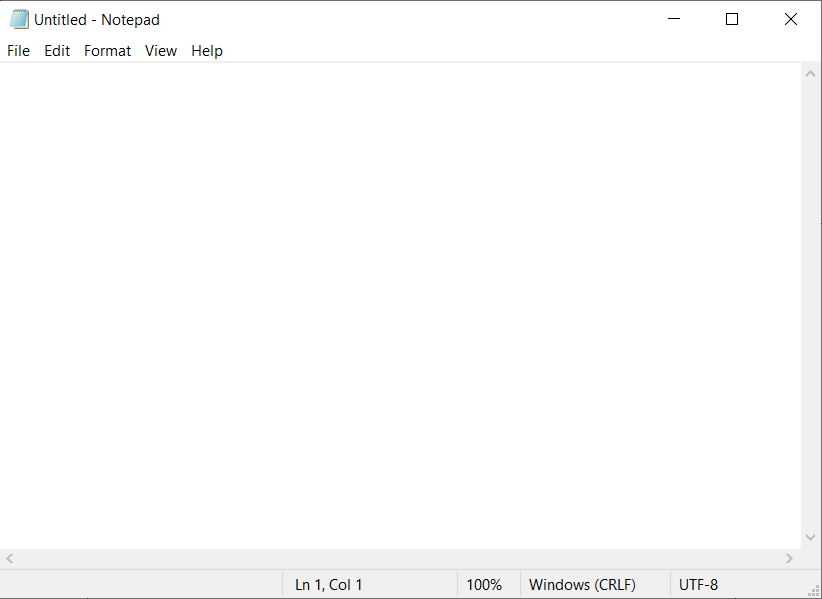
If you have just opened "Notepad" and have not yet entered any text, the name of the text file at the top of the window will be as Untitled - Notepad.
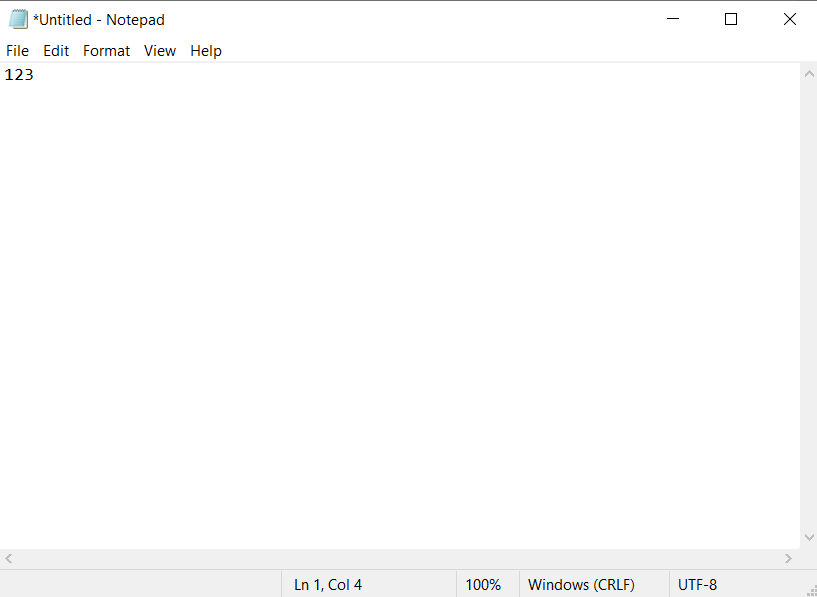
If you start typing any text in the input box, the name at the top will change. Now it will look like *Untitled - Notepad.
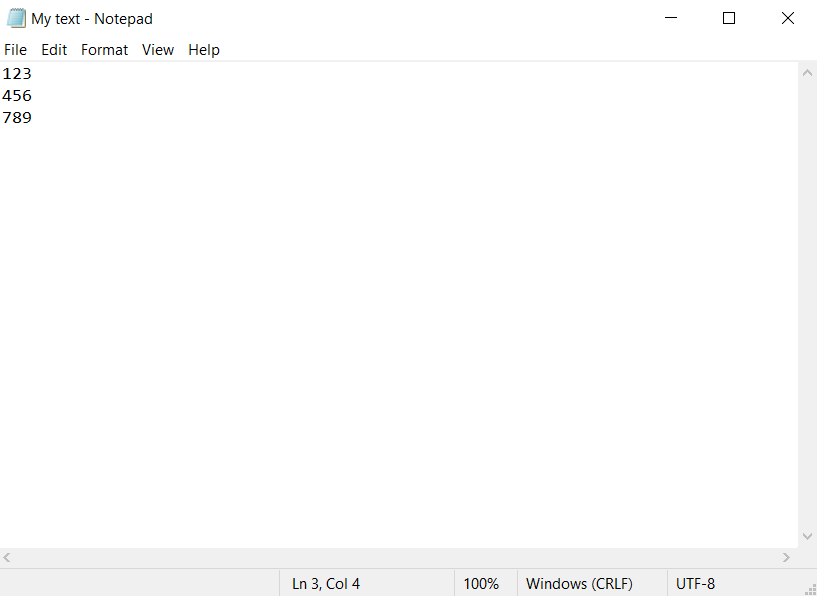
Let's explore another case: you open an already created text file with some content and the name you set when you saved it.
It becomes clear that at different stages of working with the "Notepad", its name and contents will change. These are the dynamic parameter changes we mentioned above. Let us have a closer look at them.
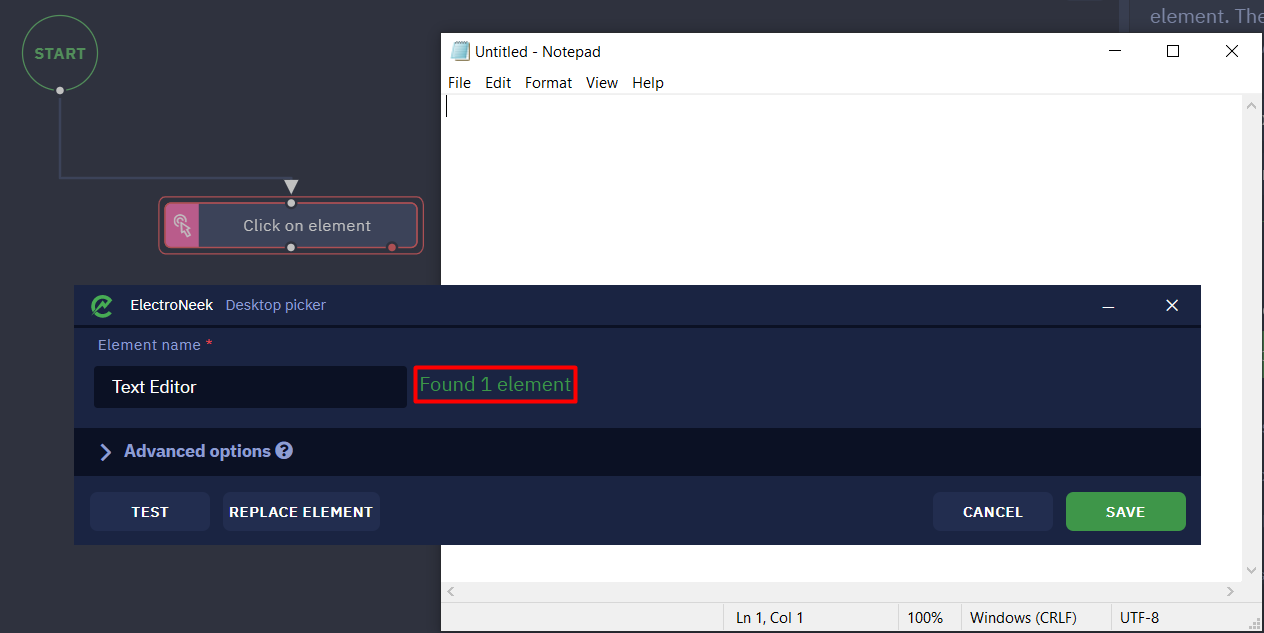
Let's take the Click on element activity as an example. Let's select any "Notepad" element via the Desktop Picker. For example, you can select the input field or the "File" button. The item will be detected without any problems and the bot will be able to interact with it, you will see the message "Found 1 item". Save the current current item with the "SAVE" button. Run the bot, make sure it works.
However, you may encounter a scenario where the bot needs to work with different text files. Let's go back to "Notepad" and enter the number 123 in the input field, then the title of the "Notepad" window will change - until the file is saved, the "_" symbol will appear before the title. Thus, the entire header will have the look of *Untitled - Notepad. Let's try to run the bot: it won't work and we will see an error message in the console.

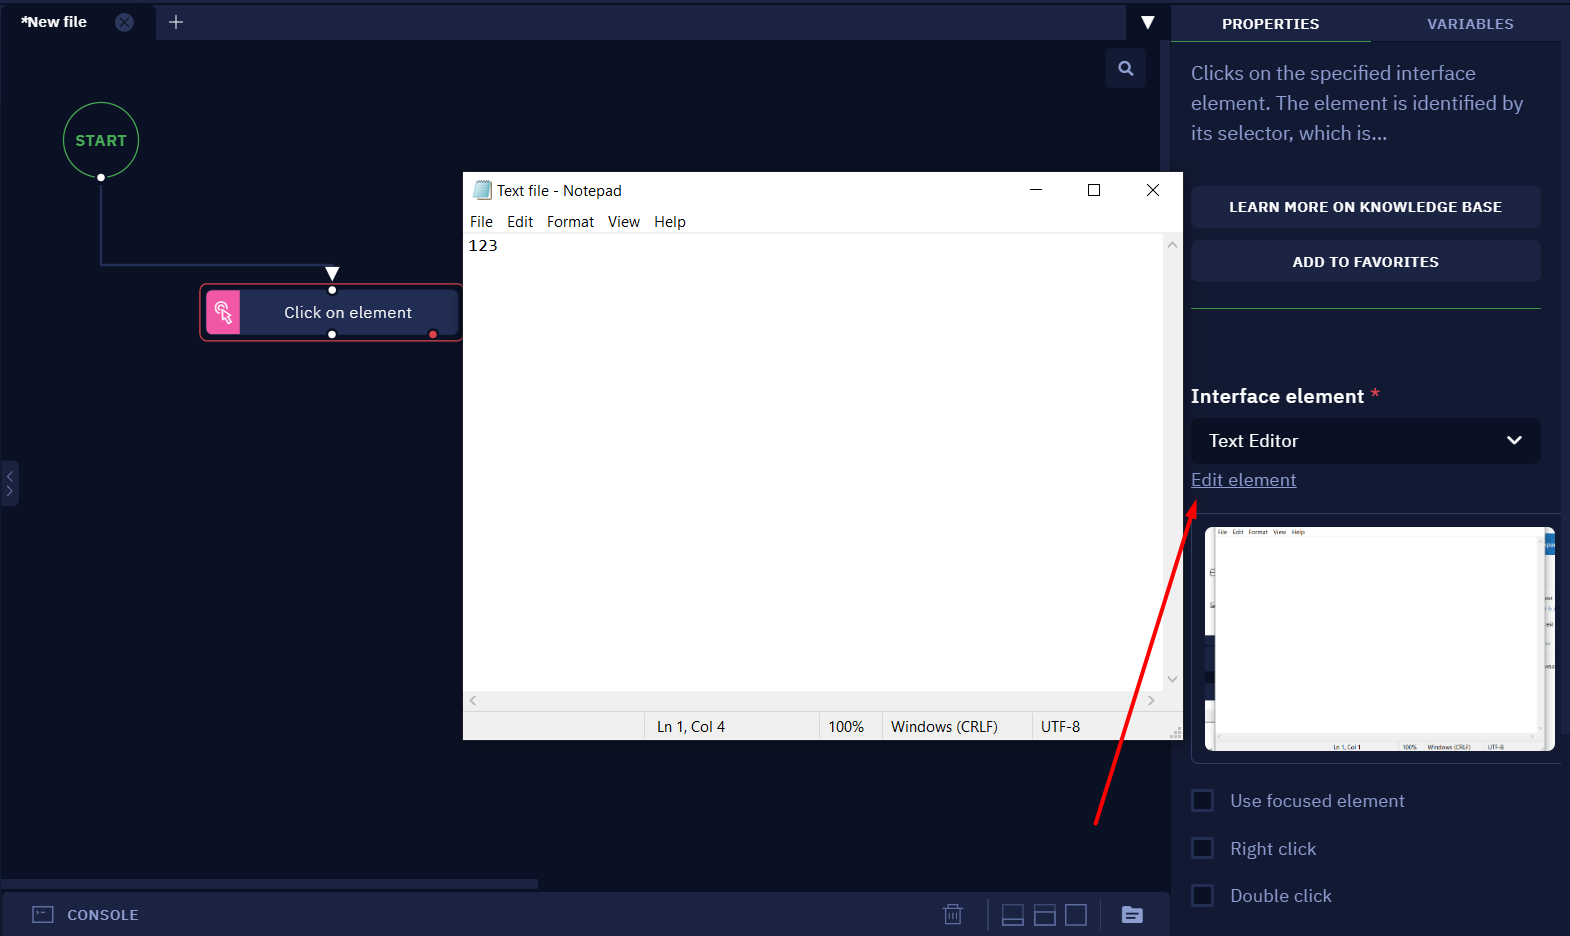
Let's consider another scenario. In the current "Notepad" window, open an existing text file. Note the "Notepad" title - it will look like {{Document name}} - Notepad, which means that the title can be anything. In the screenshots below, the document name will look like a Text file.
Let's try running the bot again. In this case the bot will not work either and we will see an error.
Let's analyze what goes wrong and how to fix it.
- Navigate to the "Edit element" tab in the activity parameters.
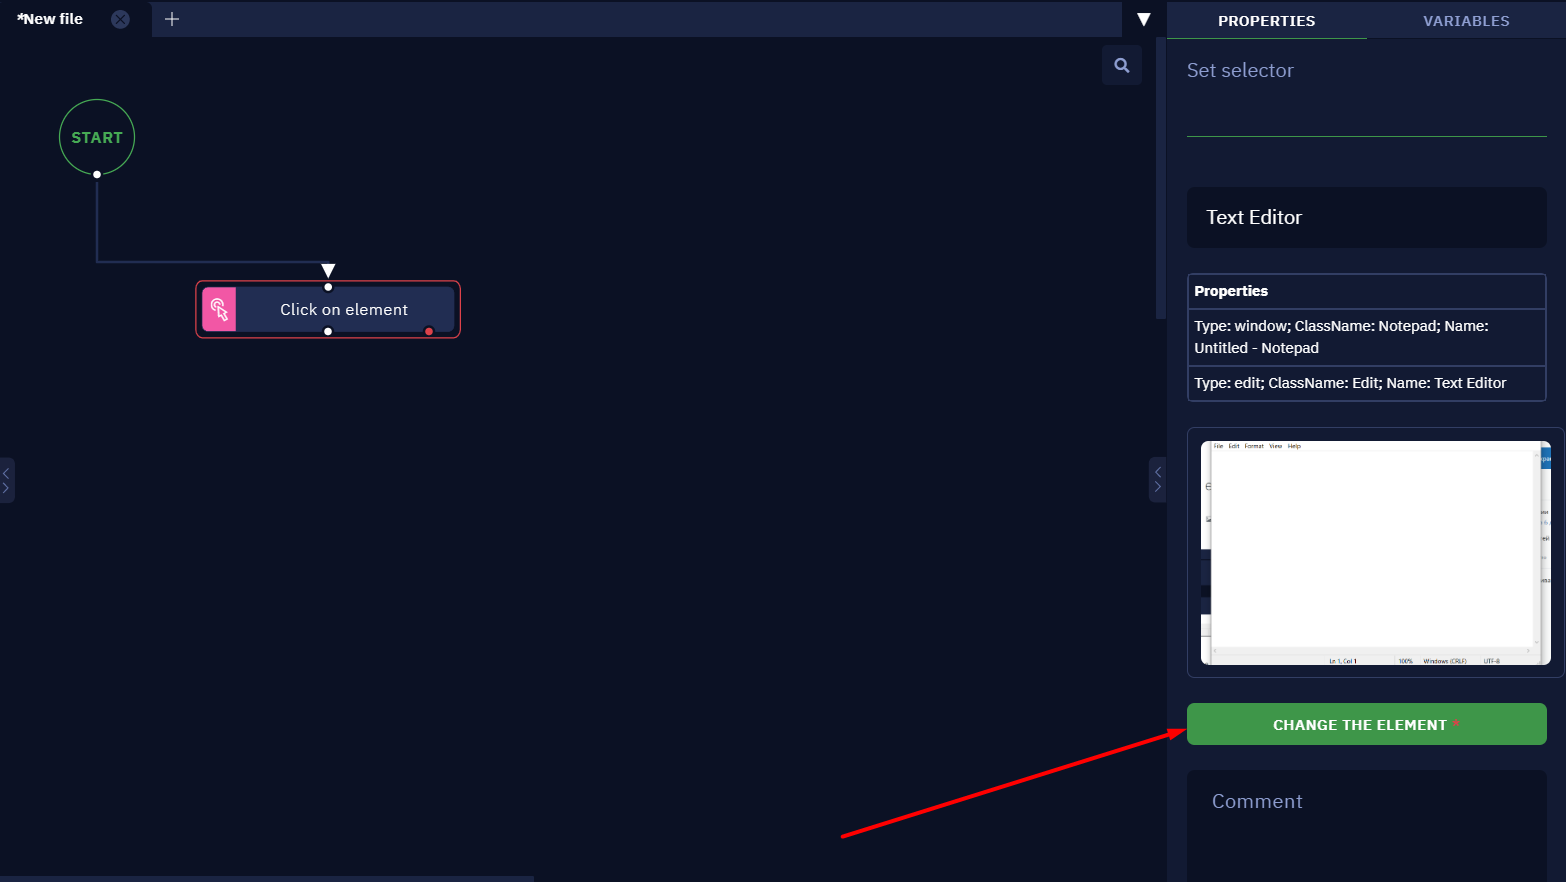
- Press on the "CHANGE THE ELEMENT" button.
- Test it by pressing the "TEST" button. The element will not be found.
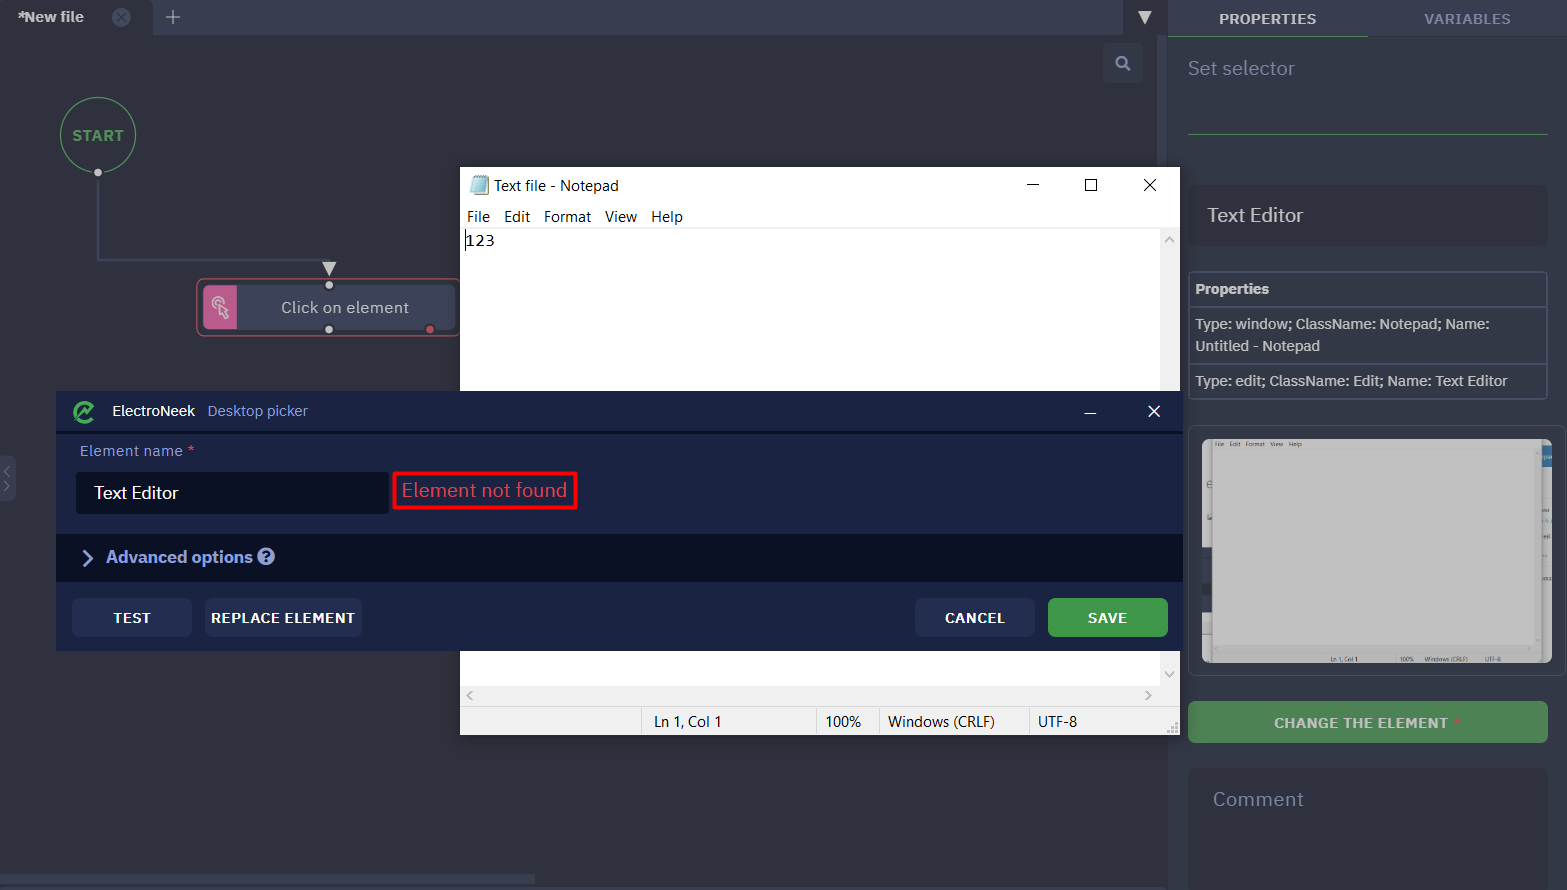
Let's expand the "Advanced щptions" to take a closer look at the parameters of the selected item. Let's go to the "Window" tab, which has a Name attribute showing the title of the "Notepad" window. Since the attribute value is set so that the title must be strictly equal to the Untitled - Notepad value, Desktop Picker cannot detect the file with the changed title.
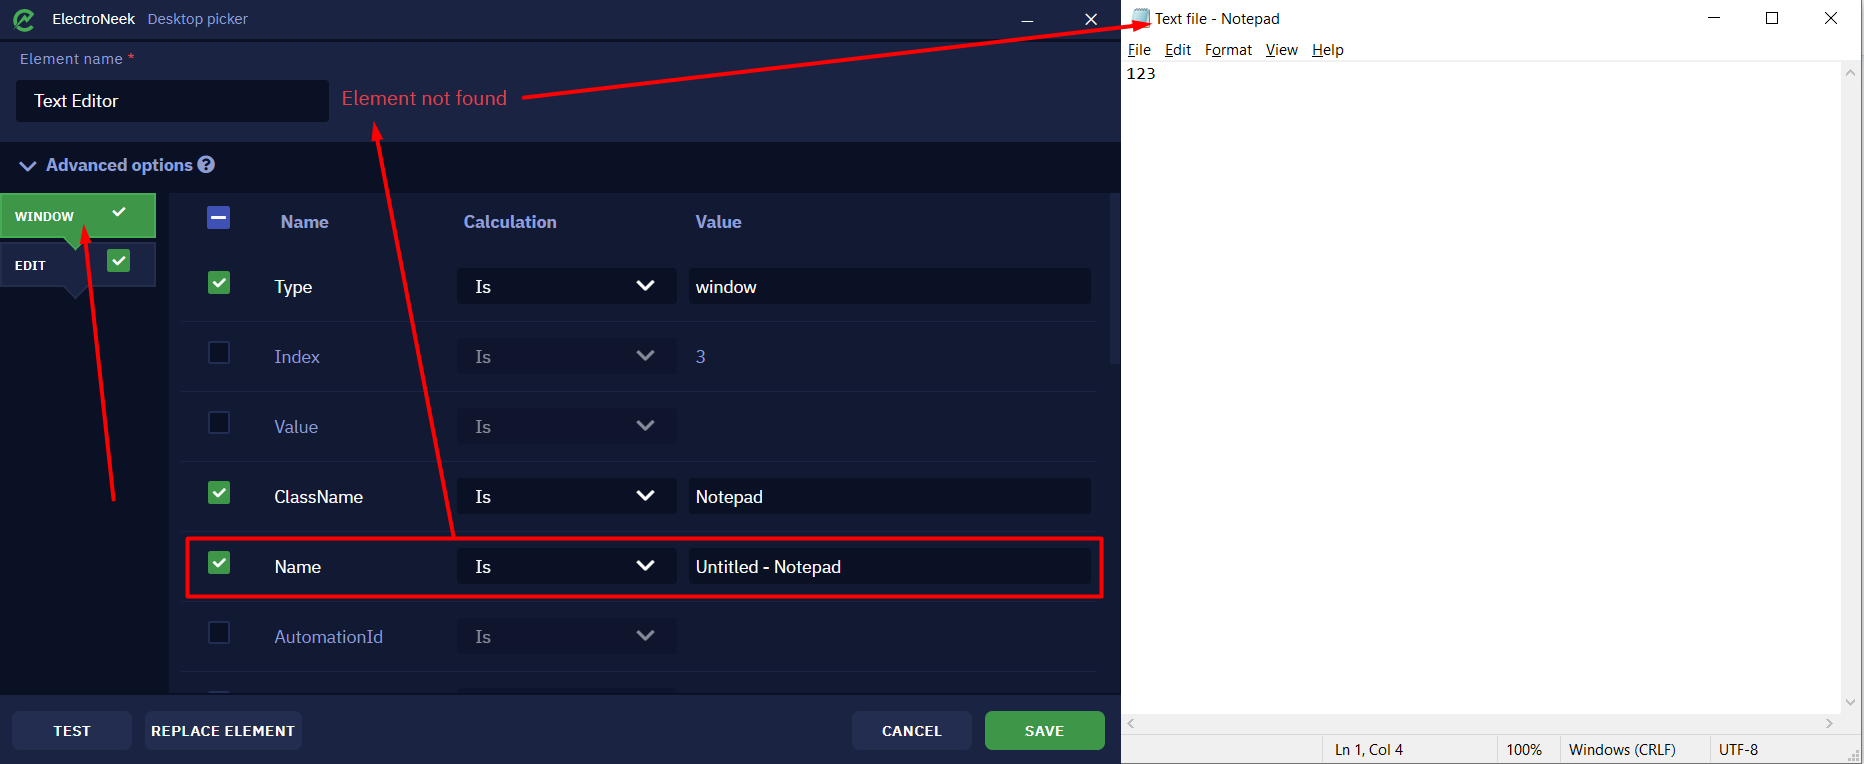
Thus, because of changes in certain parameters (and they can also change during bot execution), the element is not found and the bot cannot work correctly.
Now let's see how we can easily solve this situation. Let's click the "REPLACE ELEMENT" button in the Desktop Picker window, select the item of the last opened "Notepad" again and press CTRL+X. This will open a window like this:
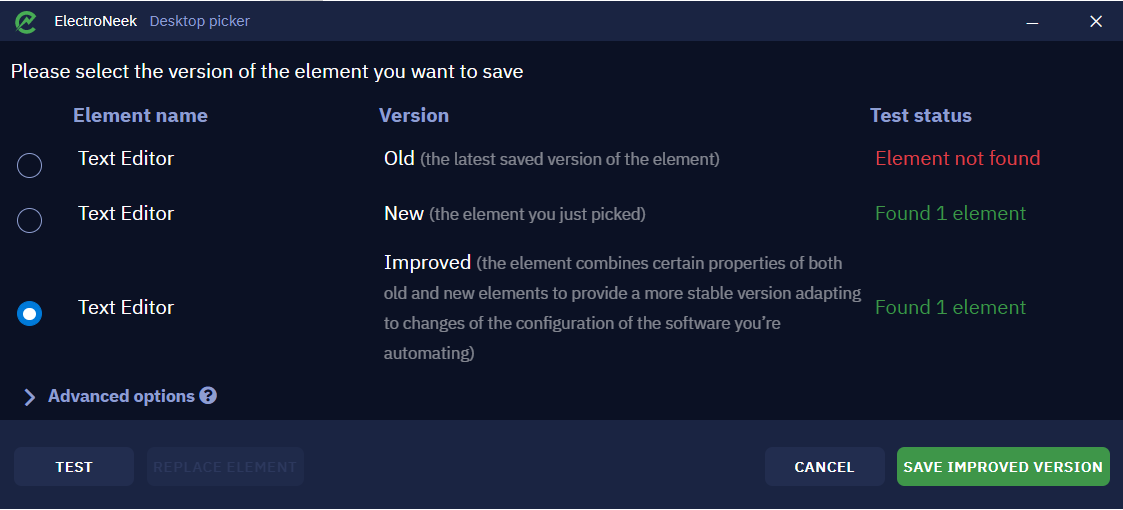
The top of this menu shows the three available versions of the workflow:
- Old version. This is the version of the element that was last before you clicked "REPLACE ELEMENT". In our case, it is the version where the Name attribute is
Untitled - Notepad. - New version. This is the version of the element we just selected. That is, the
Nameattribute is{{Document name}} - Notepad. - Improved version. This version of the element combines the features of the old and new versions to create a selector that can detect the element with any "Notepad" window title.
Select the " Improved" version of the selector and expand the "Advanced options". Here we will see that the changed parameters are highlighted in orange. Now the item will be detected in any case, since the parameters Wildcard→*- Notepad will be selected for the Name attribute, i.e. the platform will search for elements that have in the Name attribute the phrase - Notepad and any number of any characters up to this phrase.
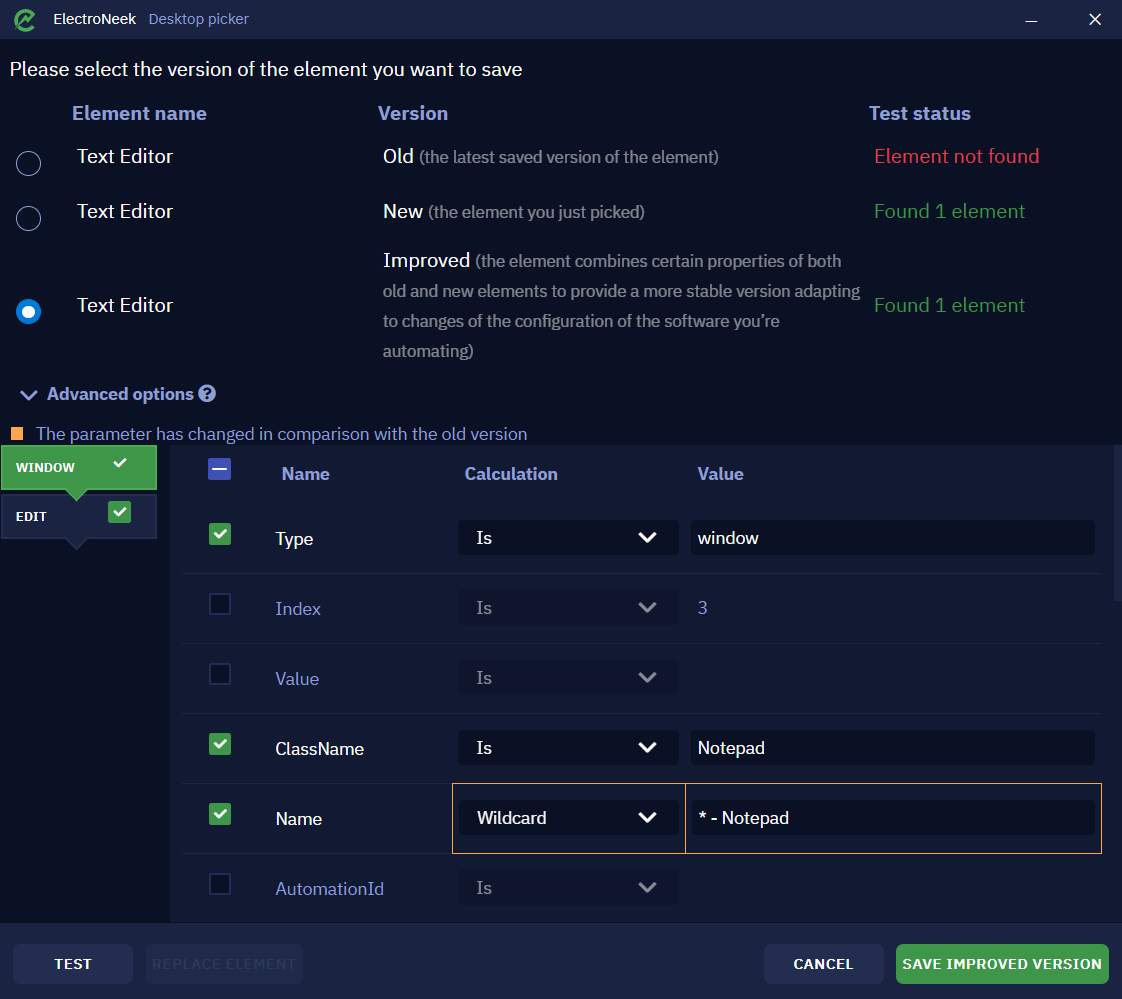
Next, all you have to do is save the element selection in this form. You can also manually adjust the "Name", "Calculation" and "Value" so that the elements you want are defined. We told you more about that earlier in this article.
How to pass and return data from Studio Pro when working with Python
Description
This activity lets you pass data using Studio Pro to execute Python scripts. You can learn more about how to run scripts written in Python in this article.
How to use it?
There are two ways to perform this operation, depending on the amount of data.
First Method: String
You can pass a string to Python as a parameter. To demonstrate this, let us look at the following workflow.
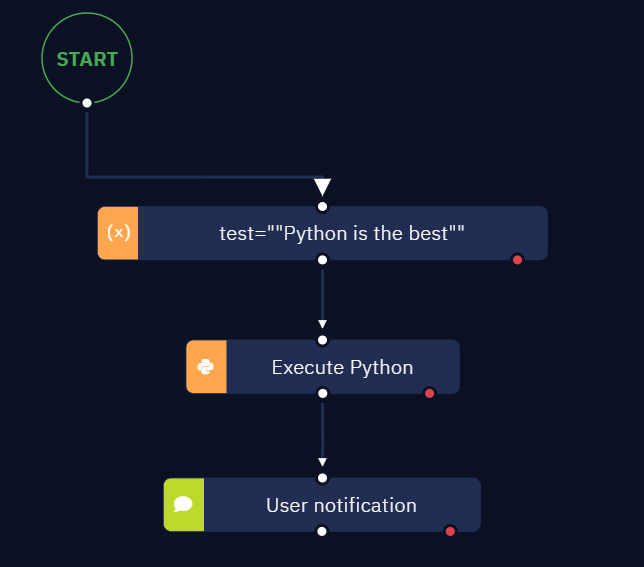
It is important to note that your string must be wrapped in double quotes, otherwise Python will process your string incorrectly. Using the given string, you can create a variable in Studio Pro as shown below.
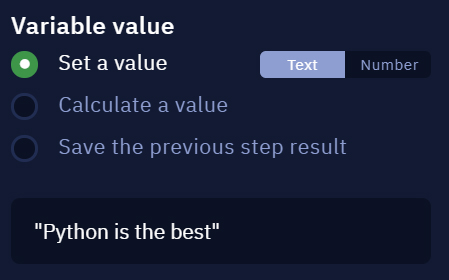
We also need to add a Python script as a test case
import sys
print(sys.argv[1])
It should be noted that
sys libraryshould be imported in your Python script:import sys.- Once it has been imported, any argument can be called:
sys.argv[{{argument number}}].
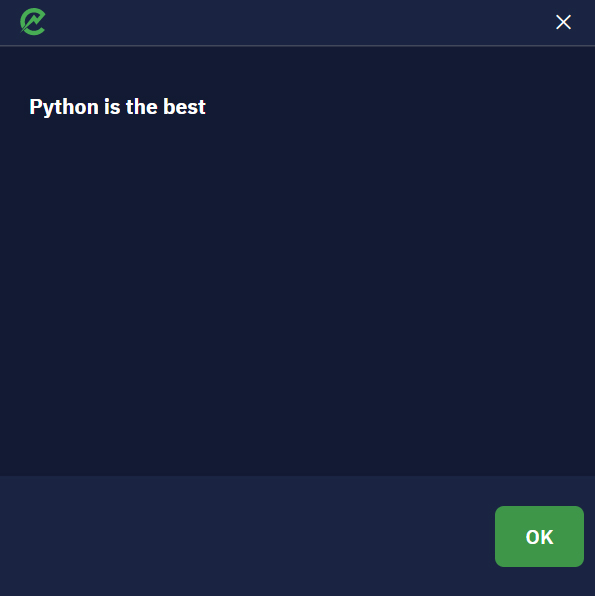
The result of the workflow is:
However, you can get the same result if you add double quotes to a variable in Parameters as follows '"' + {{variable name}} + '"'. For this reason, we no longer need to manually add double quotes to a string. This operation should look like below.

Multiple values can be sent as needed. Make sure to wrap them correctly and use proper indices. As an example, let us consider the expression: '"' + test + '" "test_value"'. In this case, the value of testis the argv[1], and for the test_value is argv[2].
You can also pass two variables as arguments: '"'+test1+'" "'+test2+'"'.
Second Method: A large amount of data
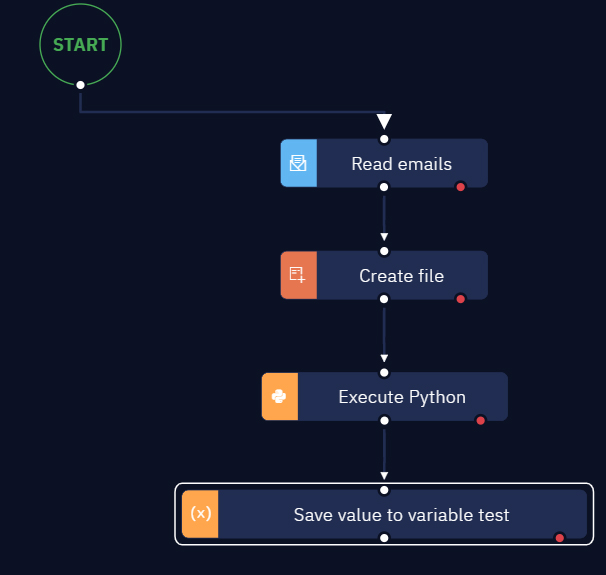
At the moment, there is only one possible way to pass a large amount of data, for example a JSON data file. In this case, you need to extract data using Studio Pro and then use it in Python. Let us look at the following example to understand how to deal with such a problem.
- Read emails and save the value to a variable (in the JSON format).
- Create a file in the JSON format using the result of the previous step.
- Prepare a Python script and use it with Execute Python activity as follows.
- Use Assign value to variable activity to save data returned from Python and use it further.
In the given case, we have created the following workflow.
We also need the Python script to import JSON data.
#Import json library
import json

# Import file and encode/decode JSON
with open('C:\\Users\\ElectroNeek\\Desktop\\test_case\\test.json') as file:
data = json.load(file)

#returns data back to Studio Pro for further usage
print(data[0]['from'][0]['address'])
The result of this test workflow is simply an email address.
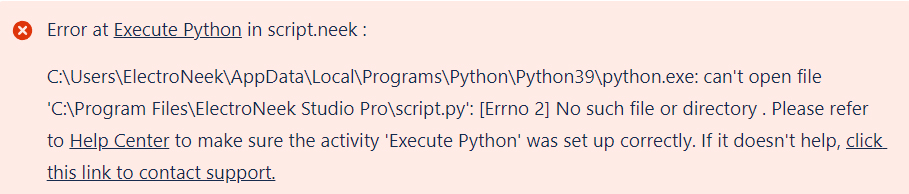
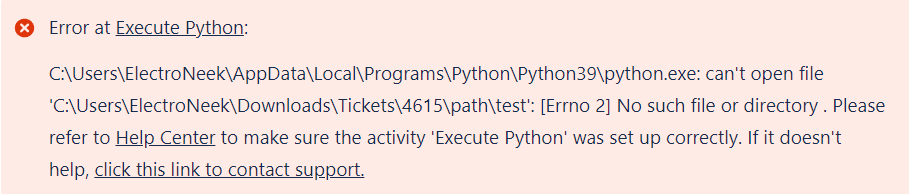
Troubleshooting: Common error messages
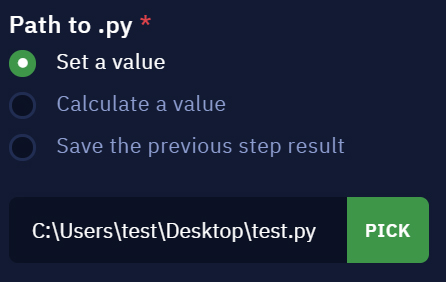
- The first error message is thrown if a wrong path was used for a Python script.
In order to fix this problem, you need to check that an absolute path is being used, for example:
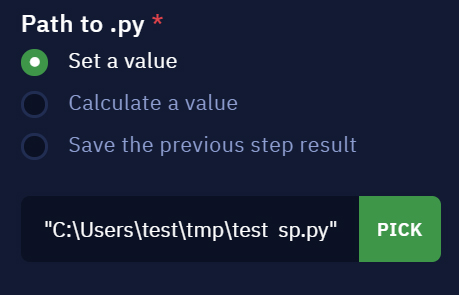
- The second error message may appear if the file name or one of the folders in the path contains a space in the name.
In order to solve this problem, you need to wrap the whole path in double quotes, for example:
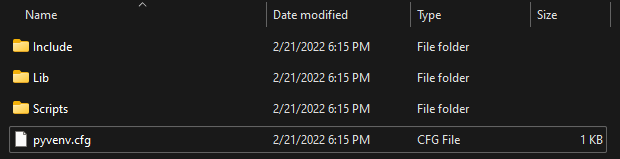
- Тhe third possible error can be displayed as follows:

In this case you should check the "Path to venv folder" parameter, because the error means that the path to the venv folder is not specified correctly: the folder does not exist or it does not contain Python libraries. Note an example of the contents of the venv folder:
How to configure proxy in Studio Pro
Description
Some companies use proxy connections on their internal networks. Most often, this is for privacy and security reasons or to access secure content.
The ElectroNeek platform requires a network connection during startup. A proxy server is essentially an "intermediary" between a particular computer and network access, so a proxy server must be specified in the Studio Pro and Bot Runner settings in order for the platform to connect to the network.
Possible errors
- Error connecting to EletroNeek services when starting Studio Pro.
- Error «Client network socket disconnected before secure TLS connection was established» when starting the Bot Runner.
Configuring proxy
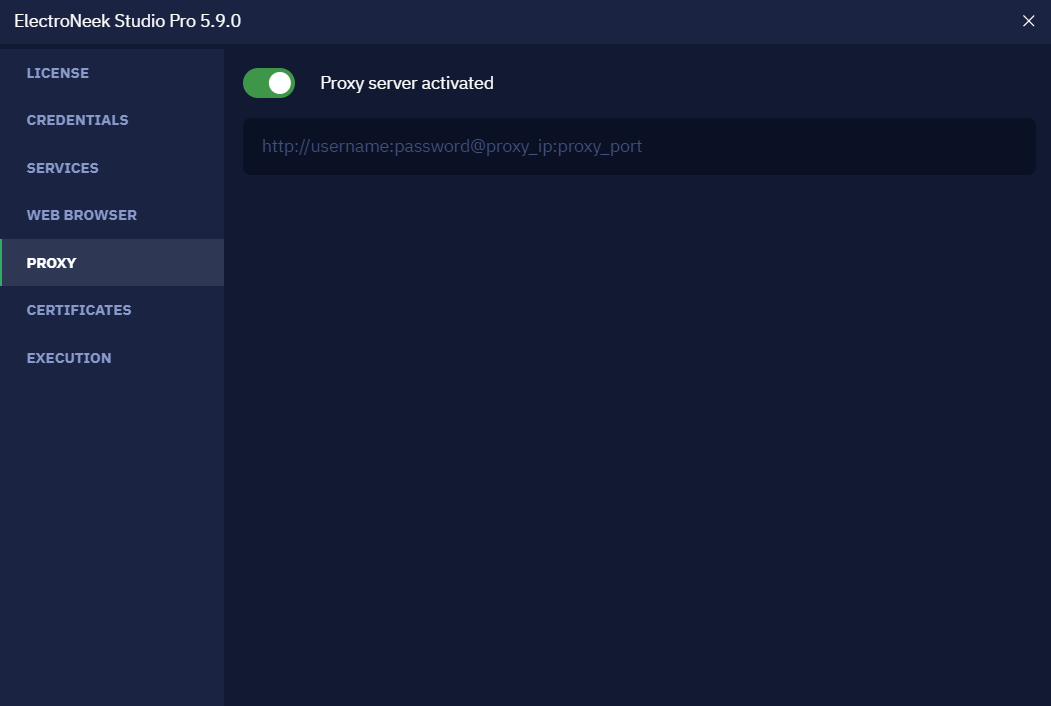
If your network uses a connection through a proxy server with authentication, make sure that the basic authentication method is used (or can be configured). If so, you only have to specify the address of the proxy server in the form http://username:password@proxy_ip:proxy_port
To specify the address of a proxy server:
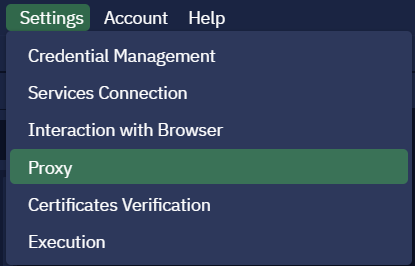
Studio Pro - "Settings" → "Proxy" (or at startup if there is an error connecting to ElectroNeek services).
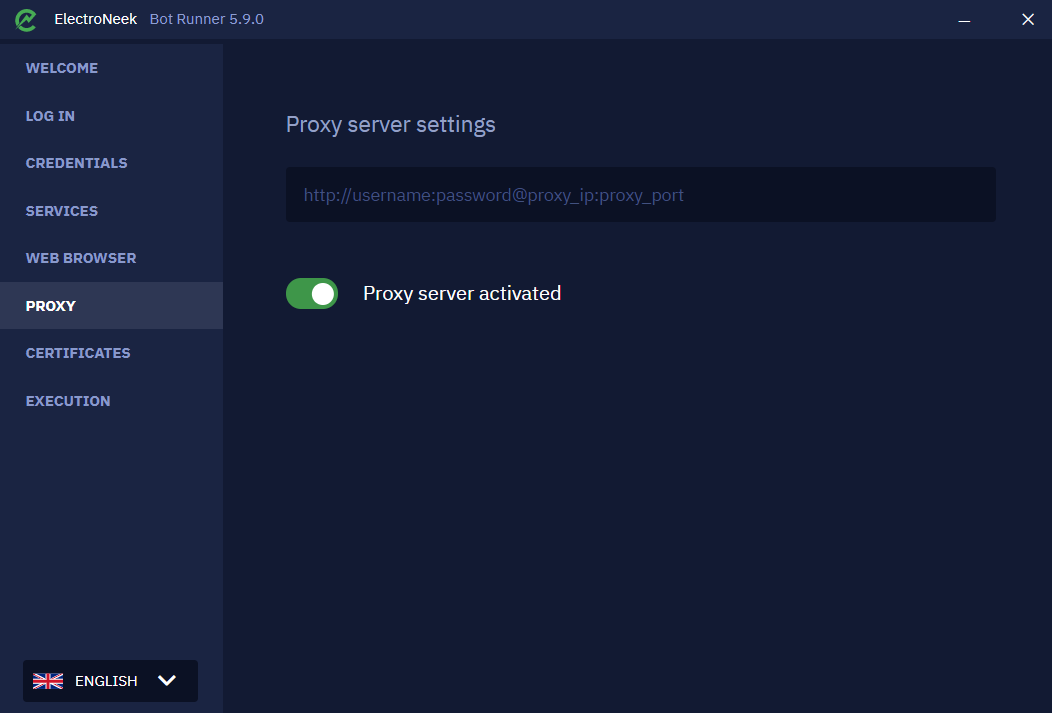
Bot Runner - “Proxy” tab.
How to exclude Studio Pro from antivirus checks
In some cases, due to various settings, antiviruses do not trust third-party applications and block them. If the ElectoNeek platform does not start, one of the possible reasons could be that it is blocked by an antivirus. In this case, we recommend you to contact your system administrator to add certain files to the antivirus exception list. Below you will find a list of files for "Studio Pro".
Studio Pro:
Versions before 5.10.2
- C:\Program Files\ElectroNeek\Studio Pro\Loader\ElectroNeek-loader.exe
- C:\Program Files\ElectroNeek\Studio Pro.exe
C:\Program Files\ElectroNeek\Robot.exe
C:\Program Files\ElectroNeek\Studio Pro\Robot\win-agent-selectors\ElectroNeek-Robot.exe
Versions from 6.0.25
- C:\Program Files\ElectroNeek Studio Pro\Loader\ElectroNeek-loader.exe
- C:\Program Files\ElectroNeek Studio Pro\Robot\ElectroNeek Bot Runner.exe
- C:\Program Files\ElectroNeek Studio Pro\Robot\win-agent-selectors\ElectroNeek-Robot.exe
- C:\Program Files\ElectroNeek Studio Pro\ElectroNeek Studio Pro.exe
SSO authentication
Description
The logging process now uses one single webpage to which you will be automatically redirected during the authorization. Moreover, you now can use your Google account (if you have one) for the logging process or choose the standard login with a password.
NoteUsing SSO (such as Google SSO, etc.) is often more secure than the standard login with a password.
How to use it?
After you launch any Electroneek product you will be asked to authenticate as shown below:

After you click on the "Authenticate" button, you will be automatically redirected to the dedicated login web page as follows:

Building and running your first bot
In this article, we are going to build the first bot that produces some actual results. This example will help you try Studio Pro in action.
Our goal here is to create a bot that shows a simple notification with ‘Hello, World!’ text. In this example, we are going to use the User notification activity located in Human in the loop section.
Now let us start diving into RPA development!
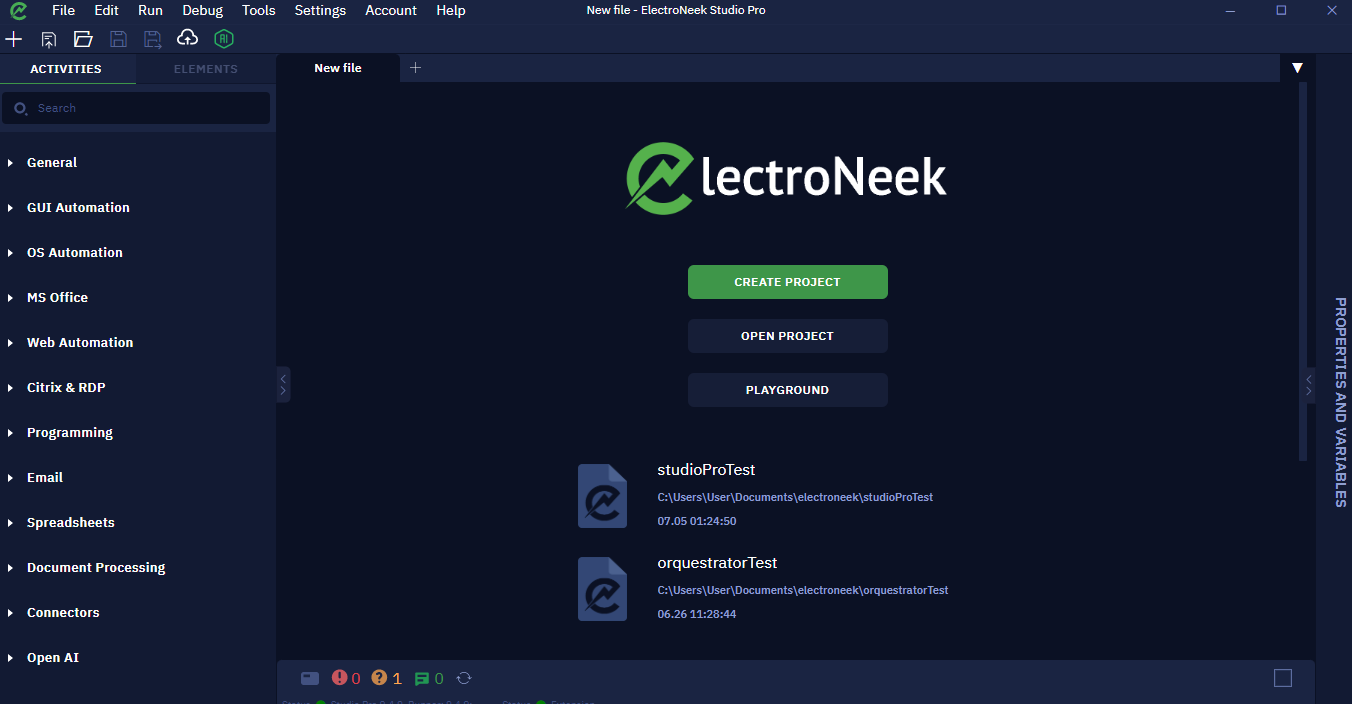
- Launch Studio Pro. You will see this window.
- Click on "Create project" to create your first bot. For more information, please refer to this article.
- Complete the following information:
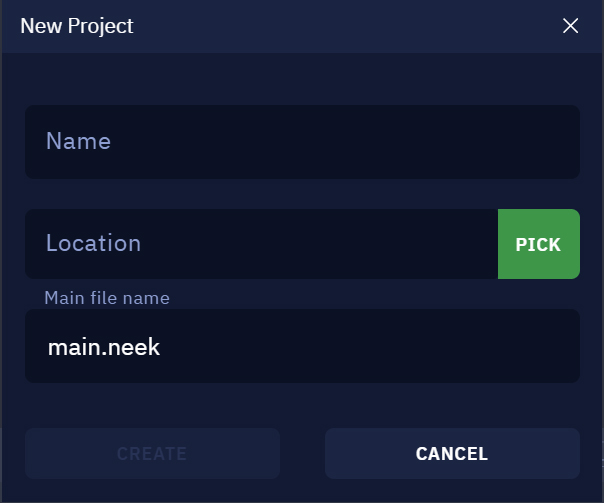
- Name: the name of your project, you can choose any name.
- Location: the location of the new project on your computer.
- Main file name: the name of your main file in the .neek format.
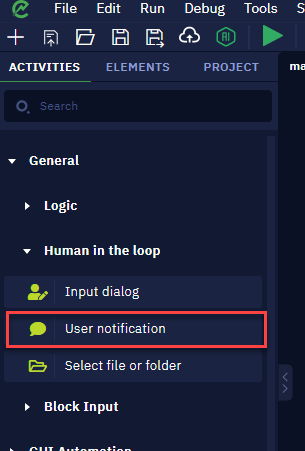
- In the left tab, you can see a list of all the available activities. Go to General > Human in the loop > User notification.
- Drag and drop this activity onto the canvas or double click it. It should automatically connect to the START block. It should look like this:
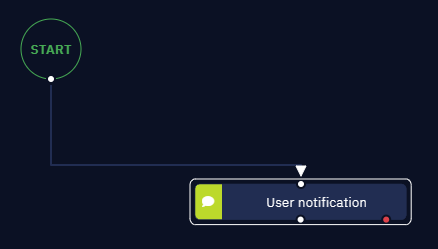
If the activity did not connect to it automatically, place your cursor at the small white circle on the START block. Your cursor will turn into a cross icon. Hold your left mouse button and drag the appeared button onto the activity block.
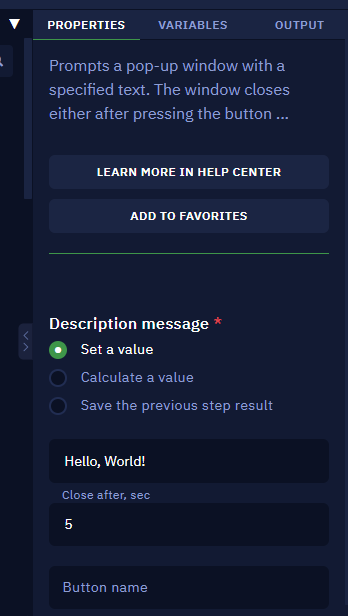
- Doble click the User notification block. You will see the Properties tab in the right. Type
Hello, world!text in the Description message field. This is the message that will be displayed in the notification. Also, let us set Close after, sec to 5. This means that the notification will be shown for five seconds. Other parameters can be left untouched in this case.
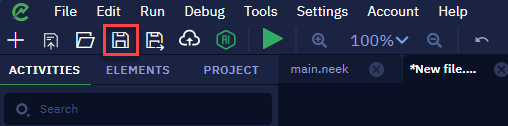
- Press "Save" in the toolbar.
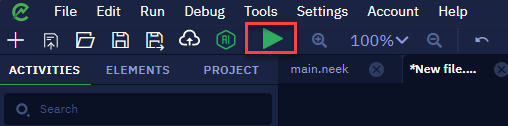
- Your bot is ready now! Launch it by clicking the Play button in the toolbar or by pressing the F5 key.
- Studio Pro will be minimized and in a few seconds you should see the following result:
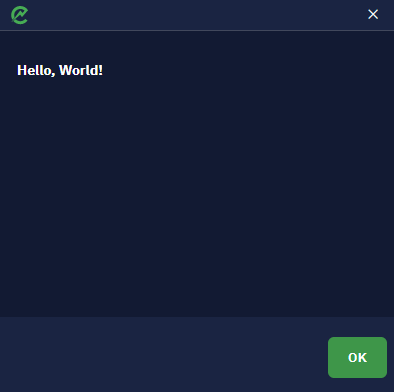
This is it, you have just created your first bot! This simple example only shows the most basic capabilities of the platform. Be sure to check other articles in our "Studio Pro Activities" section to find detailed explanations of what can be achieved with them!
How to work with credentials
Introduction
Credentials that bots need to interact with (logins and passwords) are stored in the Windows Credential Manager. The data is synchronized so if you add a credential to Studio Pro or Bot Runner then it will be also displayed in the Windows Credential Manager and vice versa.
Managing credentials
Method 1: "Credentials" tab in Studio Pro or Bot Runner
Both Studio Pro and Bot Runner support adding a credential that will be used in a bot.
- To manage credentials, open the "Credentials" tab in Studio Pro or Bot Runner:
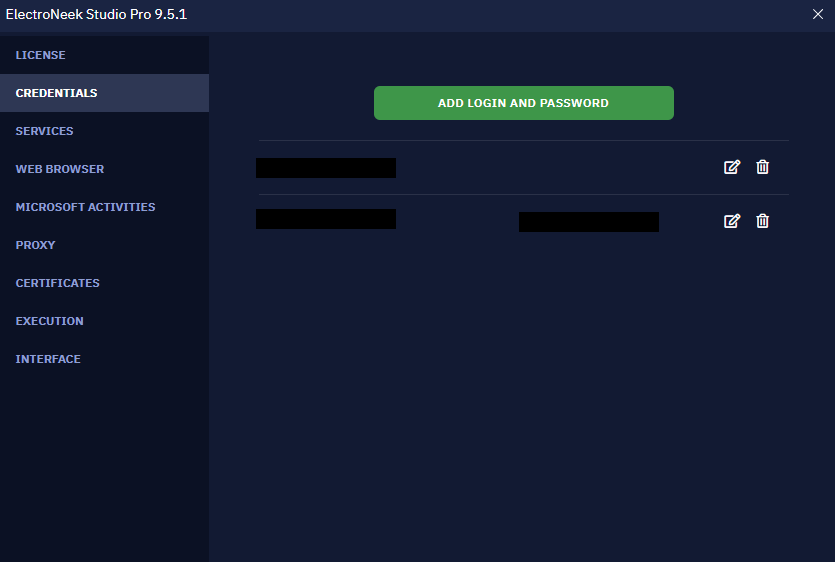
- In Studio Pro, press "Settings" - "Credential Management".
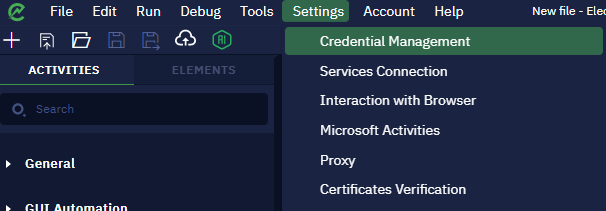
ii. In Bot Runner, open the program interface and switch to the "Credentials" tab.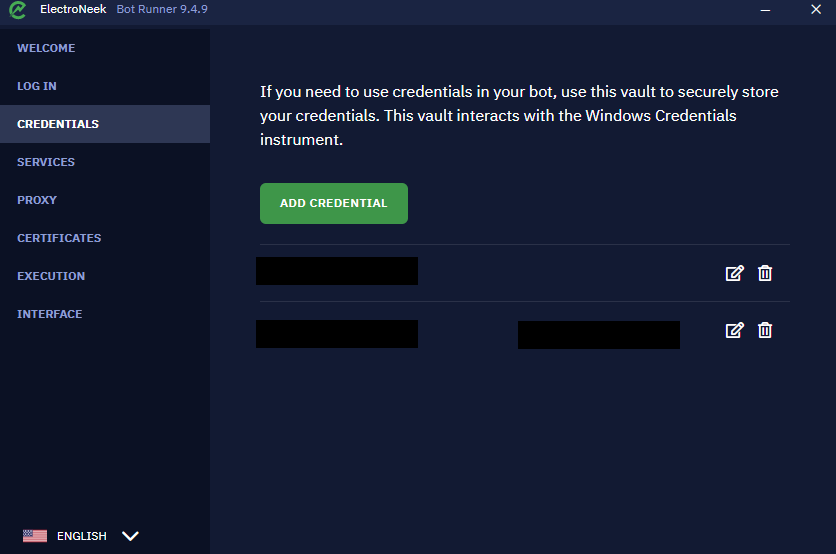
- On the tab, press "Add login and password". A form will appear like on the screenshot below:
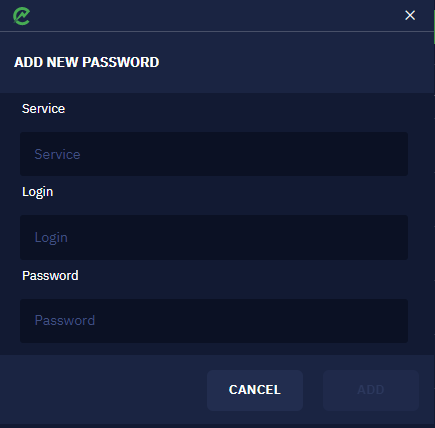
- In the form, fill the following parameters:
- Service - a name of the credential. Specify a suitable name so that you could easily identify it when working on the bot.
- Login - specify the user name.
- Password - specify the password.
- Press "Add". If a credential with the identical "Service-Login" pair already exists, you will receive a message with a question about whether the existing data needs to be overwritten.
If no duplicates exist, then the form will be closed once the "Add" button is pressed, and the corresponding credential will be displayed in the list of credentials.
Method 2: Windows Credential Manager
This method is a bit more complicated because of the number of actions required but it still should be taken into consideration. It involves interaction with the Windows Credential Manager:
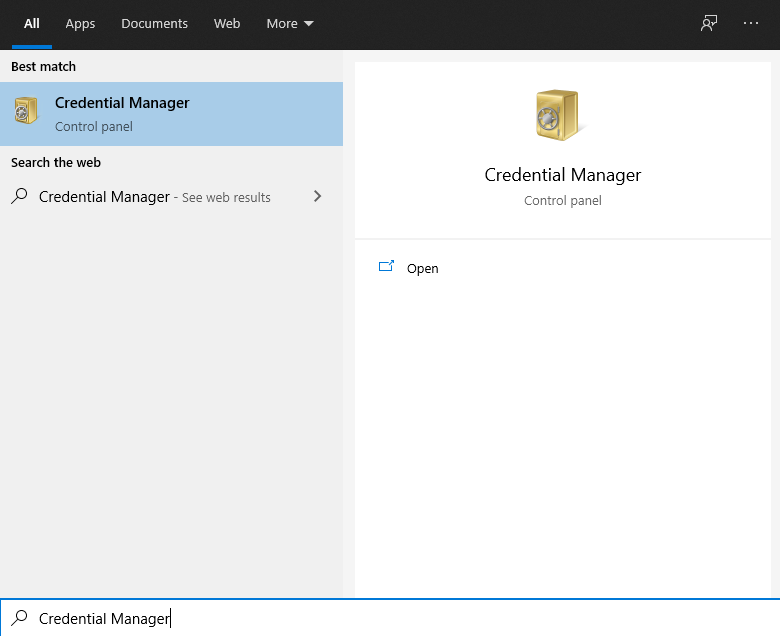
- Click on the search button in the taskbar and enter "Credential Manager". This is the fastest way to open the credential manager.
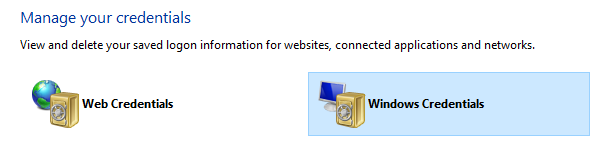
- Switch to the "Windows Credentials" tab.
- Press "Add a generic credential". You'll see the following form:
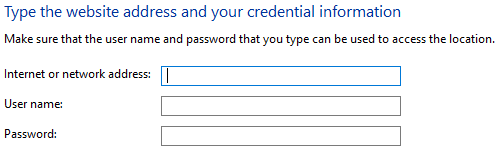
- In the form, fill the field in the following way:
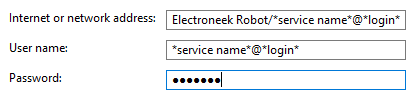
- Internet or network access: Electroneek Robot/service name@login
- User name: service name@login
- An example is provided on the screenshot below:
- Press "OK" and restart Studio Pro or Bot Runner. If you then navigate to the "Credentials" tab, you will see the added credential there.
NoteWhen transferring the algorithm to run on another machine, you must add an account with the same value to the "Service" field. The algorithm will not work on another machine if there is no such account.
Using credentials
Usually, credentials are used in two ways:
- Working with activities requiring authorization, such as Read emails from the "Email" section.
- Accessing third-party systems through the desktop or web interfaces.
In the first case, you just need to select the desired credential in the corresponding parameter of the activity. See the description of the activity if you want to know more details about it.
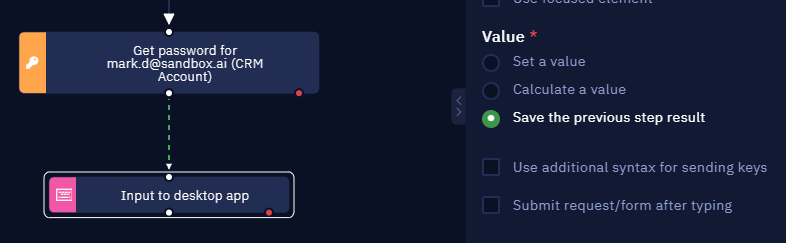
In the second case, you need to make use of activities from the "Credentials" section in Studio Pro. For example, you may want to use the Get password activity. This activity returns the password depending on which service name was selected but it doesn't save it to a variable automatically for security purposes.
Nevertheless, this password can be passed from this activity to the next one, for example, Input to the desktop app, in the "Value" parameter of which you need to specify the "Save the previous step result option".
In this case, the password won't be displayed anywhere, yet it will be typed into the specified UI element securely. An example of a similar portion of code is provided below:
How to use Google App Passwords
Introduction
To help keep users' accounts secure, starting May 30, 2022, Google no longer supports the use of third-party apps or devices which ask you to sign in to your Google Account using only your username and password. Since this is how Studio Pro connects to Gmail, you need to use the App Password to maintain access to the email service.
How to create an App Password
The process of creating an App Password is described in detail in the "Create & use App Passwords" section of this Google tutorial.
How to use an App Password in Studio Pro
For the Read emails activity to work with the Gmail, you must set the App Password in the "Credential Management" menu. To do this:
- In the top toolbar, go to Settings → Credential Management.
- Create a new "Login - Password" pair or edit an existing one.
- Fill in the fields as follows:
- Service - you can fill it in any way you want, it will not affect the operation of the credentials.
- Login - enter the email address of your Google account.
- Password - enter the App Password generated in your Google account.
When working with the Read emails activity, use the "Login - Password" pair, where "Password" is the App Password.
How to Interact with the Web Scraper Tool
Prehistory
A popular use case in RPA is a process in which you need to extract a bunch of structured data from a website. For example, we may want to extract the result of a search request in Google, items data in an online shop (from multiple pages), or anything else - there are a lot of examples. These processes have the following things in common:
- We work with structured data. It means we know what we want to extract, for example, prices, links, and ratings. We also know where these fields are located.
- We want to do it on a regular basis.
A question is how to build solutions for such cases.
- We need to learn how to extract data. For that, activities such as Get element property or Get element value. Besides, if you want to extract, say, four positions (title, link, price, rating), then we'll have to use this activity four times specifying different UI elements.
As we want to extract these positions for all elements of the same type on the page, we will need to run a loop iterating through each element on the page. There is also an alternative option - the "Several elements" option in the parameters of the activities mentioned above.
This option would allow you to extract a specific property of the whole range of elements which shortens the number of actions you need to do. - We need to learn how to save the data. When we extract data, we typically want to save it to either a variable (so that we can process it further) or to a file (for example, Excel, Google Sheets, CSV files). Since the data we extracted is stored in a variable, we will have to process the variable to save it to, say, Google Sheets.
This all doesn't sound trivial and intuitive. Also, if we want to apply it to multiple pages on a website, it will become even more difficult (though not much more) as we will have to run another loop.
As a result, we've developed a separate instrument that will simplify significantly all of the actions listed above.
What is Web Scraper
Web Scraper is an instrument that allows you to extract a portion of data from a website without coding the algorithm of running through the elements on the website. All you will need to do is to specify from which type of elements we want to extract data.
Currently, this tool will not allow you to extract data from multiple pages (you will still have to run a loop for that) but the part with data extraction will become much more intuitive and easier to construct.
What Web Scraper consists of
Before demonstrating the instrument, let's take a look at what is included in the instrument:
- A new type of file - .rel. This type of file needs to be created through Studio Pro. It has a separate canvas with a different list of functions. The purpose of this file is to store the structure of the elements from which we need to extract data. You do not have to develop the whole algorithm and you do not have to code. It is just the structure of data.
- A new activity - Scrape structured data. This activity is placed in the section Web Automation - Browser and accepts a path to a .rel file. It returns extracted data and saves it to a table. If needed, the data can be saved to a variable (you will need to disconnect the table block and replace it with the Assign value to variable activity saving the previous step result).
- A new selection mode in the Desktop Picker tool. This mode is launched when you click on the "Pick new element" button in the "Data element" function that relates to the .rel file. This mode allows you to select a range of elements at a time.
The Web Scraper tool will keep improving and receiving new functions, watch our updates.
Example
Let's learn how to work with the tool through an example. Let's suppose that we want to open Amazon, find best-selling American history books, and extract all links, titles, and prices of the search result.
In the picture above, purple rectangles refer to the titles, and blue and green rectangles - to the prices. We didn't highlight links because they correspond to the titles (they are clickable).
We will extract data from the first result page only and save it to an Excel table.
Step 1 - Creation of data structure
Setting up environment
We do not need to emulate opening "Amazon" and navigating to the category. We will replace all these actions with just one link that already contains the search result. Open manually the Google Chrome or Microsoft Edge browser and copy and paste this link.
Creation of element relations file
Let's start with the most interesting, time-consuming, and yet fairly simple step - preparing a file that will store the data structure (or relations between elements, those phrases have a similar meaning in this context). Open Studio Pro, click "File" - "Create element relations flowchart".
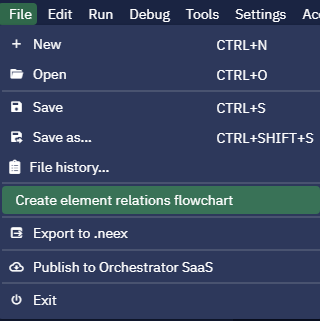
You will see how a separate canvas will be opened. There will be a "Start" block on it and a separate list of functions on the left panel. Currently, Web Scraper has only one function - "Data element".
Save the file, let's call it scrape_bestsellers.rel.
Building data structure
Drag and drop the "Data element" function to the canvas and connect it with the "Start" block. If the block is highlighted with a red exclamation mark then it only means that some required parameters are not filled. We will fill all of them during the process.
Selection of elements
Let's select elements from which we want to extract data. Click on the "Pick new element" button to launch the selection mode. You will see that when you hover your mouse over different elements, there is a blue rectangle highlighting them.
Hover your mouse over an element so that the first title of the search page becomes highlighted with the blue rectangle and press CTRL + X. As you can see, a few elements of the same type were selected as well. Now you need to check if all titles are selected. If not, hover the cursor over unselected titles and press CTRL + X again. The number of selected elements must increase.
If you do not want to select some highlighted elements, hover the cursor over them and press CTRL + Y. The number of selected elements must decrease.
This way, by combining CTRL + X and CTRL + Y, you can highlight all the desired elements.
After you select all desired elements, press ESC. You will see the Browser Picker window with the number of found elements shown.
Previewing data
In the Browser Picker window, there's the "Test" button - it shows the selected elements. This way you can make sure that your choice is correct (see the screenshot below).
You can also see the "Preview Data" button. Click on it - you will see the extracted links.
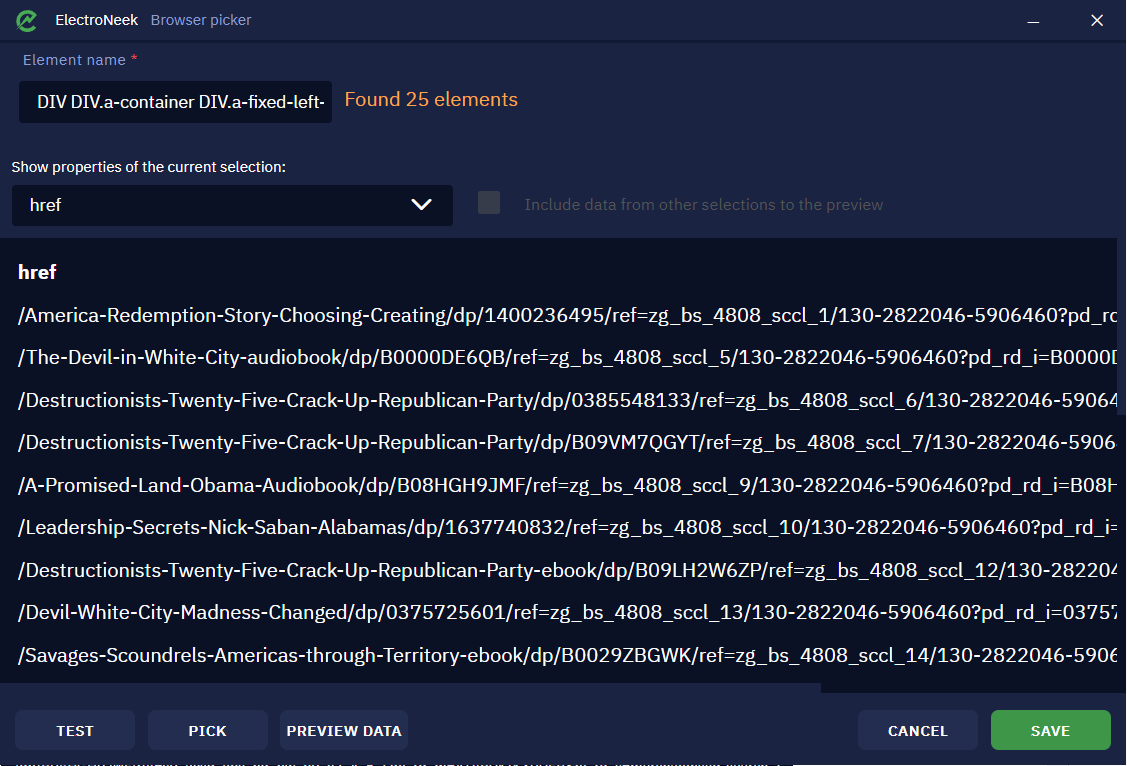
In the drop-down list, you will see attributes from which we read the data. As we selected titles, that are links essentially, the default output attribute will be href. However, we can add more attributes and read data from them. Click on the drop-down list and select another attribute - innerText.
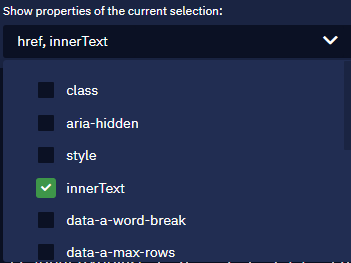
This attribute will be used to extract the titles (the text itself). After you've added this attribute, there will be another column. You may not see it explicitly because of the size of the first column so you just need to scroll to the right.
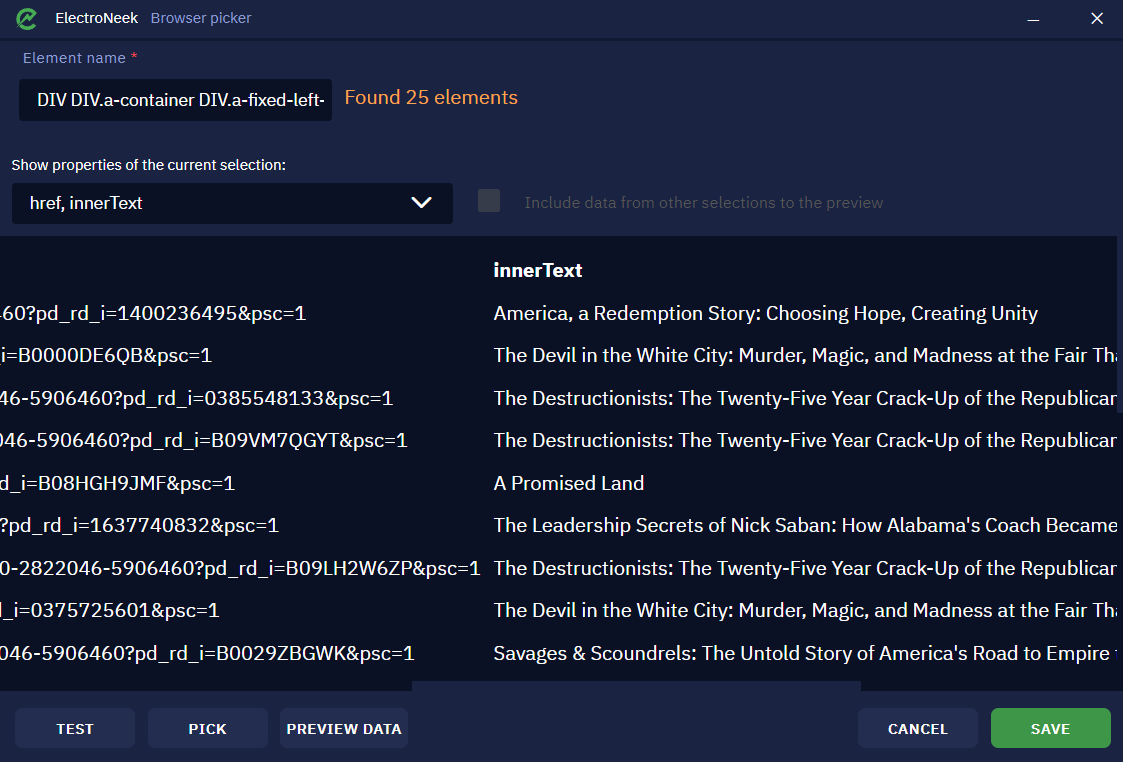
You may also use the vertical scroll to view the whole range of data. This is how you can test your selection.
You can also change the name of the element to something intuitive, for example, "Book titles". Click "Save" to return to the canvas.
Finishing working with function
In the "Data element" block, there are only two parameters left - "Properties to extract" and "Output name". We will use the same attributes in the "Properties to extract" parameter that we used when previewing the data - href and innerText.
"Output name" is how the corresponding column in the resulting table will be named. Let's call it title. Then in the resulting table, we will have two columns: title_href and title_innerText.
Adding more functions
Now let's set up the canvas so the prices get extracted as well. Drag and drop another "Data element" function and connect it with the "Start" block. We will adjust the position of the "Start" block to put it in between the two functions as this reflects the hierarchy and relations better - there is the start node (the Amazon page itself) and two elements of the same type from which we want to extract data.
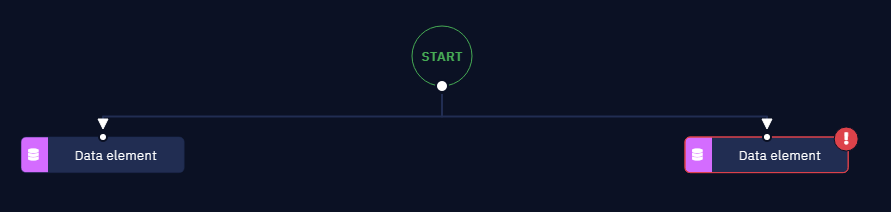
Let's set up the second "Data element" block similarly to how we did it with the first one. Only this time we will select the prices.
There is also one more interesting thing with the selection mode. If you press CTRL + H, elements from the previous selection (from another "Data element" functions on the canvas) will be highlighted or hidden. This is meant to help you orient in what you are selecting.
Press ESC to save your selection of prices. You can also test it again.
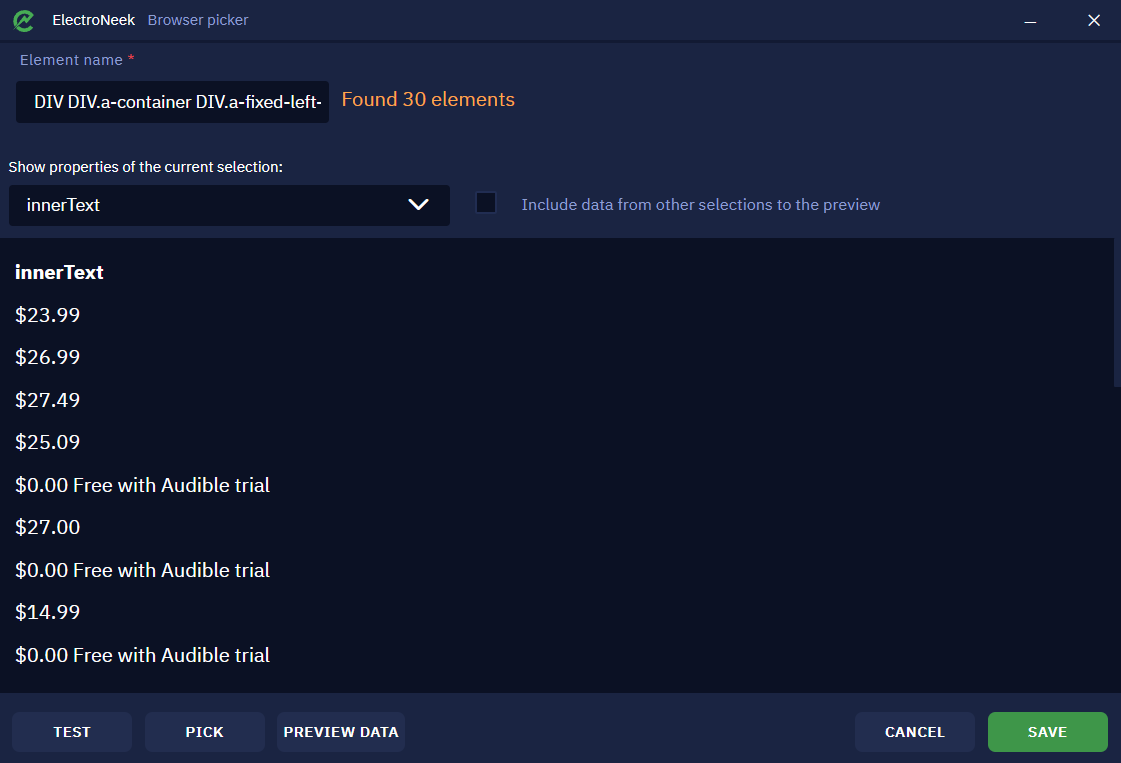
We will not change the extracted property this time, but we will make use of the "Include data from other selections to the preview" checkbox. If you enable this option, you will see two columns from the other "Data element" block on the canvas. Now you can check the data and see if it actually matches. Click "Save" to exit.
Let's finish setting up the block. We will specify innerText as the property to extract and price as the output name.
We've prepared the data structure of Amazon and are ready to test it.
Testing structure
Before creating a .neek file, we can make a final test to see how it extracts data from the page. Click on the "Start" and paste the link we posted above to it. The "Test scraping" button will become active.
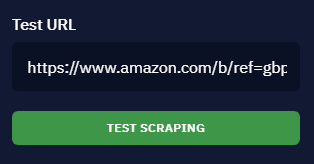
Make sure you use the "Chrome Native" method of interaction with the browser ("Settings" - "Interaction with browser"), then just leave the Amazon page opened in Chrome. Click on the "Test scraping" button - the bot will open a new tab and scrape data from there. The result will be saved to the data_preview variable on the "Variables" tab.
Save changes to the .rel file.
Step 2 - Setting up a bot
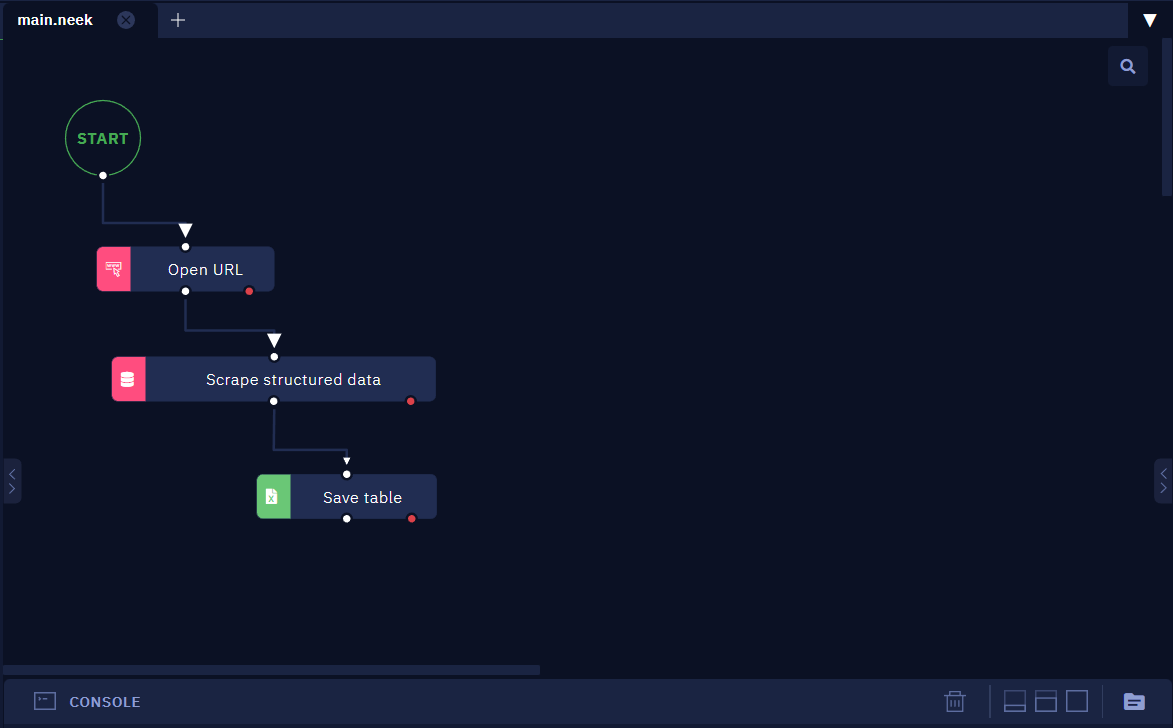
Create a new .neek file and save it. Drag and drop the Open URL activity. In the URL parameter, specify the link to the page. Drag and drop the Scrape structured data activity from the "Web Automation" - "Browser" section. We already have a file with data structure so we do not need to click on the button "Create new data relation file". Click "Pick" and select the previously saved .rel file.
Click on the Save Table activity that follows the Scrape structured data activity. It is already set up in a way that the resulting Excel file will be placed in the same folder where the bot is located. But you may modify it if needed. For example, you may save the result to a Google Sheets table. We leave it as it is.
Save changes to the .neek file.
Step 3 - Launch
Since we haven't added any activities related to opening a browser instance and we use the "Chrome Native" method (see above), we need to make sure that Google Chrome is opened, the Amazon page is opened there as well, and that there is no another tab with the exact same content.
Launch the bot. It will scrape the data nearly simultaneously and save it to a table. Navigate to the folder with the bot, open the table, and check the result.
How to extract data from multiple pages
Suppose we want to extract data not only from the first page (or row of data) but from the first two (or three, four, or until the end). Let's suppose that we would like to focus on one category only, say, "Best Sellers". In the row with the book, you will notice the right arrow button on the right-hand side. We will make use of this button.
All we need to do is to create a loop:
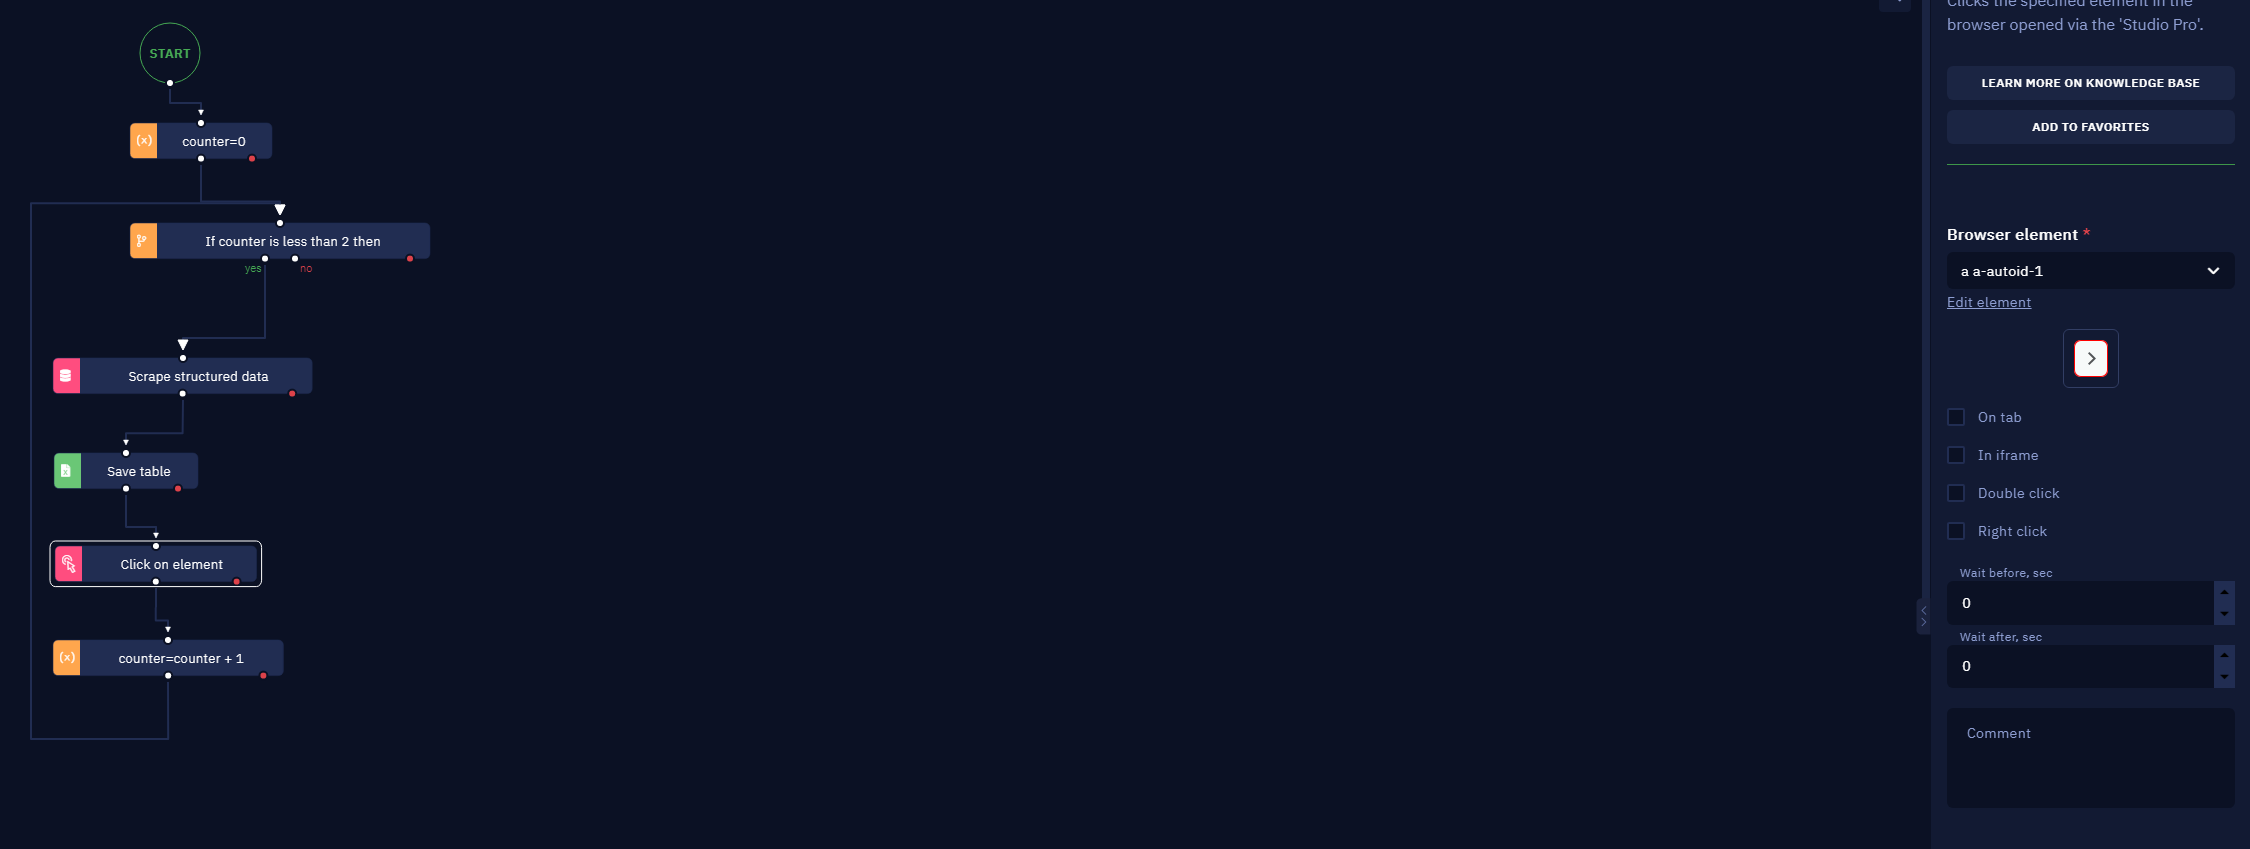
The loop is simple:
- We create a counter variable
counter = 0, that will count the number of iterations. - We create a condition for the loop in the If...then activity:
counter \< 2(since we want to make two iterations).- In the body loop, the bot scrapes the data from the current row of data (or page in another possible example).
- In the "Save table" activity, we'll need to adjust the path. Let's select the "Calculate a value" option and set it to
"data\_" + counter + ".xlsx". This way, a new file will be generated for each iteration. - Then we click on the "Next" button.
- The bot goes to the next iteration.
- A similar method should be used with other websites when you want to extract structured data from multiple pages or sets of data.
How to edit existing data structure
To open and edit an already existing data structure in Studio Pro, do the following:
- Click "File" - "Open"
- Change the filter to the .rel extension.
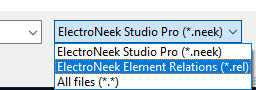
- Search for the desired file and open it.
- Download ru_yandex_search_result.rar.
- Download en_amazon_scraping_result.rar.
How to export bots to .neex and run them on other machines
Introduction
The .neex format allows you to run the created workflow on any computer without having to install Studio Pro. To run an algorithm in this format, you only need the free Bot Runner program installed on your computer. The use of the .neex format allows you to build a system of so-called attended automation when the work of the bot and/or its launching is performed with the participation of a user.
NoteThis feature is now only available for Projects and is no longer available for Playground.
Procedure
- Create a bot in Studio Pro.
- When the bot is ready - navigate to "File" → "Export to .neex.".
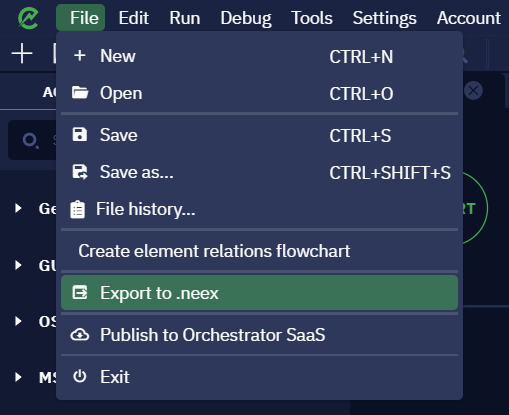
A pop-up message will remind you that Bot Runner must be installed on your computer to run the bot.
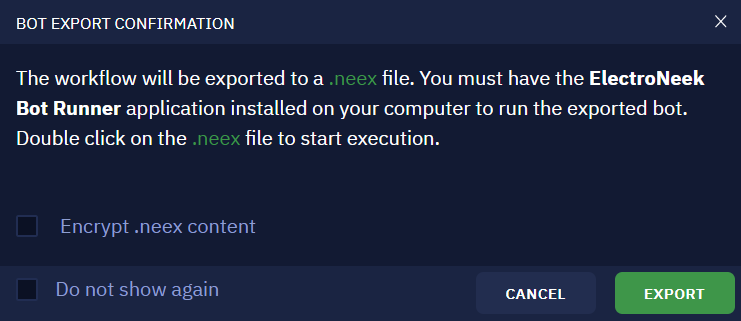
You can encrypt the .neex file using the **"Encrypt .neex content" checkbox. This option protects the bot file from attempts to read the content by third-party programs.
- Click "Export". In the file explorer window that opens, you can choose where to save the bot file.
NoteYou need an existing entry point to execute these steps. In case the file was deleted, you must assign a new one under Settings → Project Settings → Project entry point.
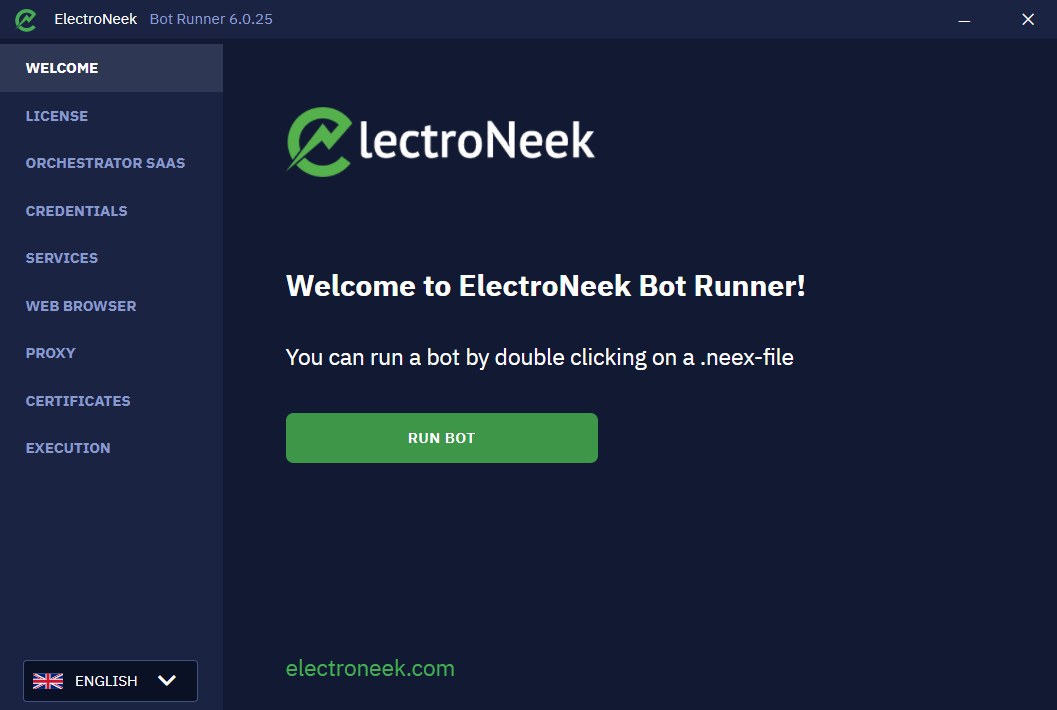
Launching the bot
After the .neex bot is saved, you can run it by double-clicking the left mouse button. If Bot Runner is installed and running on the computer, the workflow will start. You can also run the workflow directly through Bot Runner. To do this, click the "RUN BOT" button in the "Welcome" tab.
Bots can also be launched via the command prompt. In this case, you can pass some arguments for launching. For example, in the command prompt you can write the following command:
echo This is a test argument > example.txt & main.neex
Such a command will pass the argument to example.txt and launch the main.neex file.
Transferring bots and files
Subprogram
If the Subprogram activity was used when creating the bot (the .neek files), the subprograms will be automatically taken into account in the final file when converting the algorithm to the .neex format. As a result, it is not necessary to additionally transfer the subprograms themselves or perform any actions to make the subprograms work in the .neex file.
Interaction with elements
If your workflow contains activities that interact with desktop elements, web-elements, or terminal elements, you can also transfer only the .neex file to another computer without having to manually transfer the element files or any other files.
Interaction with images
First of all, if your workflow contains activities that interact with images (Click on image, Find image, etc.), then all images generated by Studio Pro, such as screenshots, will be stored in your project folder. Therefore, you do not need to manually transfer images, when converting your algorithm to the .neex format. But most importantly, you can port the generated .neex file to another computer without any issue.
The same is true for any external image, if you transfer them into the project folder. Thus, you can also use the generated .neex file to another computer without any issue.
However, if images are not stored in the project folder, then only the paths to the images are stored. Therefore, when porting the .neex file to another machine, in order for the algorithm to work correctly you will have to somehow calculate the picture paths in the algorithm itself (for example, this can be done by creating a config-file) or to reproduce exactly the same picture path as on the machine where the workflow was developed.
Interaction with files
If your workflow contains actions that interact with files on your computer (Read text file, Append to file, etc.), then the path to these files must either be calculated within the workflow or reproduced exactly on the machine that runs it.
Working with ElectroNeek Chrome Automation extension and Selenium
Description
Studio Pro can interact with the Google Chrome browser via two tools - the ElectroNeek Chrome Automation browser extension and Selenium.
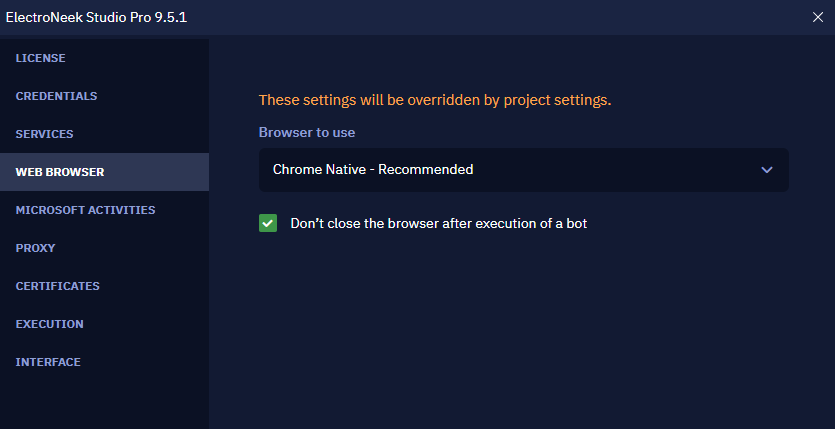
You can choose which tool you feel more comfortable with. To do this, go to "Settings" → "Interaction with browser". In the "Browser to use"option, you can select one of the options:
- Chrome Native (interaction through an extension, the default option).
- Chrome Selenium (interaction via Selenium).
Chrome Selenium and Chrome Native
Previously, Studio Pro supported working only via Selenium. This imposed some restrictions on working with the browser, for example, you could not use web automation with a browser already open, i.e. the first activity in the workflow always had to be the "Open URL" activity.
We've improved the ElectroNeek Chrome Automation extension, making it easier to work with:
- You don't have to open the browser directly with the bot (you can use web automation in an already open browser).
- You don't have to specify the browser tab number: the platform will automatically detect the tab with the desired item. At the same time, the ability to specify a tab explicitly saved - this will help build a solution in some non-trivial cases.
- Increased speed of the extension working.
An example of working without Selenium
- Make sure you have "Chrome Native" option selected in "Settings" → "Interaction with browser" menu.
- Open any page in Google Chrome, for example google.com.
- Launch Studio Pro.
- Choose the "Click on element" activity in the "Web Automation" section.
- Click on the "Pick New Element" button to select an element on the webpage, such as the "Gmail" button.
- Make sure the selector is formed correctly.
- Go back to Studio Pro and run the bot.
- If everything is done right, the bot will work correctly.
NoteYou may expect to notice some differences in behavior between Chrome Native and Chrome Selenium since they function very differently from each other. Hence, if you create a workflow or specific activity designed for one of them, we suggest that you keep using that same browser since the other version is likely to present unexpected behavior.
Exceptions handling
Introduction
When developing an algorithm, the developer often has to consider the program's behavior in different scenarios and think through the steps for handling possible errors in the bot's operation. For example, if the bot is supposed to work with files on a computer, a situation can arise when the necessary file or folder is missing (has been moved or deleted). This scenario (depending on the business process, of course) can usually be foreseen and handled quite easily, for example, by adding an activity to check the presence of a file before the activity that works directly with that file.
However, there may be exceptional situations that cannot always be foreseen. For example, when working with the interface of the application or browser, it may happen that some element (a button or a picture) will not load in time or will not appear at all. And when the algorithm reaches the step of working with this activity, an exception will occur, because the bot will not be able to find the element in the given time. There are several ways to handle such exceptions, we will describe them in more detail below.
Exceptions handling mechanism
Each activity block has an "Error" port, or "red port" as it is called. This is the port to which you can bind a set of activities to be performed if an error occurs during the main specified activity step.
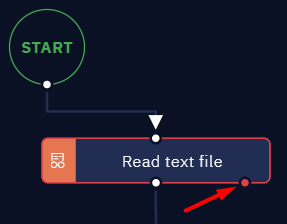
Let's take a simple example of error handling in the execution of an algorithm.
Suppose that our bot has to read text from some file. To do this, we use the Read text file activity, but deliberately move the file itself before launching the bot, so that the bot won't be able to find it. For some time the bot will try to find the required file, but will eventually stop and an error message will appear in the console:
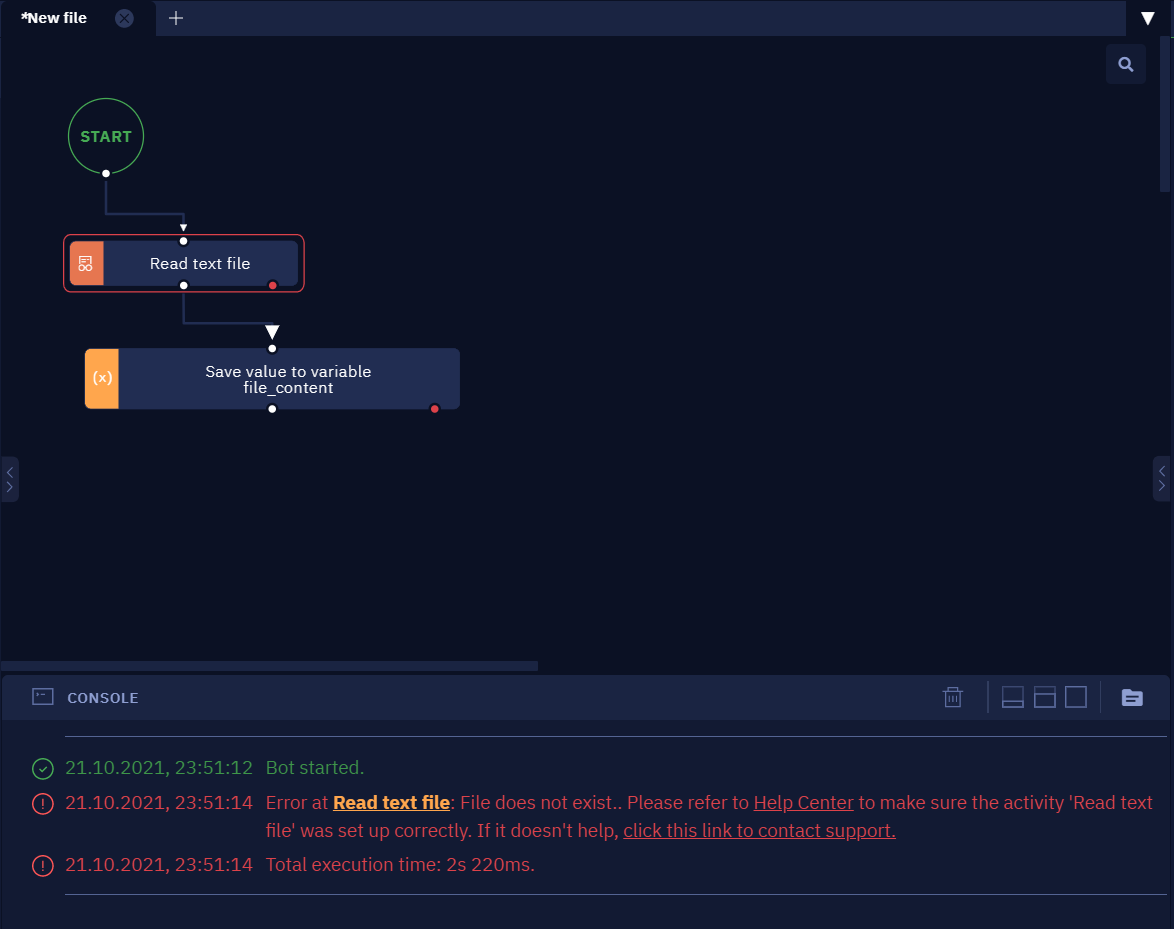
Now let's look at the exception handling process itself. Let's design the algorithm so that the bot displays the cause of the error in the notification window for the user.
-
Specify a path to file in the Read text file activity. The path should look like this:
C:\\Users\{USERNAME}\\Desktop\\Sample file.txt -
Move this file to some folder so that the path to the file changes, but we won't change the "Path" parameter in the activity parameters.
-
Add the Assign value to variable activity via the red port. You can set any name for the variable, for example "exception". In the "Variable value" parameter, pick the "Save the previous step result" option.
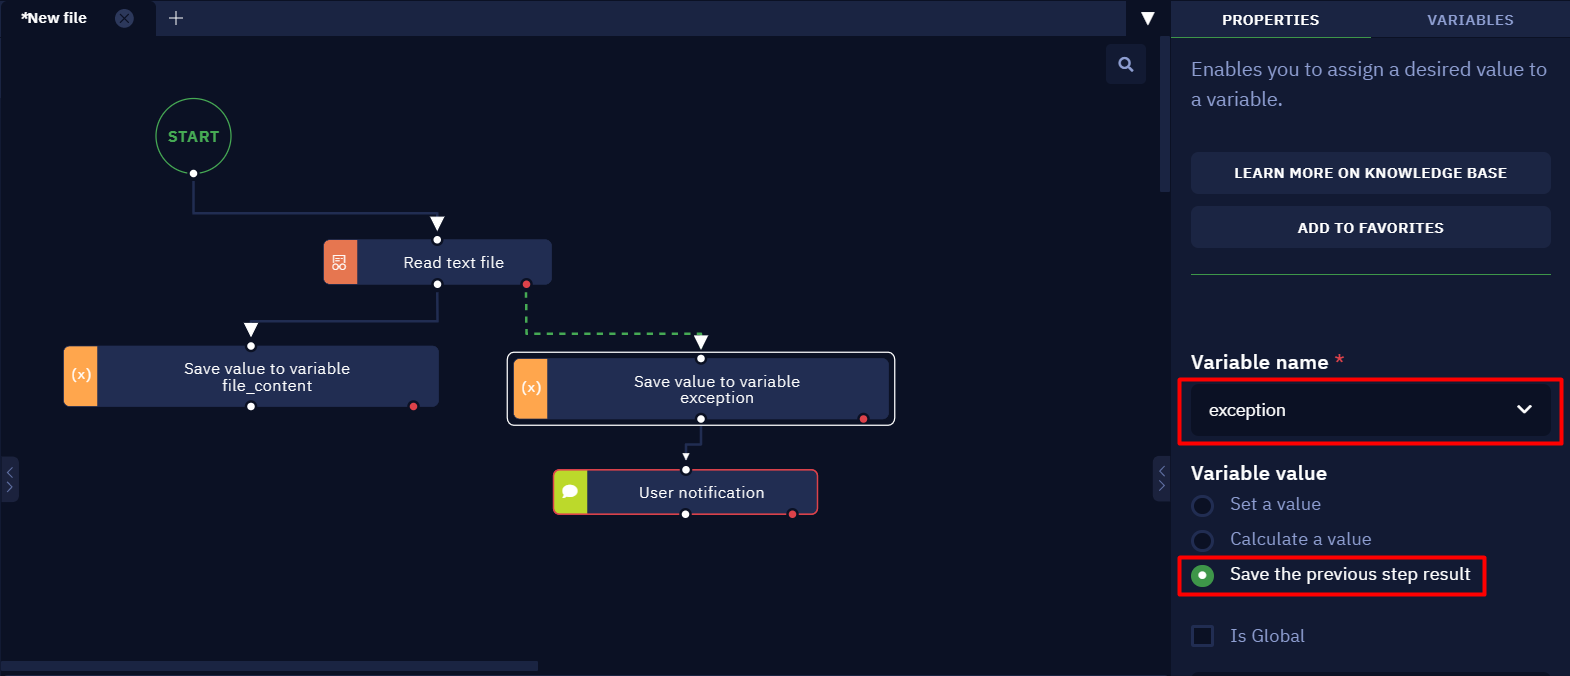
- The next acivity in the workflow will be the User notification activity. Pick the "Save the previous step result" option in the "Description message" parameter. You can specify any value as a "Button name" parameter.
Run the algorithm. The bot will try to find the file, but when it fails, there will appear a message showing that there is no such file in the given path.
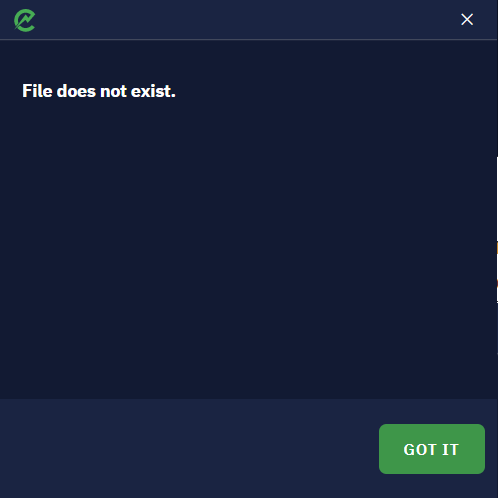
In reality, such a scenario can very easily be foreseen and handled (by checking the presence of the file manually). In this example, we want to demonstrate an approach that could be used in such a scenario if the manual check cannot be performed before launching the bot, so you can see on a simple example the principle of exception handling.
Useful tips for exceptions handling
The following tips and tricks are recommended when processing exceptions:
- Try to anticipate possible bot behavior and, where it makes sense, handle each scenario explicitly.
- When using the "Error" port, it is often useful to save an error message and display it in the log or in a message to the user. For the business user, you can provide a clearer error message.
- In some situations, it makes sense to allocate the part of the algorithm into a subprogram, within which not to handle exceptions. It is better to use the "Error" port from the subprogram block to handle exceptions.
- A good practice in some cases is to catch an exception and return the algorithm to its starting point for another pass. For example, if the algorithm involves transferring data from a set of documents into a program, a good solution when an exception occurs at any iteration is to close the program (or force termination) and return to the initial state of the algorithm to re-process that document or move on to the next.
- If your algorithm interacts with the interface of a website or some application, it would be useful to add the Take a screenshot activity via the red port. Thus, when an exception occurs, you can not only see the error message in the console, but also a screenshot of the moment the error occurred, which will allow to understand the causes and handle the exception in more detail.
OCR services in ElectroNeek
What is OCR?
Optical Character Recognition (OCR) is a technology that converts images with text into data that can be handled as plain text in any text editor.
RPA processes often have tasks that require using of OCR. Typically, scanned documents, PDF files, and photos need to be recognized in order to extract certain information from them, often process it, and enter it into some system.
The documents can have either a strictly fixed structure, where we can accurately predict the location of specific data on the sheet (for example, knowing in advance the position of the "Name" field in a passport), or a less rigid structure (such as a payment bill with a known set of fields that may appear in different areas of various documents). In some cases, the documents may not have a clearly defined structure at all.
We can process such documents based on the final task. In general, we distinguish four main approaches to recognize and convert text from a image (document):
1. Image into plain text
This approach allows you to recognize the data from an image and output it as a set of characters, with which you can work, for example, in a text editor. In this case, the definition of the meaning of the text is left to the person. For example, if the bot needs to find the amount of a bill in the text, the search algorithm must be written by the bot's developer. It is also worth keeping in mind that with this recognition, elements of the formatting of the document - the location of individual words, characters, etc. may be lost.
2. Image into plain text with characteristic forms
We are talking about tables, "key-value" pairs and so on. This method is similar to the previous one, but in the output, besides plain text, we get a separately formatted table or other characteristic form (a list of "key-value" pairs, for example).
This means that the implementation of an algorithm for finding information in such data does not require extracting table elements from the plain text, but can work with the table itself directly. Nevertheless, it is still up to the developer to determine the meaning of the information.
3. Image into text by selecting recognition zones
We can also recognize a specific pattern. Typically, this approach makes sense in documents with a strictly fixed structure. For example, we work with scans of passports and we know that the passport issue date is always located in this particular area of the document and nowhere else.
In this case, we can simply ask the bot to look in this particular area of the document and return its contents, recognizing the text from this area. This somewhat simplifies the determination of the meaning of the information, because the picture is divided into areas just by the semantic criterion.
For example, the area with the date of issue of the passport, the area with the name of the passport holder, the area with the place of issue of the passport, and others.
4. Image into a data set
You may often encounter the term "data extraction", which reveals the meaning of this approach. The output here is more than just a set of characters — it is already-transformed data.
For example, we know what information is stored in invoices. The result of applying the described approach to the invoice will be a set of data like "Seller - Smith's cargo LLC.", "TIN - ..." and so on.
Therefore, we do not need to extract the meaning of the recognized text independently, we already receive the transformed information and can immediately use it for its intended purpose.
Which OCR-services does ElectroNeek support?
At ElectroNeek, we want to give our users the widest possible OCR experience. So, first of all, we have a specific tool integrated to our Ecosystem: IntelliDocs. You can use it to create apply high-level Intelligent Document Processing (IDP) in your workflows. Learn how to easily do that in this article.
Besides that, we provide you with a set of solutions that implement all of the described approaches:
- Converting an image (document) into plain text.
- Convert image (document) to plain text with characteristic forms (table, "key-value" pairs and similar) highlighted.
- Converting an image into text by selecting recognition zones (specifying a recognition pattern).
- The Recognition template activity. This is the ElectroNeek's own design.
- Converting an image (document) into a data set (or data extraction).
Is there a charge?
ElectroNeek provides users with a free complimentary OCR page plan for one year for Google Cloud OCR and Microsoft Cloud OCR. We give this option for development and testing purposes so that the developer doesn't waste time signing up for an account with the vendor, but can focus immediately on the final task.
When a bot is developed and tested, the question arises of transferring the bot to a productive environment. Execution of bots in the productive environment is done through the Bot Runner tool.
Since this tool is free and does not require mandatory authorization in our system for the execution of bots, it does not provide for the use of a complementary plan. In this case we allow you to connect your own account with the vendor being used, so that the payment can be made on the vendor's side.
An exception is if the user is already authorized in Bot Runner - then the complementary plan can be used, but the number of pages of the complementary plan is limited, so for production it will not be enough and in any case it will be necessary to connect your own account with the vendor.
As for the other available OCR vendors in the system: ElectroNeek provides connectors that allow you to link your own account with these vendors.
This is done also because these vendors work with different types of documents, have flexible billing plans and can release regular updates. The connector allows you to always use the up-to-date version provided by the vendor and still easily change your plan from that vendor without affecting your integration with the bot.
NoteWe do not store processed images on our servers.
Debug
Introduction
Debugging is a stage of algorithm development in which errors can be detected, localized, and eliminated. Studio Pro has its own debugger that allows you to monitor algorithm execution, stop and restart it.
How to debug an algorithm in Studio Pro
Debugging in Studio Pro should be used when you want to find out exactly at what stage of the algorithm's operation errors occur. After the error is localized, you can understand the reasons for it and eliminate them. Below we look through the capabilities of the debugging tool and show some examples.
Concepts
Breakpoint
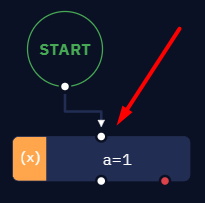
Breakpoint is the main tool for working with the debugging tool. If you set a breakpoint on some activity, all previous activities will be executed and the execution of the algorithm will stop before the designated breakpoint. Thus, you will be able to capture the current state of the system and analyze the functionality of the algorithm. To set a breakpoint, put the cursor on the desired input port of the desired activity and click the left mouse button.
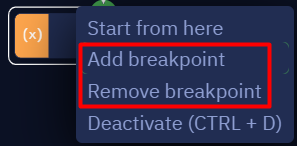
You can also add or remove a breakpoint by right-clicking on the desired activity on the canvas.
Another way to add a breakpoint is to use the "Toggle breakpoint" option in the "Debug" tab. Before that, you need to select the activity block where you want to add a breakpoint.

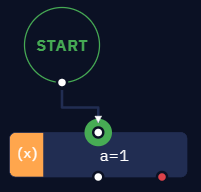
After that the port will be highlighted with a green circle, indicating a breakpoint. You can remove a breakpoint by reverse actions: left-click on the port where the breakpoint is set, right-click on the action block and select "Remove breakpoint" option or use "Switch Breakpoint" option. Use the "Remove all breakpoints in file" option in the "Debug" tab to remove all breakpoints from the algorithm.
Debugging process
After setting at least one breakpoint, the "Run debug mode" action appears on the top toolbar. Having started in debug mode, the bot will perform all activities up to the breakpoint.
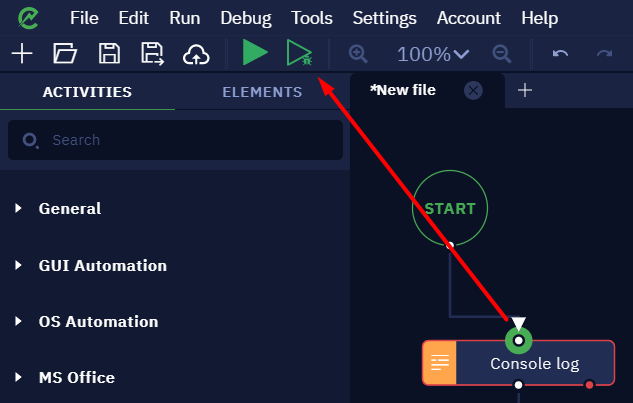
After that, the debugging tools will appear in the top toolbar.
These symbols (from left to right) denote:
- Resume — continue executing the algorithm in debug mode until the next breakpoint. If there are no more breakpoints, the algorithm will be executed to the end and the bot in debug mode will stop.
- Step over — execute a step over.
- Step into — execute a step into.
- Step out — execute a step out.
- Stop — stop the execution of the algorithm in debug mode. In this case no further actions will be performed.
Debug mode can also be run directly during the execution of the algorithm. This is useful when executing a large algorithm - you don't have to run the whole algorithm over again in debug mode, you can just set a breakpoint at some action (of course, if the bot hasn't started executing it yet). That way, when the breakpoint is reached, the execution of the algorithm will stop and the debug mode will start.
The "Resume" and "Stop" actions are used to resume or stop the debugging mode generally. The "Step over", "Step into", and "Step out" actions apply directly to activity blocks. They apply to all activities including the Subprogram activity. Let's take a closer look at them:
Step into
If you use a "Step into" with any activity other than the "Subprogram", the bot will simply execute that activity. In the case of a subprogram, a step into will open it and the algorithm will stop, after which you can continue debugging the subprogram activity with all the available debugging tools.
Step over
The "Step over" as well as the "Step into" will simply execute any activity except the "Subprogram". In the case of a subprogram, the "Step over" will execute it completely, without stopping at each activity and without opening the subprogram.
Step out
The "Step out" performs an activity and ends the execution of the algorithm in debug mode in the current subprogram. Thus, if you use the "Step out" inside a subprogram that is not called anywhere else, the bot will stop after using this step. If, however, this activity is not performed in a main subprogram, you will exit the child subprogram after hitting "Step out" and be able to continue working in debug mode in the main subprogram.
By default, Studio Pro will be minimized every time you perform some activity in debug mode, which is necessary to test how the bot works with interfaces (websites or applications). If you are debugging an algorithm that does not require working with interfaces, you can disable the Studio Pro minimization to reduce the algorithm's running time. This can be done in the menu "Settings" → "Execution" → "Debugging settings" → "Do not minimize Studio Pro while debugging".
Debugging example
Let's take a look at an example of debugging the algorithm. Note that in the example below we show only the principle of debugging, there are no errors in this algorithm. In reality, all sorts of errors can occur, and the processing of the algorithm will always have individual aspects.
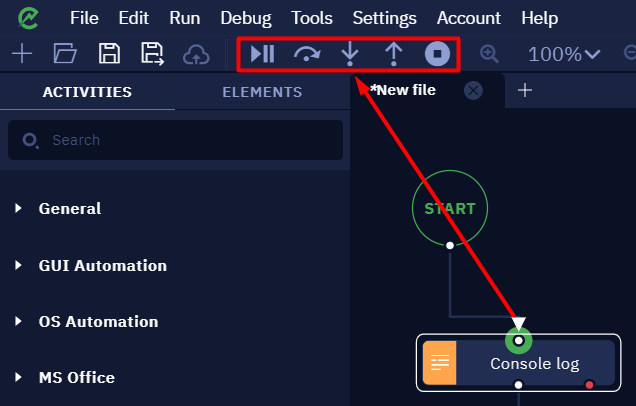
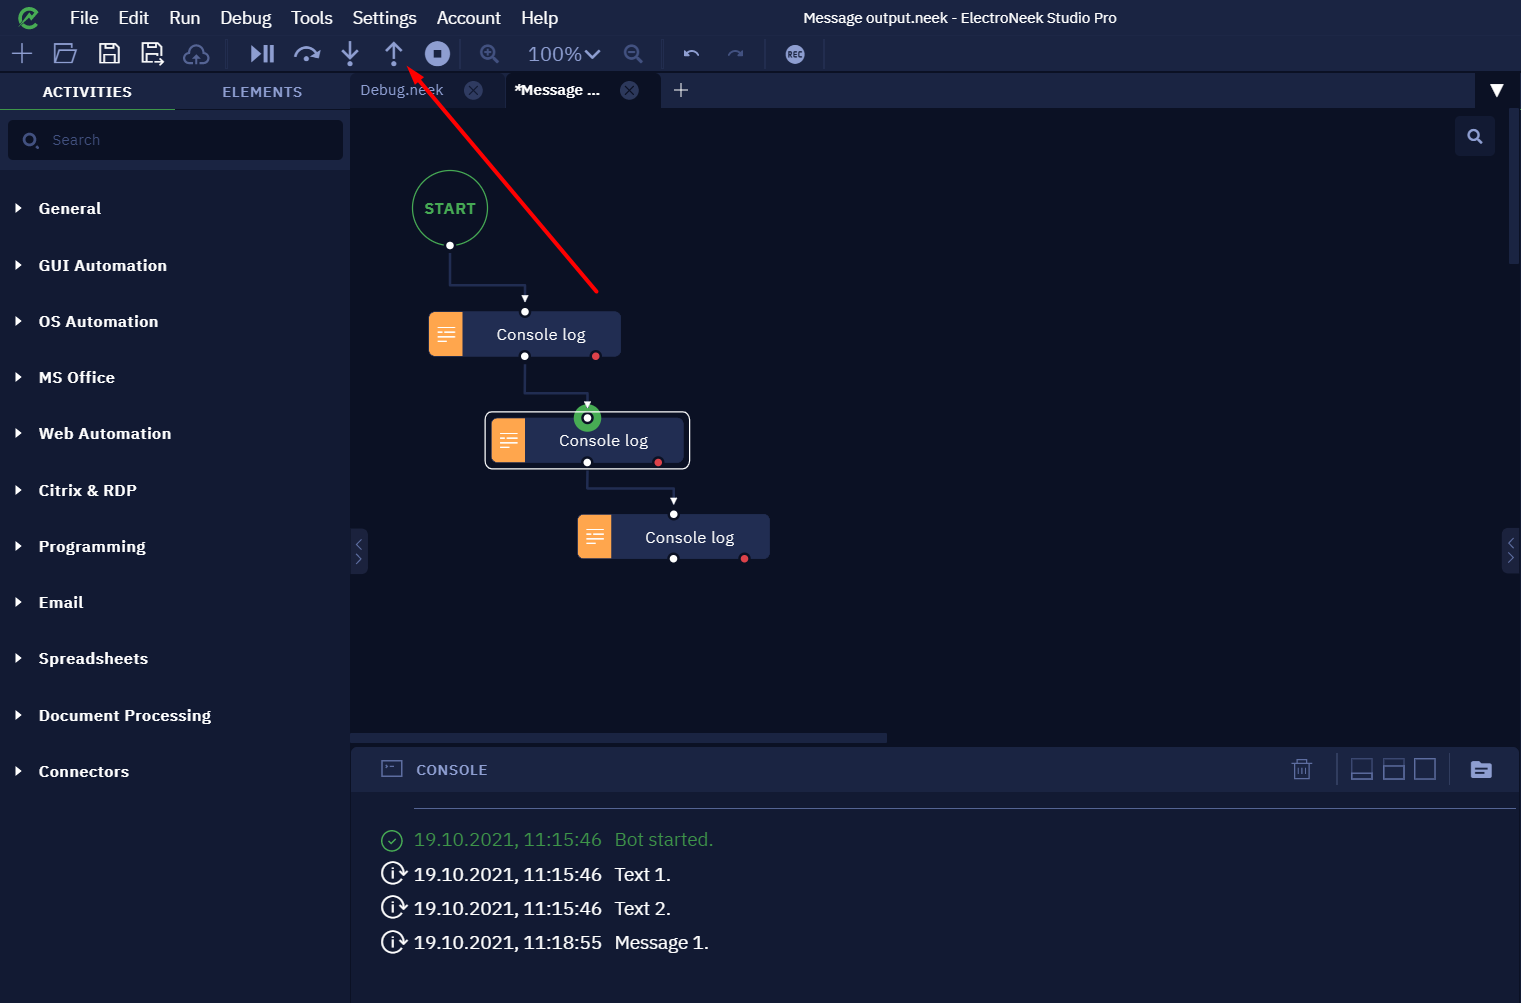
For a simple demonstration, let's take the algorithm that outputs messages to the Studio Pro console.
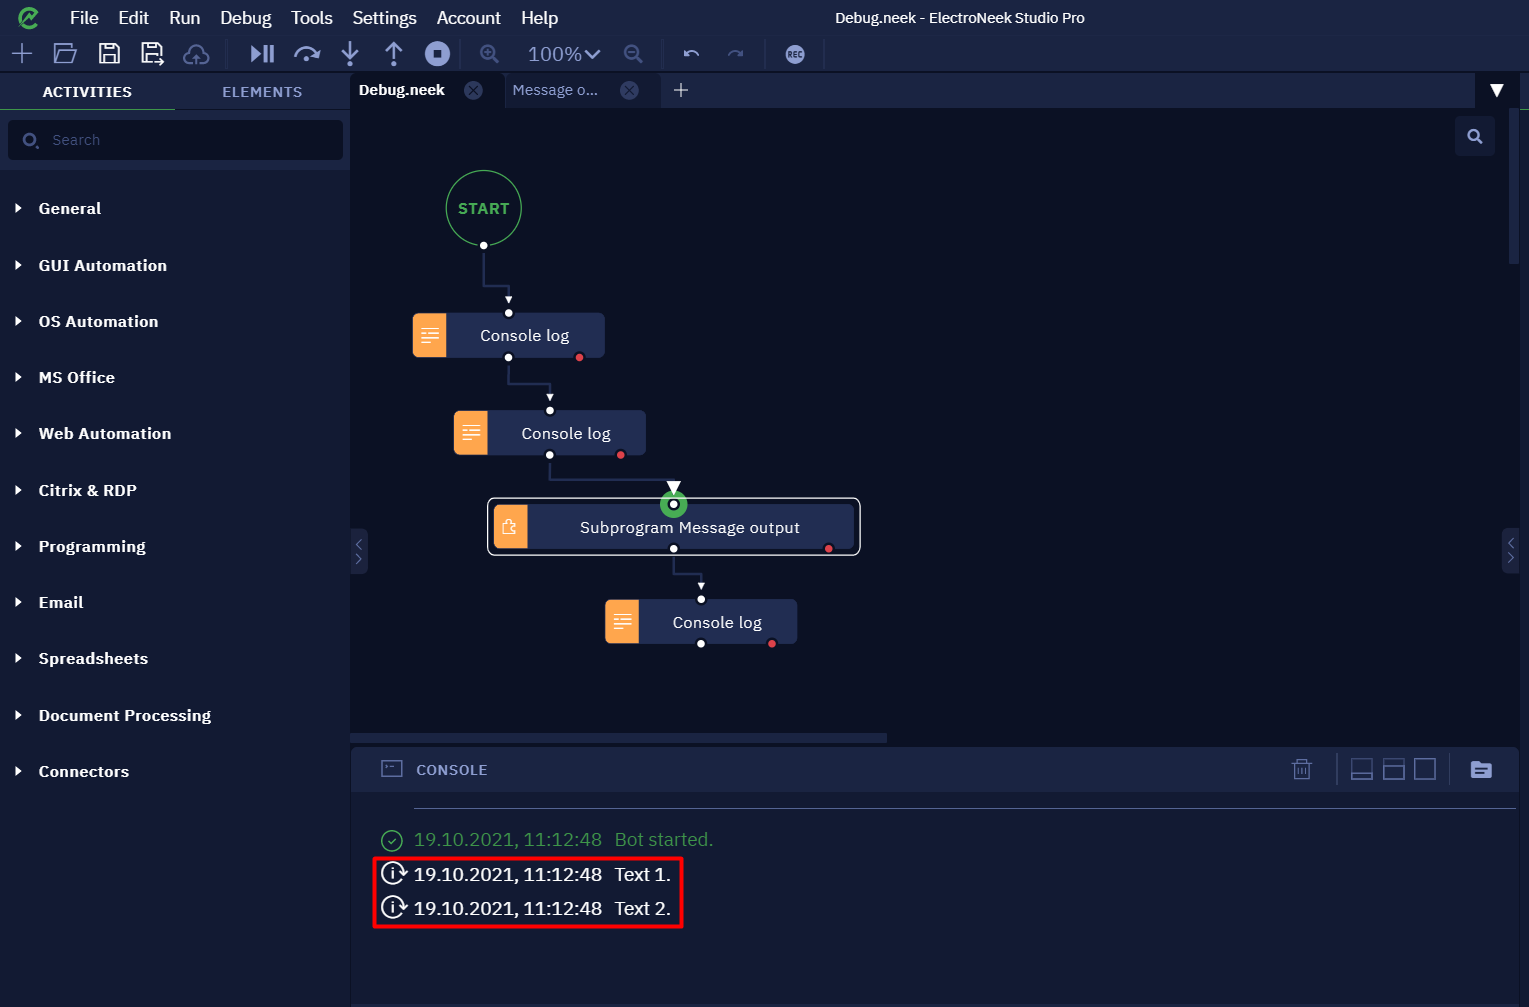
Let's put a breakpoint on the "Message output subprogram" activity and run the algorithm in debug mode.

There will be two activities before the breakpoint - we will see two logs in the console.
Let's assume that at this stage we are satisfied with everything. Next, we want to continue with the actions of the "Subprogram". Let's leave the breakpoint at the same place and execute the "Step into".
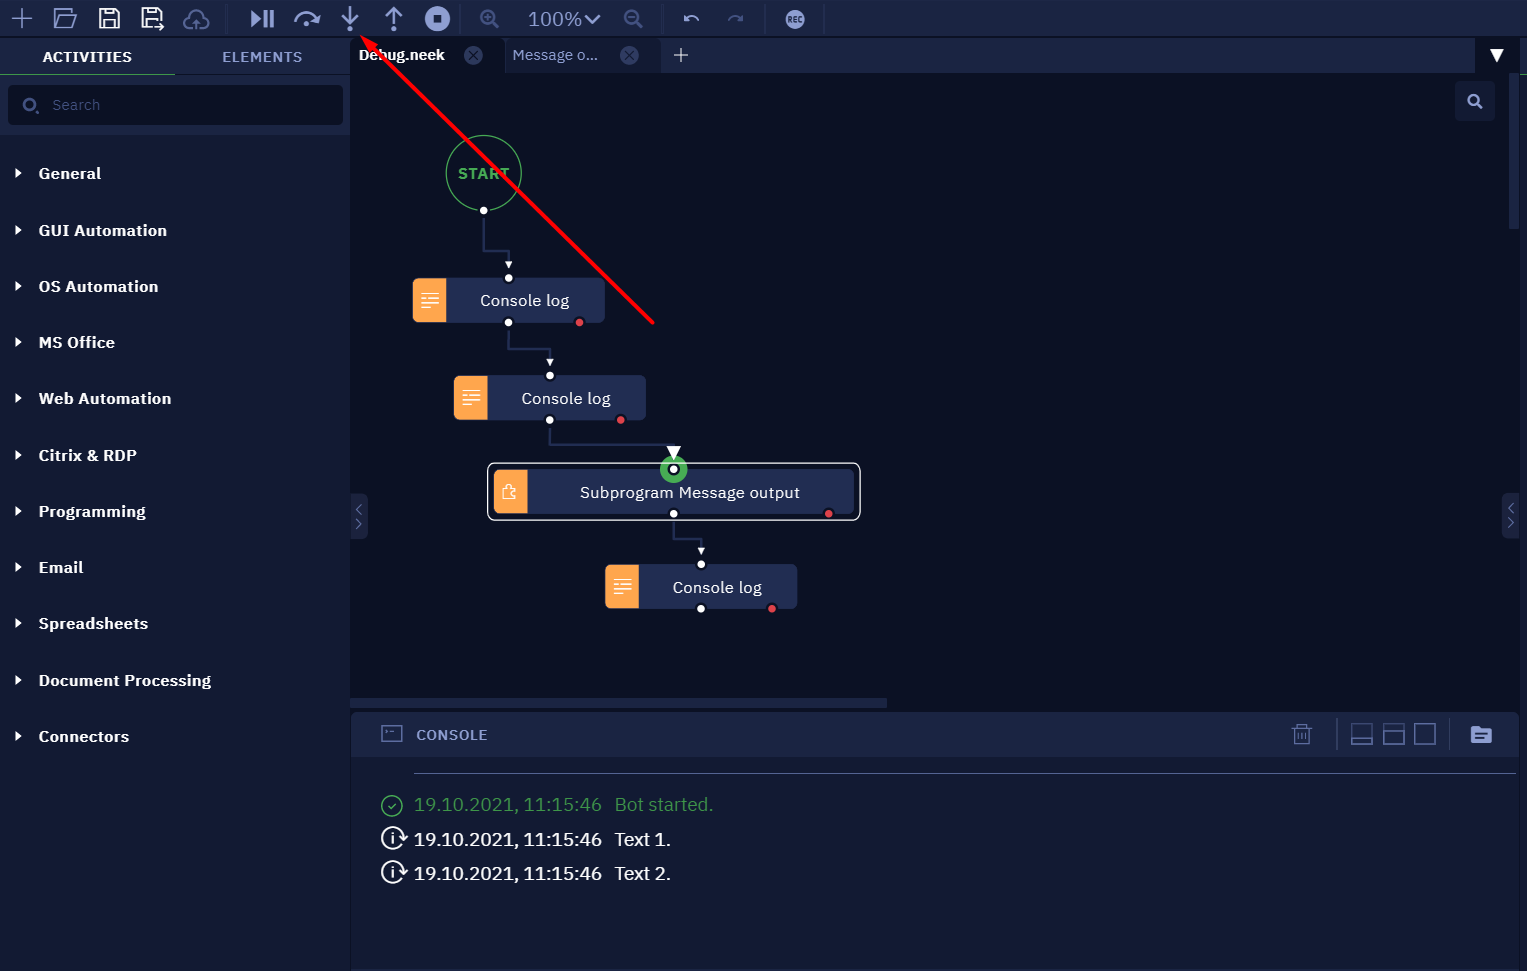
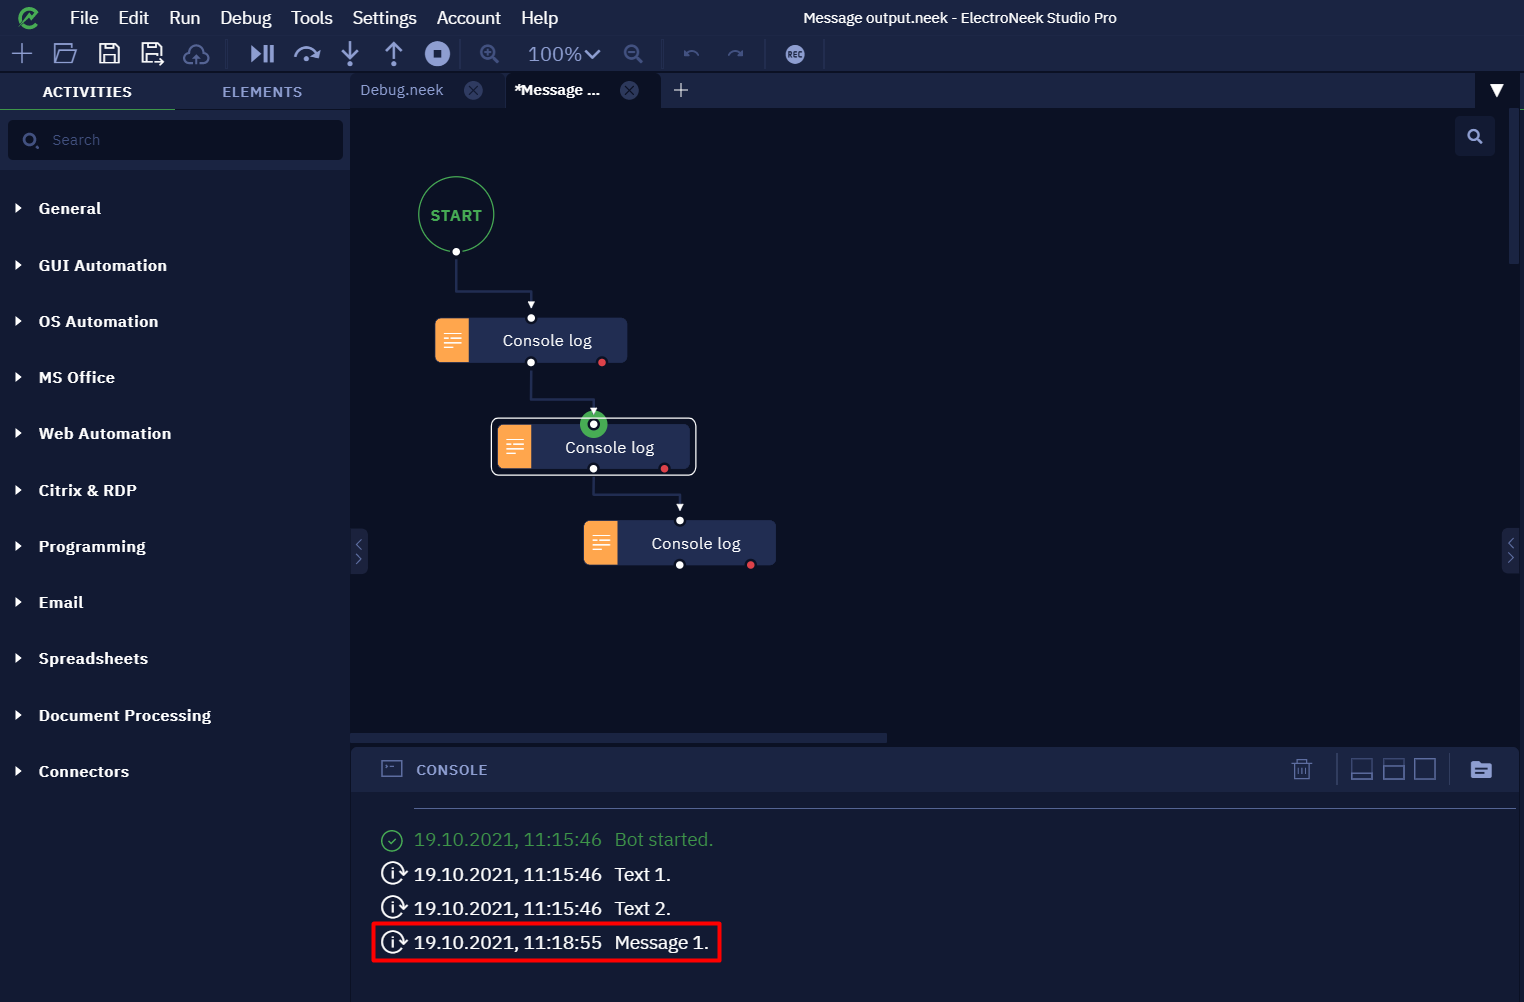
This will get us inside the subprogram, but the activities in it will not be executed. Let's put a breakpoint on the second activity and press "Resume".

This will execute the activity up to the breakpoint.
Next, perform the "Step out" - to return to the main subprogram.
The last subprogram activity will be executed, and we will return to the main subprogram. Note that the last activity in the algorithm has not yet been executed, we are still in debug mode.
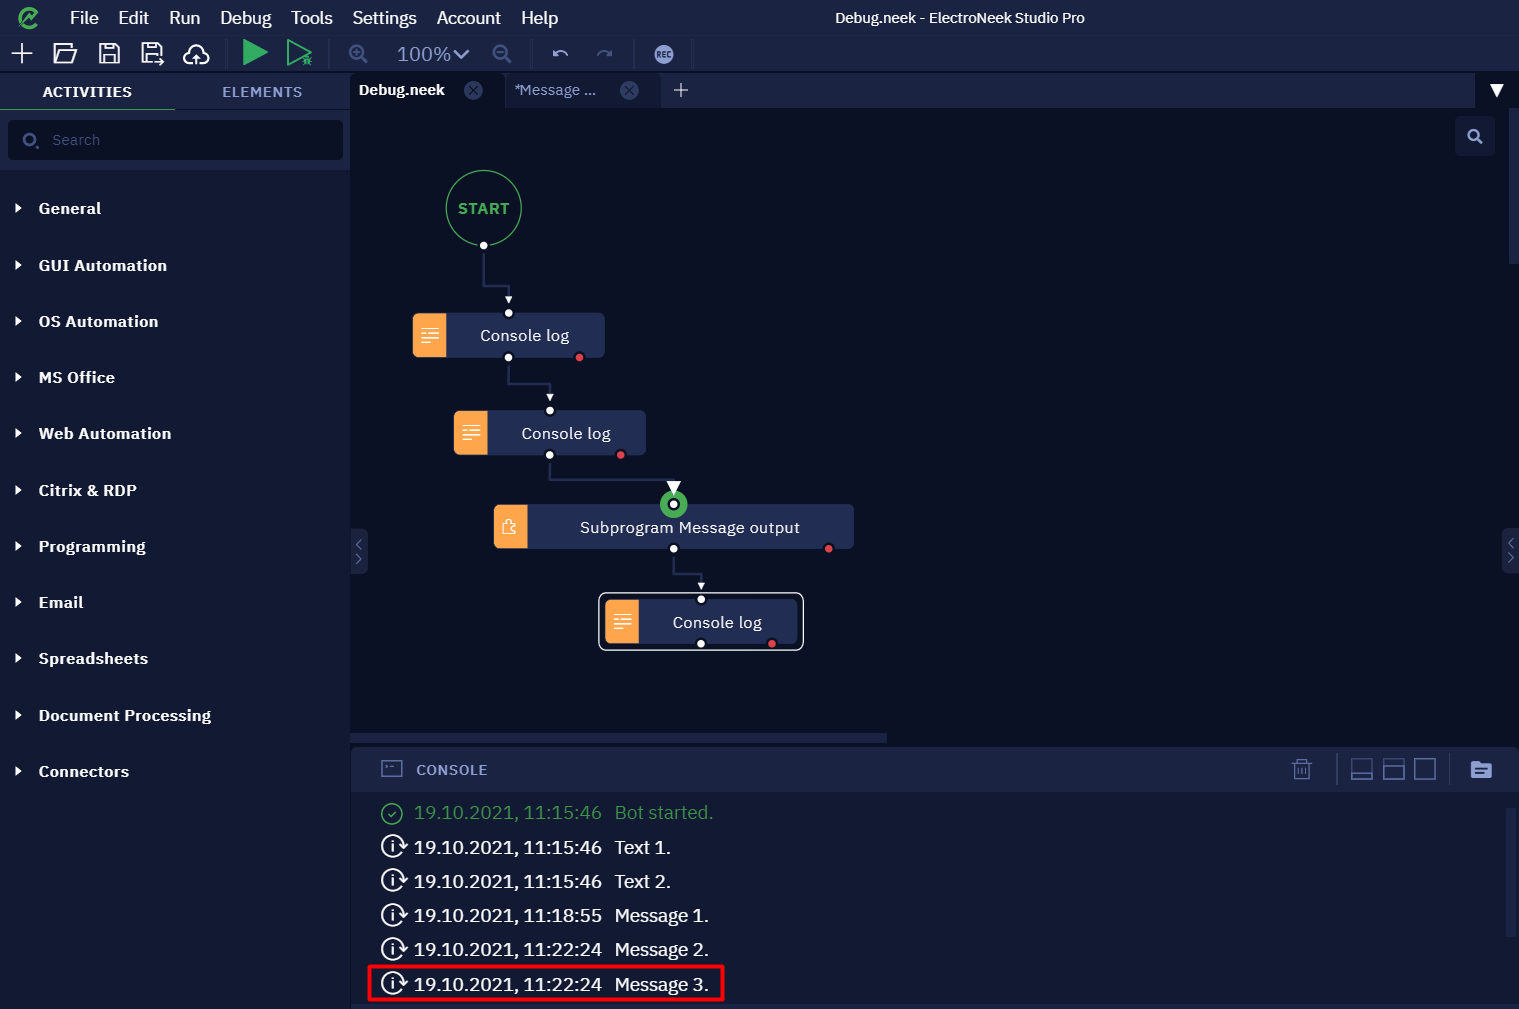
Now you can press "Resume" again to finish the execution of the algorithm with the last activity after the "Subprogram".
Note
- If your algorithm contains the Assign value to variable activity, the value of the variable will be set only after the activity is executed in the debug mode.
- The variables will be saved after creation. If you need the variables to be set anew each time you repeat an action during debugging, use the "Clear variables before execution" option.
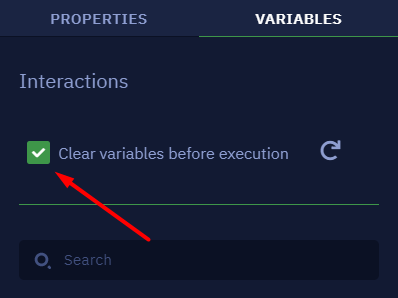
Import Workflows and Elements
Introduction
Studio Pro features different tools meant to simplify the process of developing workflows. Sometimes, high-loaded workflows designed by several developers require several parts of the project to be merged. As another example, there can be a situation where it is necessary to reuse already created workflows in some projects.
That is why Studio Pro features a couple of tools specifically for those purposes: Import workflows and Import elements. In this article, we will go through the process of working with these tools and cover some of the scenarios of using them for collaboration, merging workflows, or duplicating pieces of the workflow.
Import Workflows
This tool allows you to import a workflow (.neek-file) to the project you are currently working on.
To use the "Import workflow" feature:
- Navigate to Tools → Import workflow
- In the pop-up window, click "Pick"
- Navigate to the directory with the desired .neek file
- Select the .neek file and click "Open"
- Click "Import".
The opened .neek file is displayed in the project tree in the left sidebar:
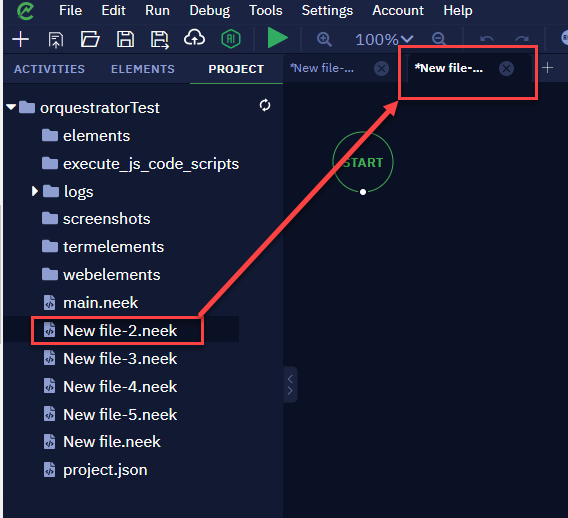
Import elements
This tool allows you to import elements (elements, termelements, webelements) from one project to another.
elements— desktop elements.termelements— terminal interface elements.webelements— browser interface elements.
To use the Import elements feature:
- Navigate to the menu Tools → Import elements.
- Navigate to the folder with the desired elements (elements, termelements or webelements).
- Open the folder and select the .elm file.
- Click "Open".
The imported elements will be displayed on the Elements tab in the left sidebar. You will also see them in the dropdown list in the Interface* element parameter in the activity that requires picking elements.
How to interact with terminals
What is a terminal?
A computer terminal is an electronic or electromechanical hardware device that can be used for entering data into, and transcribing data from, a computer or a computing system. A terminal emulator is a computer program that emulates a computer terminal within some other display architecture.
ElectroNeek software is integrated with IBM Personal Communications terminal emulator which allows users to work with different midrange computers families including IBM AS/400 (iSeries).
How to get started?
The first step is to download and install the terminal emulator. ElectroNeek software supports working with IBM Personal Communications emulator. To download the trial version, follow this link, sign up and fill in the short survey. The next opened page will show you two versions available to download. Make sure that you download IBM Personal Communications (PCOMM) v14.0 for Windows Multilingual Trial version. The 64-bit version is not supported by ElectroNeek at the moment.
What is next?
When the terminal is downloaded, install it on your computer. The installation process is simple - follow the instructions, do not change any default settings.
When the terminal is installed, launch it. At the end of this article you will find the attached file (nasa.ws). This file is used to connect to the server using a terminal emulator. Run this file with a double click.
Now you can try interacting with this terminal: type “1” and press “Enter”. There you will see information about the planet Mercury.
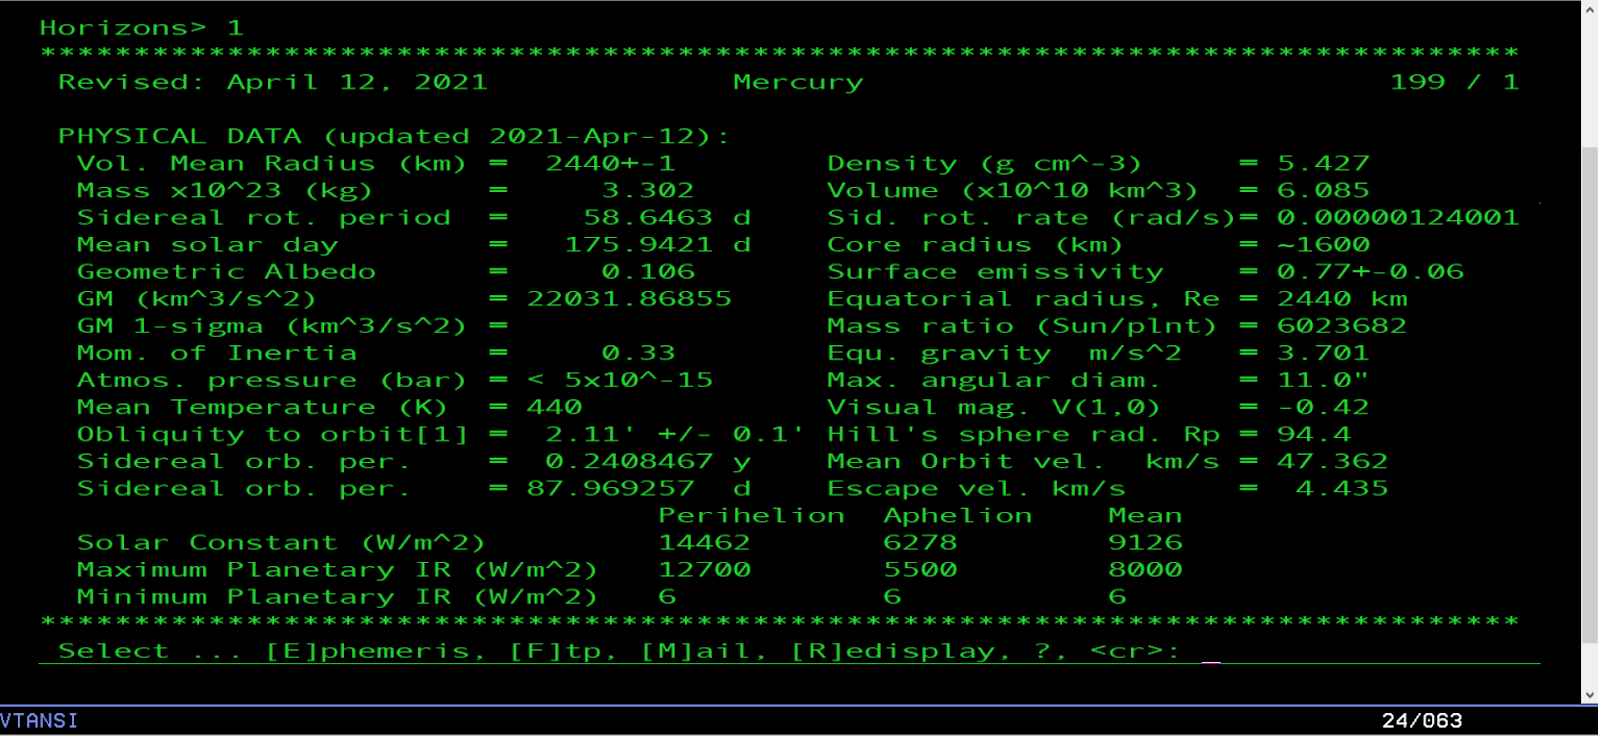
Connecting to terminals in Studio Pro
ElectroNeek automatically connects to the IBM Personal Communications emulator as long as the emulator is running and connected to the server. The emulator must be running in a single instance.
In this way, you can go straight to work with the actions from the “Terminal” section. Drag and drop any of them onto the canvas, such as "Input from keyboard". On the right side, you'll see a "Pick New Element" button, and clicking on it will open a special tool, Terminal Picker. This tool displays the same thing that the connected server displays in the emulator (without color rendering).
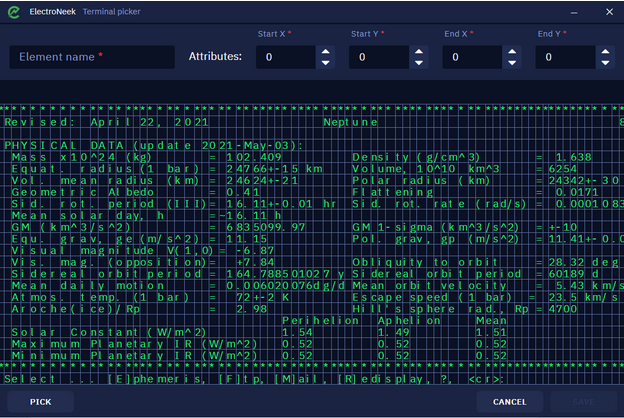
Specify the region on the Terminal Picker screen that you want to interact with. To do this, press the "Pick" button and adjust the X and Y coordinates to indicate the region you want. In addition to this method of setting coordinates, you can also press and hold the left mouse button and select the desired region on the terminal screen.

After that, you can then exit Terminal Picker and make sure that the bot is working correctly.
- Download nasa.ws.
Desktop and browser recorders
Introduction
Studio Pro features two tools meant to simplify working with elements: Desktop Recorder and Browser Recorder. They allow you to create a sequence of interaction with elements without the need to define each element separately.
How to launch the tool
In this section, we will go through the usage of both Desktop and Browser recorders, because the process of working with them is pretty much the same. The only and crucial difference is that the Desktop recorder is used to work with desktop apps, whereas the Browser recorder interacts with browsers.
To open the tool, navigate to Tools → Process recorder → Desktop/Browser.
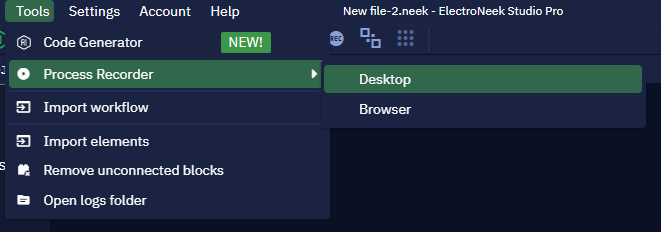
You can also start the tool by clicking on the "REC" icon in the top toolbar.
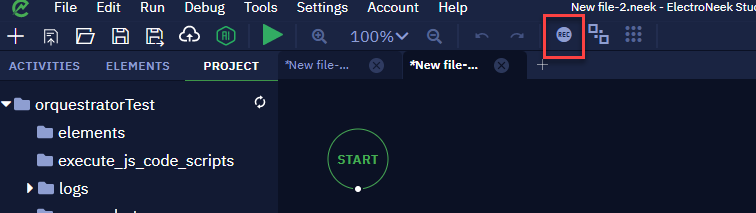
After opening the Desktop/Browser recorder, you will get into the selecting mode. Studio Pro will minimize and you will see a tool status window:
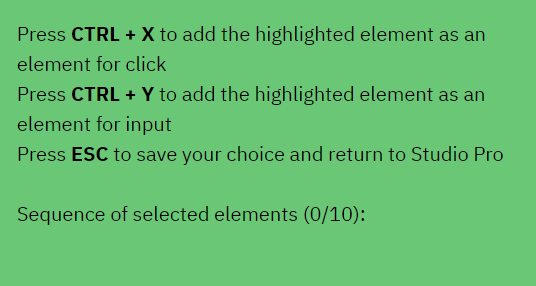
The status window looks the same for both recorders
Now you can start creating a sequence. There are two selection options: you can select an element to be clicked or an input field to be filled with a value.
To select an element to be clicked:
- Point the mouse cursor on the element
- Press CTRL+X
Create a sequence of clicks by just repeating the actions described above.
To select an input field to be filled:
- Point the mouse cursor on the input field
- Press CTRL+Y
Create a sequence of inputs by just repeating the actions described above.
A summary of the sequence of elements is displayed in the tool status Window.
NoteYou cannot select more than ten elements at once. After selecting the last (the tenth) element, you will automatically return to Studio Pro. If you need to select more elements, just open the Desktop Recorder tool again and create a new sequence.
When you are done with selecting elements, press ESC to save the elements and return to Studio Pro.
Result
As a result, you will see activity blocks on the canvas. The only thing left to be done is to fill in the "Value" parameter of the Input to desktop app or Input to browser activity.
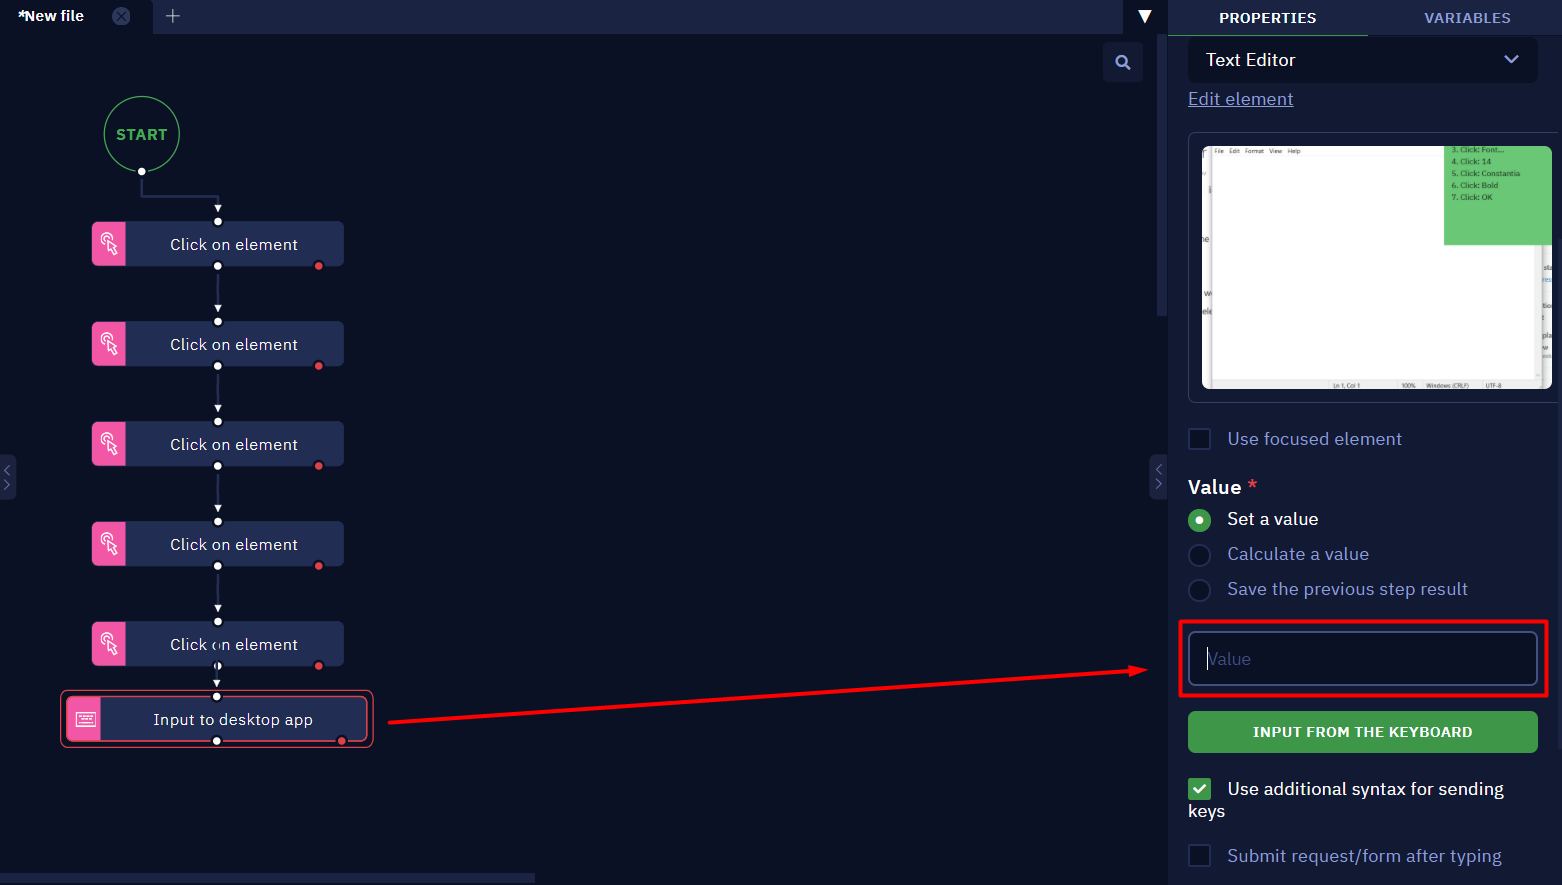
Example
Here is an example of a workflow created with Desktop Recorder.
Let us create a simple bot that will open Notepad, change font and font size and input the "Hello, world!" text.
- Open Studio Pro, log in, and create a new file (as a project or in a "Playground" mode).
- Put an Open application activity block on the canvas and select Notepad to be opened.
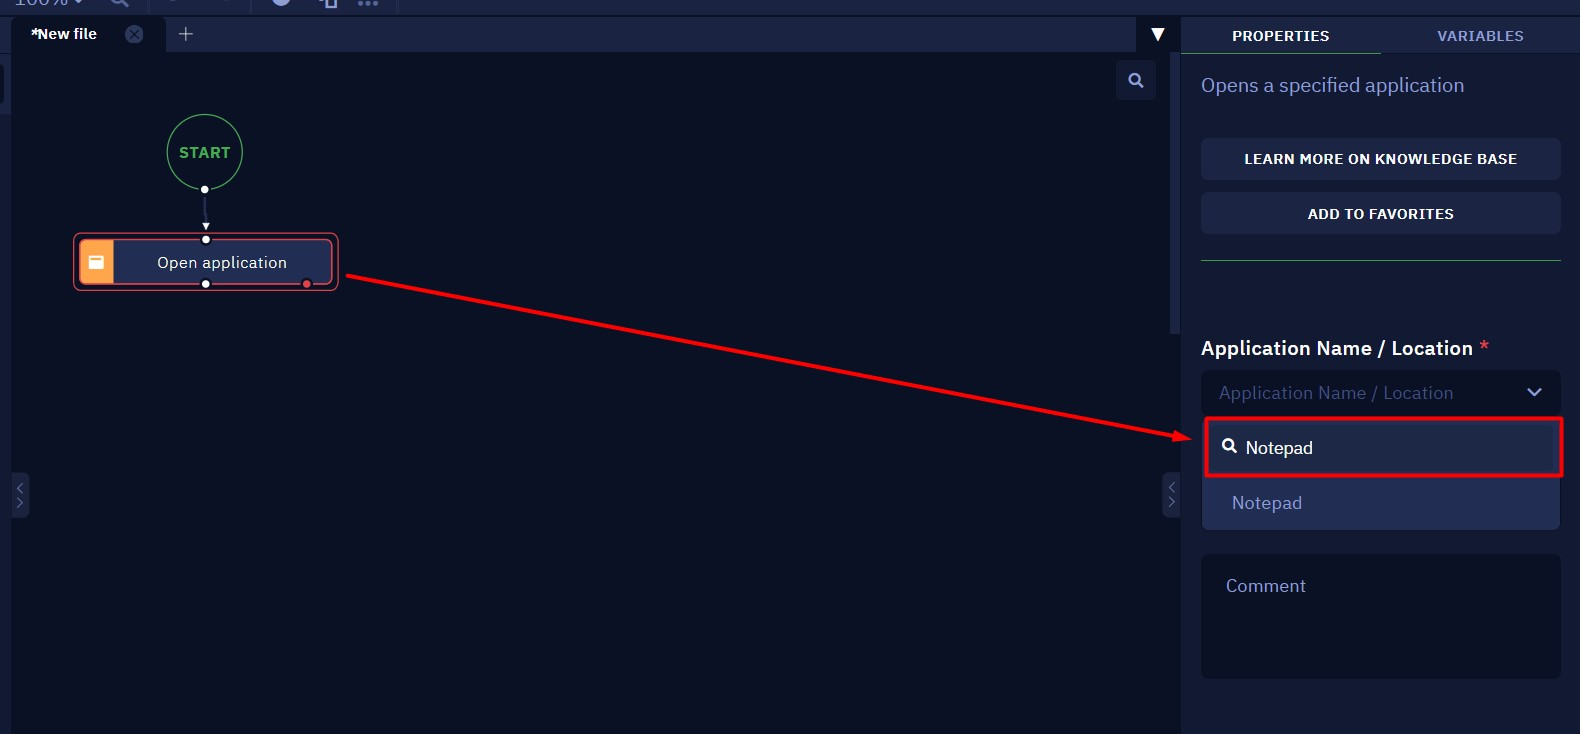
- Navigate to the menu "Tools" → "Process recorder" → "Desktop".

- Create a sequence of clicks:
- Format → Font → 14 → Times New Roman → Bold → OK
NoteDon't hurry with selecting the elements. After each selection, wait until the action is displayed in the "Sequence of selected elements" in the status window.
- Select an input field.
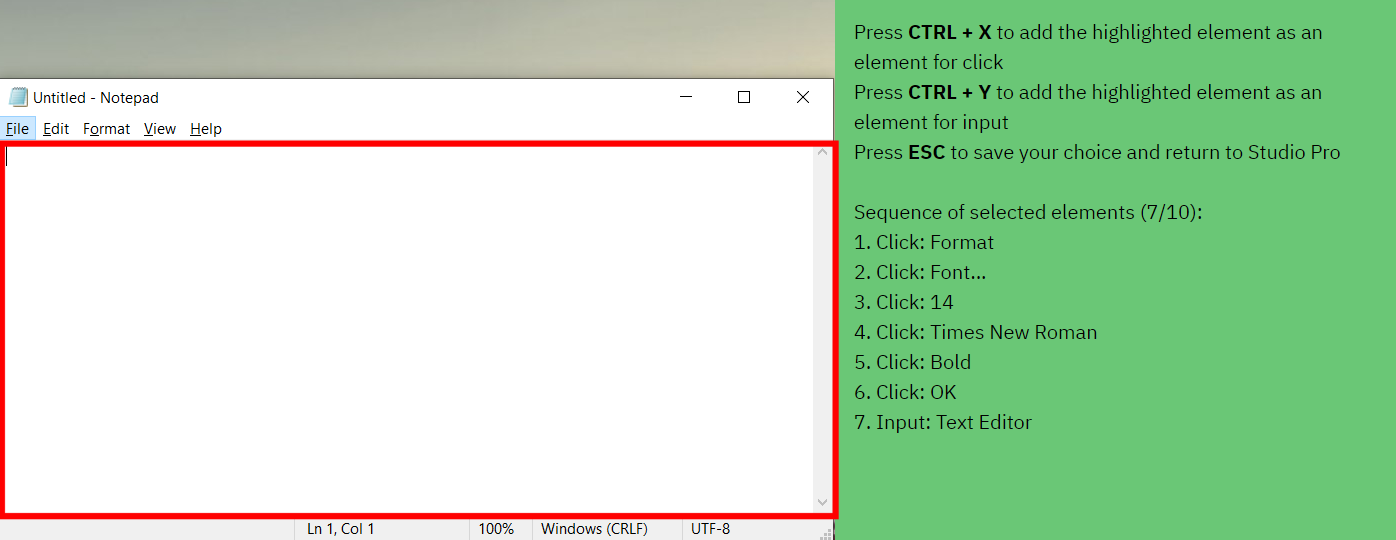
- Press ESC to finish working with the Recorder.
- Navigate to the Input to desktop app activity and type "
Hello, world!" text into the "Value" parameter. - Run the bot. If everything is done correctly, you will see the text with correct formatting in the input field.
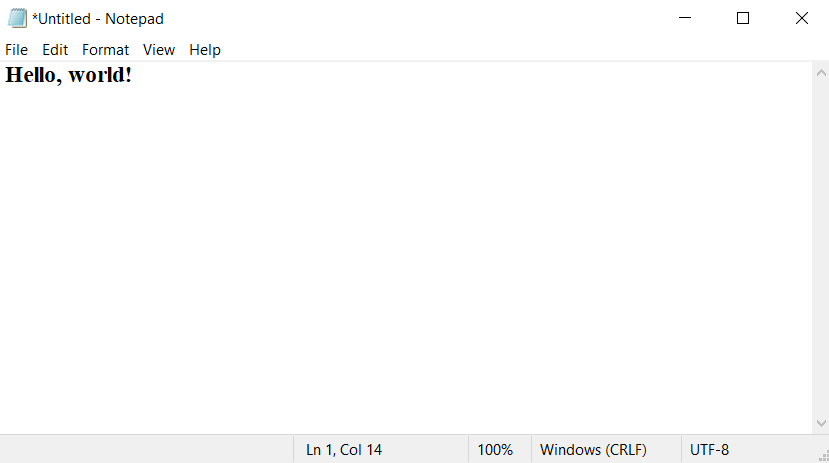
How to set activities' parameters
Introduction
Activity blocks in Studio Pro require you to specify certain parameters in order to perform the action correctly. These can be input boxes, buttons, radio buttons, checkboxes or drop-down lists.
Parameters that are mandatory for an activity are indicated by a red asterisk (*). If the mandatory parameter is not specified, then:
- When you deselect the activity block, an unfilled parameter will get highlighted in the parameter section, and the "!" symbol will appears in the activity block.

- The workflow will not be executed.
Depending on the function to be performed, the activity parameters may differ.
In this article we will review the principles of the basic parameters and examples of their use.
Assigning a certain value
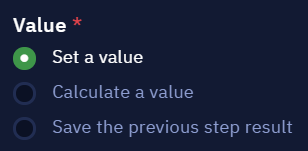
Many activities involve assigning a value to a parameter. For example, in the Input to desktop app activity, you must specify the text you want to enter.
Most frequently, when setting a value, you must select one of three options:
- Set a value
- Calculate a value
- Save the previous step result
Let's take a closer look at these options.
Set a value
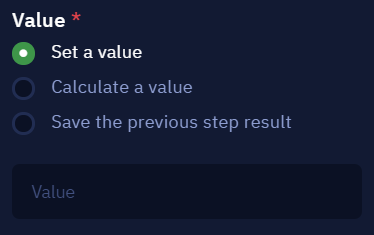
This option means that anything entered in the "Value" field will be interpreted as a string or number. For example, if you type The city of New York, the value will automatically be interpreted as a string (text). If you write a number, such as 123, the value will be interpreted as a number.
The table below shows some examples of interpretations.
| Input value | Type | Output value |
|---|---|---|
831 | Number | 831 |
Contragent name | String | "Contragent name" |
213+932 | String | "213 + 932" |
true | String | "true" |
“Today ” + new Date() | String | "\"Today\" + new Date ()" |
[1,2,3,4].filter(x => x >2) | String | "[1,2,3,4].filter(x => x >2)" |
Calculate a value
This option allows you to calculate a value using JavaScript syntax.
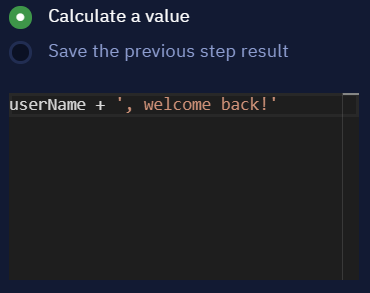
For example, if you set the contragent_exists variable to true, then the variable will take the boolean type and value true. If you write "The city of New York" in the city variable, it will become a string.
The table below shows the results for the same examples as in the previous table.
| Input value | Type | Output value |
|---|---|---|
831 | Number | 831 |
Contragent name | Undefined | Error "Unexpected identifier" |
213+932 | Number | 1145 |
true | Boolean | true |
“Today ” + new Date() | String | "Today Thu Jul 06 2021 15:33:24 GMT+0300 (MSK)" |
[1,2,3,4].filter(x => x >2) | Array of numbers | "[1,2,3,4].filter(x => x >2)" |
If you use the "Calculate a value" option, it is also possible to use additional libraries - lodash, moment.js and mustache:
//Examples of references to lodash, moment, mustache
\_.has(); //lodash
moment().add(); //moment
mustache.render(); //mustache
Set the previous step result
If the "Save the previous step result" option is selected, the value returned by the activity from the previous step will be used as the value (if the activity does not return a result, the value will not be written).
Suppose we need to read a text from a file (without changing it in any way) and send an email containing this text. The algorithm will look like this:
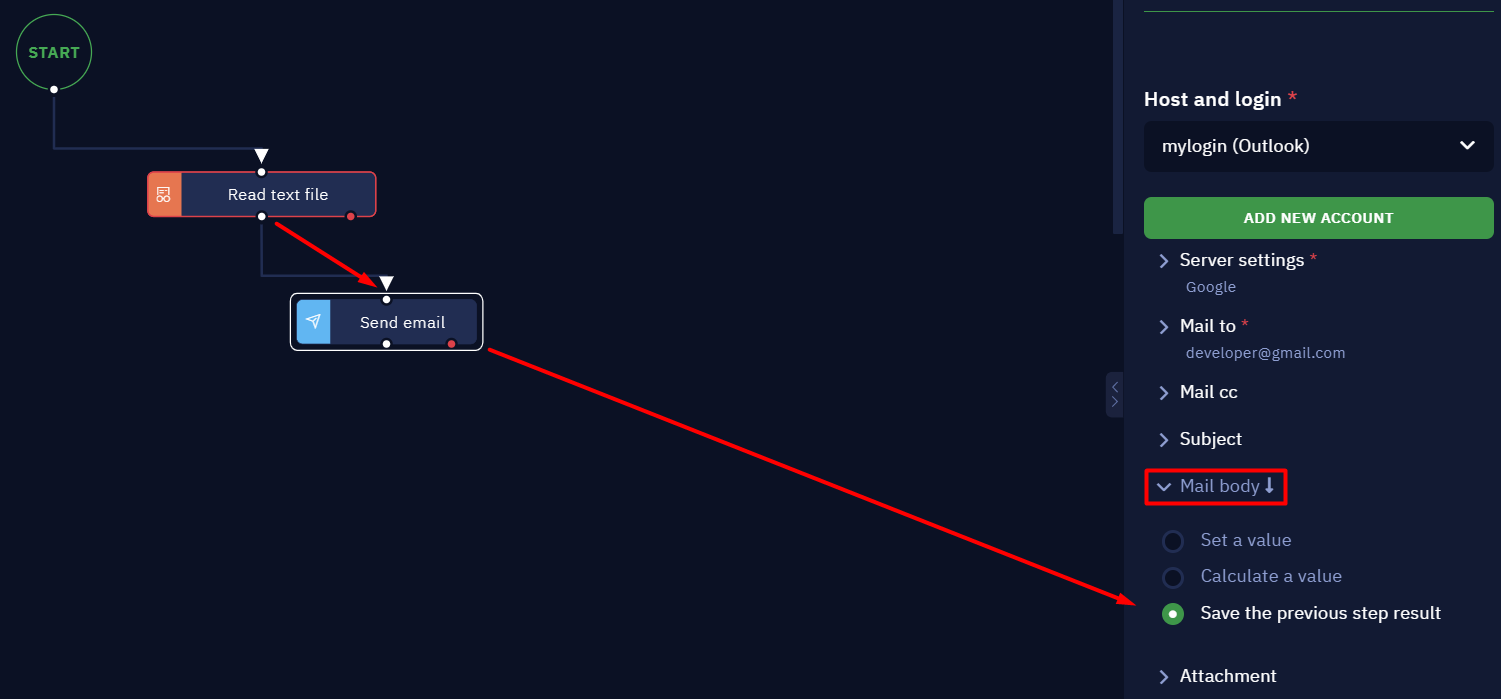
This simple workflow contains two activities:
- Read text file — this activitiy reads the text from a file.
- Send email — this activity sends an email. It takes the text read from the file as the body of the email, since we select the "Save the previous step result" option in the "Mail body" parameter.
How to work with the Elements tab
Introduction
Some activities in Studio Pro involve working with elements of desktop apps, browser, or terminal. When you define an interface element you want using the Desktop Picker, Browser Picker, or Terminal Picker, that element will be stored both in the parameters of the activity itself and in the Elements tab, allowing you to easily work with the already selected elements, modify them, or define new ones.
Elements tab
You can find the "Elements" tab in the left side of the Studio Pro interface, next to the "Activities" tab.
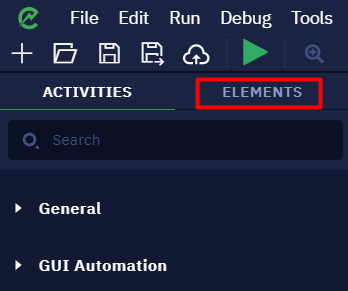
Navigate to this panel to see a list of already defined elements. If you have not yet selected any elements within your algorithm, the tab will be empty. The screenshot below shows the "Elements" panel with a defined element of the "Notepad".
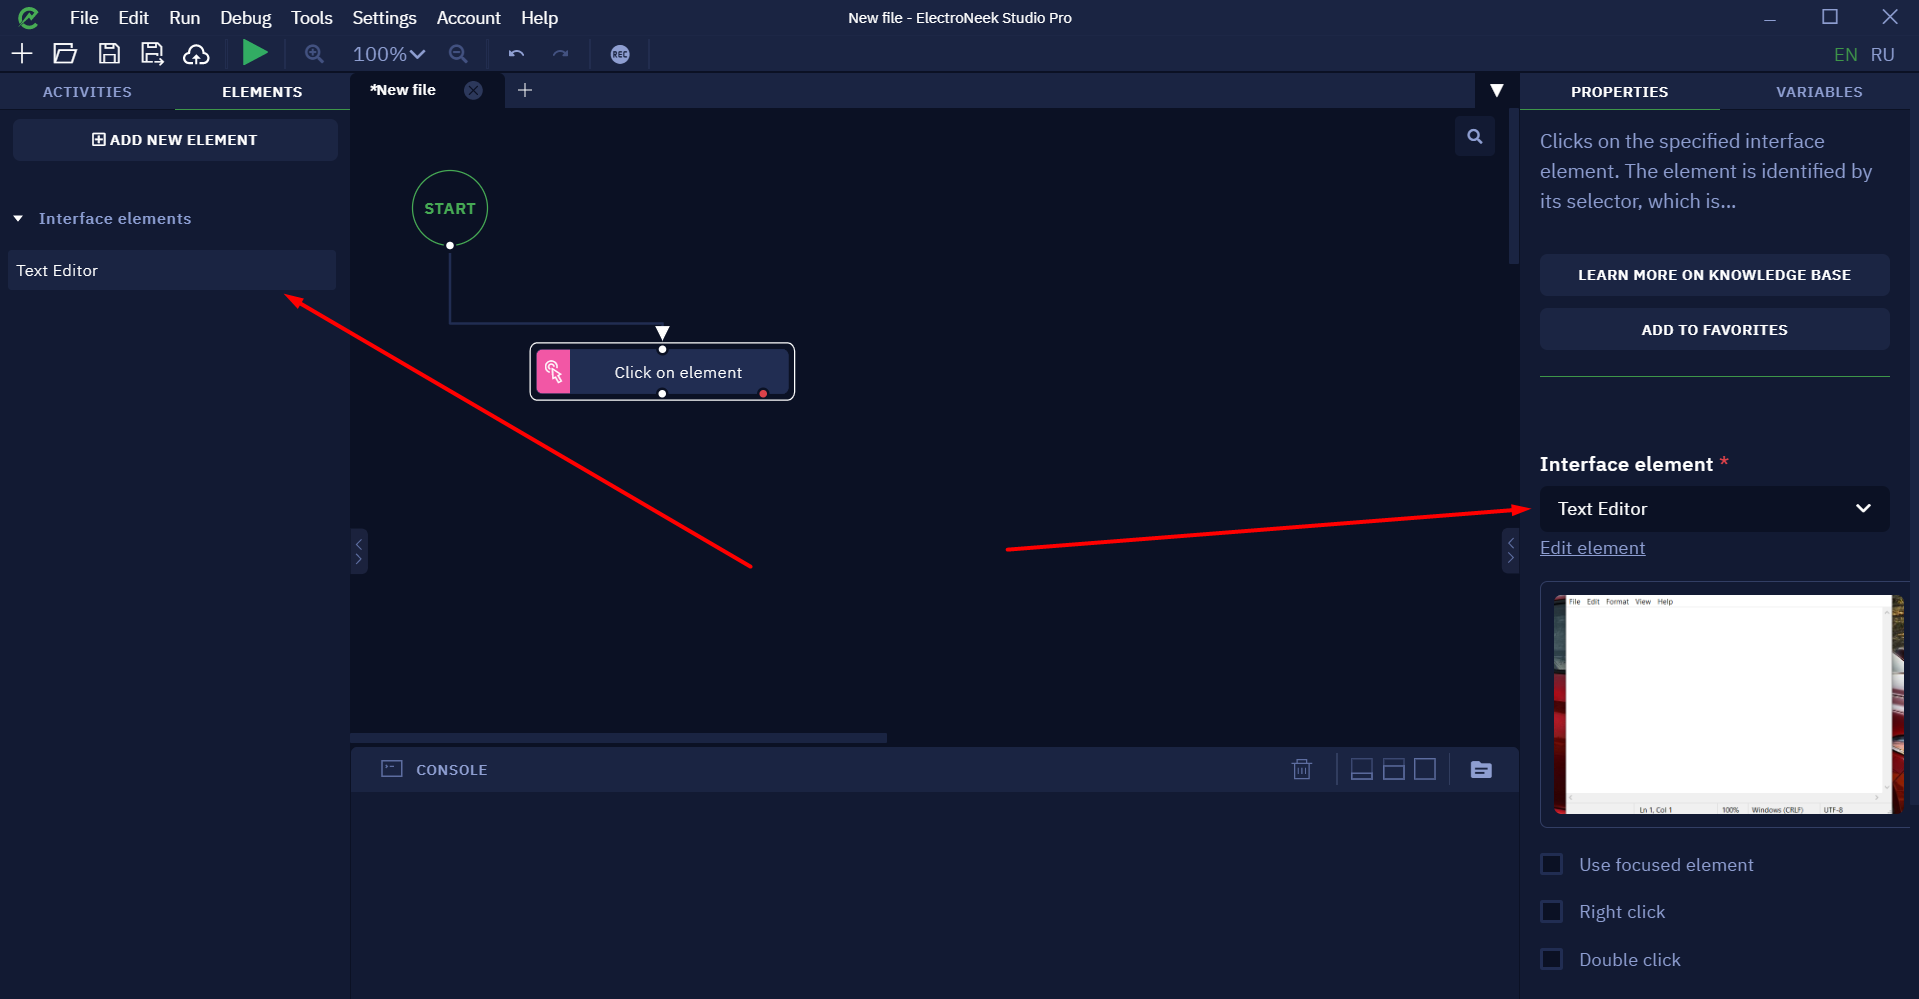
Click the button with the name of the element. Look at the screenshot below: in the right panel you will see the properties of the element. You can see the same properties in the Browser Picker when defining the element for the first time.
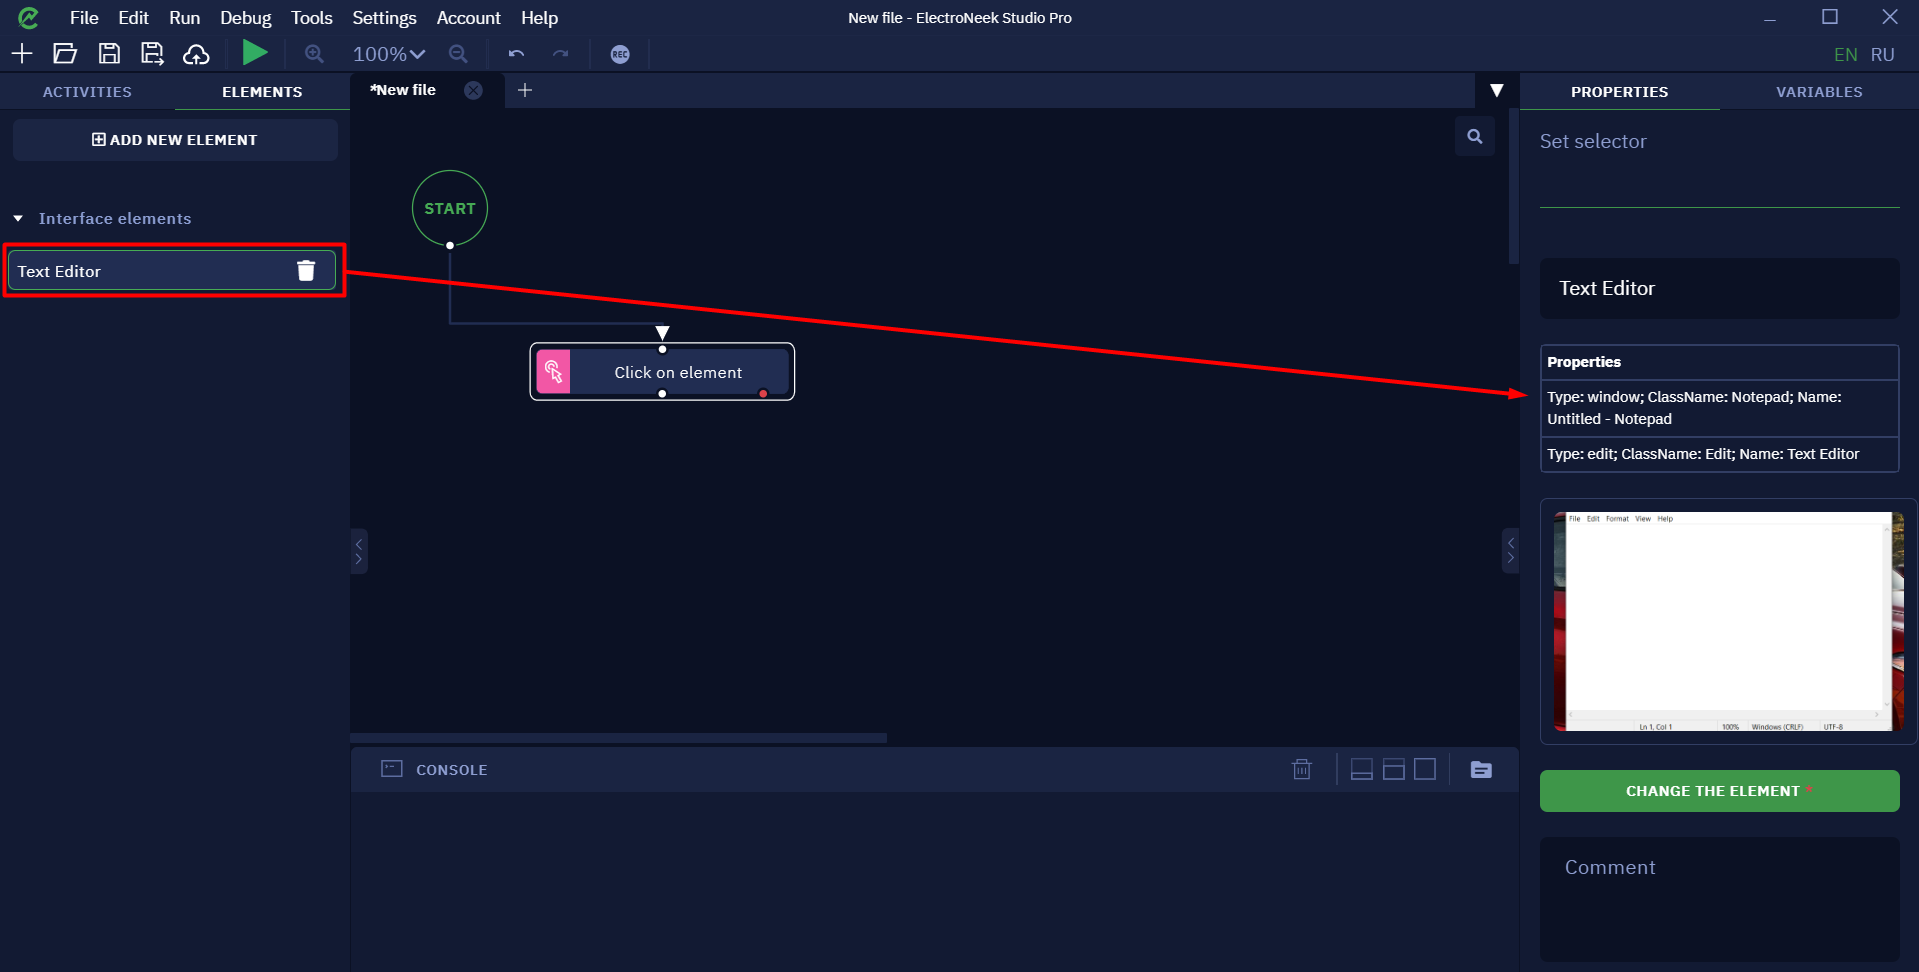
Changing elements
To replace an already defined item, click the CHANGE THE ELEMENT button.

This will open the Browser Picker window, where you can replace the selected item by clicking on the REPLACE ELEMENT button. The advanced options allow you to configure the selected item in more detail. The TEST button helps to find out if the item is defined correctly if any of its attributes have been changed.
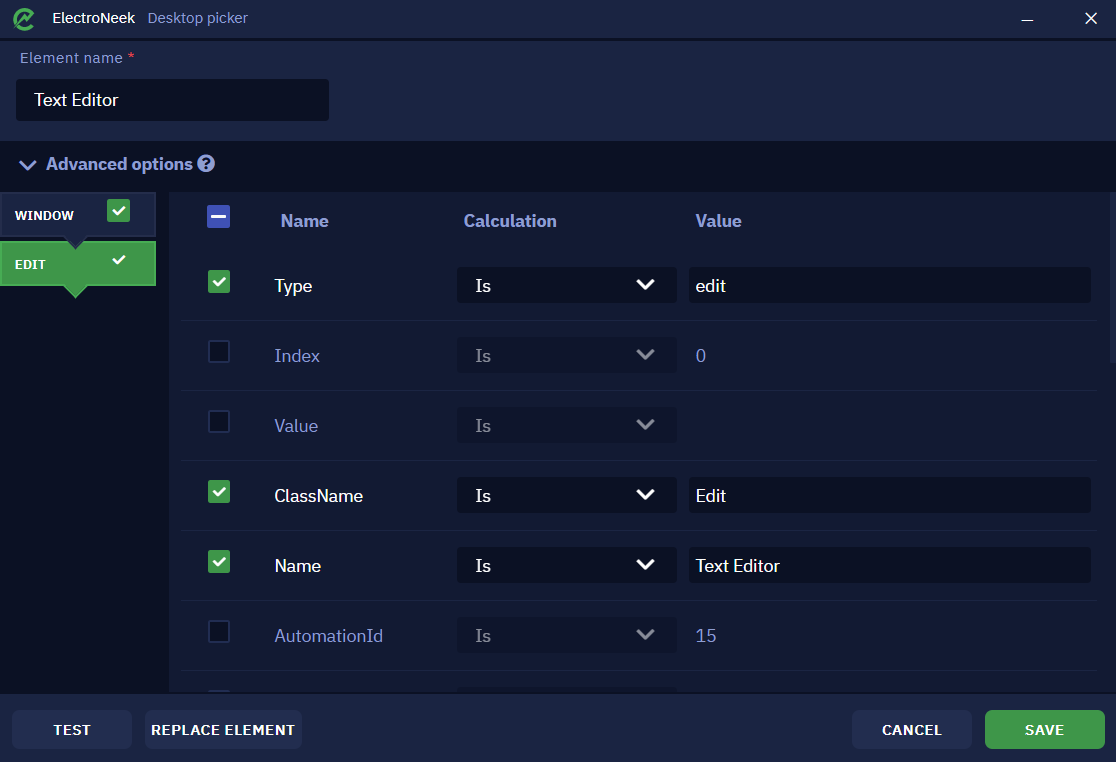
Adding new elements
To define a new element, click on the ADD NEW ELEMENT button. Select the type of element you want from the drop-down list.
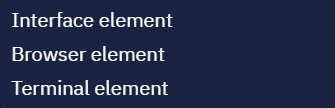
The element appears in the toolbar. Now you need to define the element directly in the application, browser, or terminal interface. You can do this by using the CHANGE THE ELEMENT button in the right toolbar. There you can also specify the name of the new element or leave a comment to it. Clicking the CHANGE ELEMENT button opens the Browser Picker window.

Note that the names of the elements in the "Elements" tab are displayed in different colors. White color means that this element is used in this particular file. An element name displayed in a dimmer color is not used in this file (it may not yet be defined through the Picker or imported from another file).
Click the PICK button to define a new element.
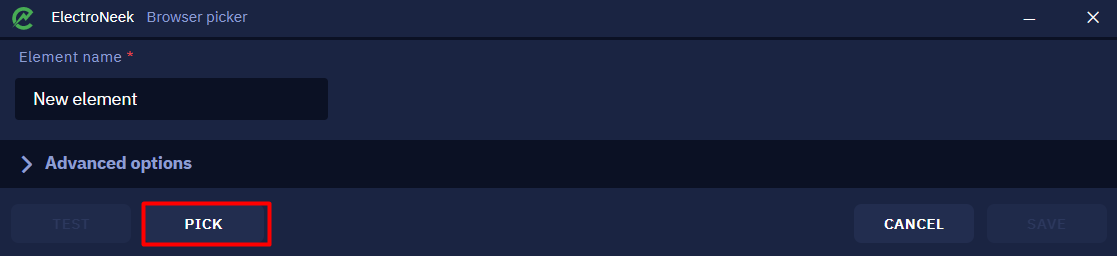
Importing elements
Studio Pro also allows you to import elements from other workflows. To do this, navigate to the tab Tools → Import elements. The file explorer will appear. Find the folder where the algorithm with the selected elements is saved. Inside this folder, you will see the folders "elements" (for desktop elements), "webelements" (for browser elements), or "termelements" (for terminal interface elements). After that you will only need to select one or more elements and click OPEN. The imported elements will appear in the "Elements" tab.
After you have selected an element, you can return to the parameters of the activity. All the defined items will appear in the drop-down list in the "Interface element" parameter. This way you can switch between the elements and select the one you want at the moment.
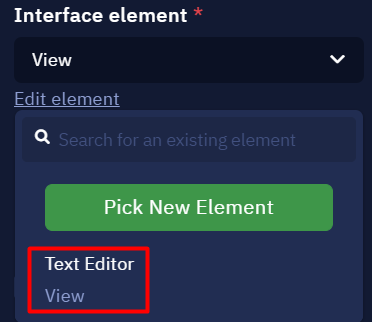
Deleting elements
To delete an element, click on the corresponding icon next to the name of the item. Keep in mind that if you delete an item that is in the current workflow (the name of the item is highlighted in white), you will disrupt the action, which means that the bot will not be able to work as you expect.
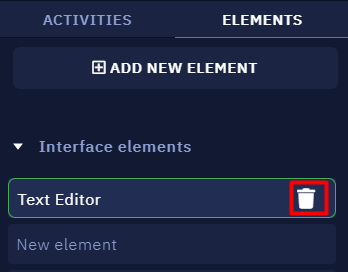
Click OK in the pop-up window.
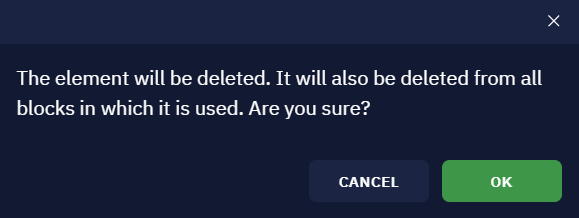
How to work with File History
About the Feature
NoteThis feature is currently in the BETA stageThe purpose is to conduct testing and receive feedback. The final version may dramatically change as well as the sales policy with respect to this feature. Should you encounter any bugs, glitches, lack of functionality, or other problems with the beta feature, please send an email to our technical support.**
Description
"File history..." - is a tool that allows you to work with local versions of workflow. This is useful when developing and testing a bot: you do not need to delete or create blocks of actions all over again, configuring their parameters, instead you can simply switch between versions of the workflow and compare the performance of the algorithm in its different states.
You can find this tool in the "File" tab → "File History...".
The file version is saved every time you save a .neek file. However, if you save a file several times in a row without making any changes to that file, the new version will be saved once, not as many times as the "Save" button is pressed.
When you transfer the file, the versions will be saved. If you use the "Save as" option, the history will be reset.
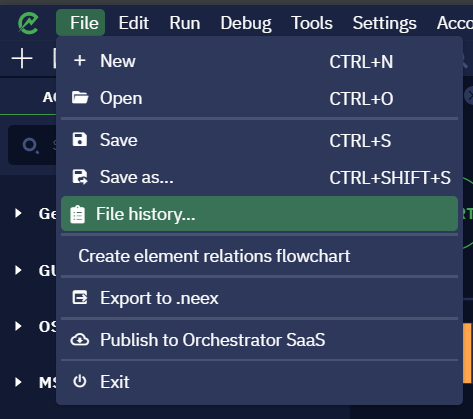
Working with the tool
The interface of the tool looks like this:
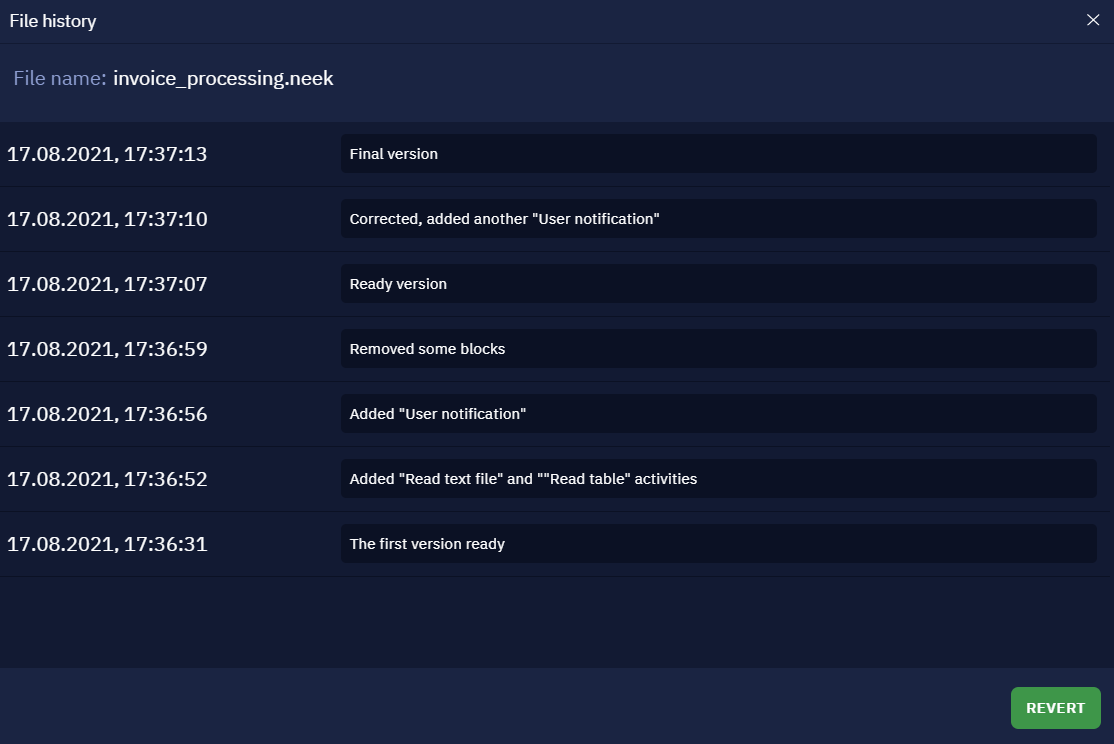
In this screenshot, we see seven saved versions of the algorithm. Each version has the date and time it was saved, as well as a field for entering a comment, which you can leave for easy navigation through the versions. By default, the comment field is empty.
To return the bot to the state of the version you need, left-click on the line of this version and then click "Revert". You will see the canvas and blocks of the algorithm in the state at the time this version was saved.
If you have restored a version of the file and want to keep that version, be sure to save the file. Otherwise, the next time you open the file, you will see it in the previous saved state (while the restored version will still be available in the history of the file).
Java desktop applications
NoteThis feature is currently in the **beta stage. The purpose is to conduct testing and receive feedback. The final version may dramatically change as well as the sales policy with respect to this feature. Should you encounter any bugs, glitches, lack of functionality, or other problems with the beta feature, please send an email to our technical support.
The ElectroNeek platform allows you to create bots that can interact with desktop applications written in Java.
No special action is required for the bot to interact with such applications: you can choose which part of the application (button, input field) the bot should interact with using the Desktop Picker tool.
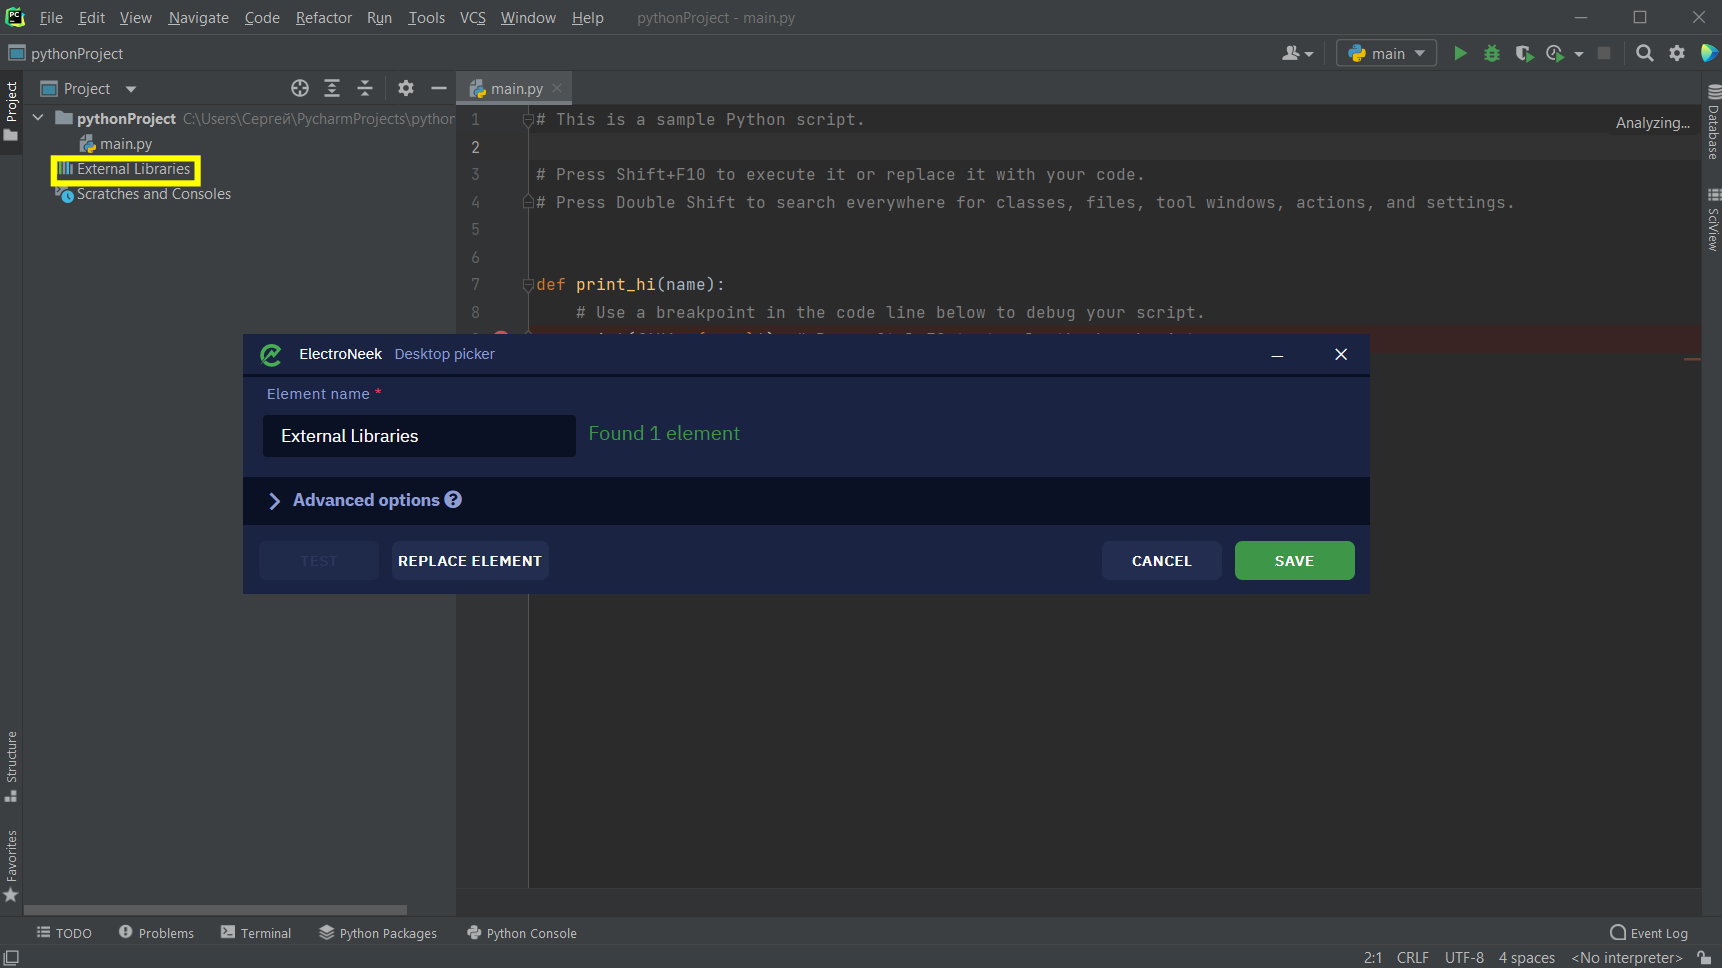
Example of Desktop Picker recognizing the element of the PyCharm application interface
The Java Access Bridge needed to interact with applications is installed automatically with the platform (Studio Pro + Bot Runner).
Studio Pro supports the most popular frameworks: AWT, Swing, SWT, JavaFX.
How to activate ABBYY OCR
Introduction
This page contains instructions on how to get a trial account to use the OCR technology from 'ABBYY'
To start using the ABBYY OCR technology:
- Create an account and get the application ID and password for the OCR.
- Add the application ID and password to Studio Pro.
These steps are described in detail below.
How to create an account
Follow this link to request a trial version of ABBYY OCR. When the account is set up, you will receive an email containing the Application ID and Application Password. Use these values to fill in the credentials in Studio Pro or Bot Runner:
Studio Pro
- Navigate to Settings → Credential Management → Services → ABBYY OCR
- Set up the Application ID and Application Password.
Bot Runner
- Launch Bot Runner.
- Right-click on the icon in the tray.
- Navigate to Settings → Services → ABBYY OCR.
- Set up the Application ID and Application Password.
NoteIf after performing the steps below you cannot interact with the ABBYY Cloud OCR activity, please restart Studio Pro and try again.
Once the activation is complete, the ABBY Cloud OCR activity will become available in the activities list#
Studio Pro Hotkeys
Hotkeys are the keys or key combinations used for the software to perform a preprogrammed action.
File
| Hotkey | Function |
|---|---|
| CTRL+N | Create new file |
| CTRL+O | Open file |
| CTRL+S | Save the current version of the file. If the file is saved for the first time, there will appear a file explorer window where you can specify the directory where to save the file |
| CTRL+SHIFT+S | Save as. There will always appear a file explorer window. That is how you can re-save the current file with the new name or replace the previous file |
| F5 | Run the bot |
| CTRL+[ | Stop the bot |
| ALT+F4 | Exit Studio Pro |
Edit
| Hotkey | Function |
|---|---|
| CTRL+Z (CTRL+SHIFT+Z) | Revert the last action |
| CTRL+Y | Repeat the last action |
| CTRL+X | Cut the block and put it to the clipboard |
| CTRL+C | Copy the selected block to the clipboard |
| CTRL+V | Paste the copied or cut block from the clipboard to the visible part of the canvas |
| CTRL+F | Find. Find the required block on the canvas by its name |
| CTRL+A | Select all the blocks on the canvas |
| DEL | Delete the selected block |
Additional Actions
| Hotkey | Function |
|---|---|
| CTRL+SCROLL UP (MOUSE) | Zoom in |
| CTRL+SCROLL DOWN (MOUSE) | Zoom out |
| CTRL+D | Deactivate the selected block |
| F9 | Run in Debug Mode |
| F6 | Resume Debug Mode |
| F7 | Step into |
| F8 | Step over |
| F8+SHIFT | Step out |