
AI Workflows
Introduction
The AI Workflows section is at the core of the AI Agent Management module. This is where you will build, manage and deploy your workflows. There are many capabilities in this page, but let's start with a more general question:
What is an AI Workflow?
An AI Workflow is a Cloud-native automation that combines abilities from mutliple kinds of tools and actors, namely:
- AI Agents
- SaaS applications, via API-based connectors
- Humans, through Chat or Forms
- Intelligent Document Processing models created in ElectroNeek's IntelliDocs
- RPA Bots hosted in ElectroNeek's Orchestrator
AI Workflows rely on a type of connector called Pieces.
Pieces
Each application, interface or method that AI Workflows can integrate has its connection, filters, parameters and data structure all defined in at least one Piece. ElectroNeek provides a massive library of +500 Pieces for integrations of all kinds.
An AI Workflow has 2 main components, both of which rely on Pieces for their use: Triggers and Actions.
A Piece may have both Triggers and Actions -- for example, the Gmail Piece has the "New Email" Trigger, as well as the "Send Email" Action (among many others).
Triggers
Triggers are events that are monitored by our system to determine when your AI Workflows must begin their execution, and which date must be obtained for it to perform its tasks. These events can come from different sources, including SaaS applications, human inputs, webhooks, SFTP/FTP servers, email servers, ElectroNeek Forms, and many more.
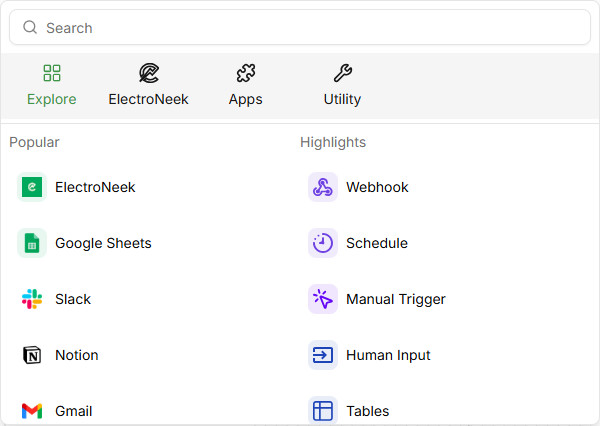
There are 3 types of Triggers in ElectroNeek AI Workflows:
- ElectroNeek Triggers: Triggers that react to events ocurring in ElectroNeek-specific products, such as Public Forms.
- App Triggers: Triggers that react to events ocurring in connected SaaS applications, such as Gmail, Google Sheet, Google Calendar, Slack, Notion, Zoho, Microsoft Outlook, Microsoft OneDrive, among many others.
- Utility Triggers: Triggers that react to generic events not tied to any specific apps, including human inputs, schedules, SFTP/FTP, webhooks and others.
Aside from these 3 categories, an "Explore" section is provided, where you can see the most popular integrations and some highlights.
Actions
Actions are steps that the workflow performs after the Trigger has occurred. Every Action can use data from any previous step, as well as from the Trigger, as input values -- and each Action also provides output values that can be passed on to the following steps.
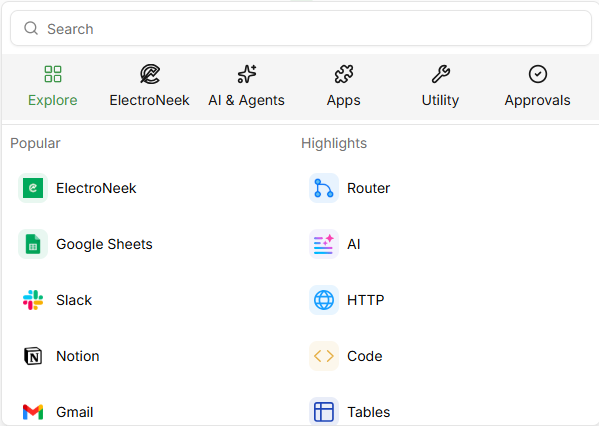
There are 5 types of Actions in ElectroNeek AI Workflows:
- ElectroNeek Actions: Actions performed on natively-integrated ElectroNeek, including RPA bots and IntelliDocs.
- AI & Agent Actions: Actions that rely on Artificial Intelligence to perform human-like tasks.
- App Actions: Actions performed on connected SaaS applications, such as Gmail, Google Sheet, Google Calendar, Slack, Notion, Zoho, Microsoft Outlook, Microsoft OneDrive, among many others.
- Utility Acctions: Generic actions that are not performed within a specific app, such as executing code, performing custom API calls, and adding logic structures (such as loops and conditions) to your workflows, among others.
- Approval Actions: Actions performed on specific messaging apps, including Slack, Teams, Gmail and Microsoft Outlook, specifically oriented towards requesting approval from users.
Aside from these 5 categories, an "Explore" section is provided, where you can see the most popular integrations and some highlights.
How to create an AI Workflow
In order to create an AI Workflow, a user must perform the following steps:
-
Open the ElectroNeek User Portal and log in.
-
Navigate to AI Agent Management > AI Workflows.
-
Click the Create New button, and then select New Flow.
-
You are sent to the AI Workflow Editor. As soon as it loads, the workflow's title is automatically selected, allowing you to change it from the default "Untitled".
-
Start by adding a Trigger to your flow. Click the "Select Trigger" block located in the canvas, then select any Trigger from the available categories. For example, Gmail > New Email.
-
A tab shows up on the right of the screen where you can edit the Trigger's properties. If your Trigger relies on a connection to an application, then the Connection property will be the first one to fill. Set up your Connection by selecting an existing one, or clicking "Create Connection".
- If you are creating a new Connection, provide it a name and follow the provided steps and/or instructions to connect your account. Then click the Save button.
-
Set up any other properties on your Trigger. Make sure to set up all mandatory properties, marked with an asterisk (*). You can also edit the Trigger's name by clicking the pencil icon to its right.
-
Once you are done setting up the Trigger's properties, in most cases you need to test the Trigger and/or load some sample data. This is necessary not only to confirm that the Trigger works, but also for the steps in your workflow to have data to process and react to. You will see a button below the properties that allows you to do this.
Tests use real data!Keep in mind that in most cases, unless explicitly indicated so, testing your Triggers or Actions will fetch real data from your connected application, in accordance to the filters and/or properties you set up. If no match is found, the test will come back empty.
-
Once you Trigger is ready, add at least one step with an Action to your flow. You can do this by pressing the "+" button below the Trigger block in the canvas. Select any Action from the available categories. For example, Gmail > Send Email.
-
The tab on the right will now allow you to edit the Action's properties for this step. If your Action relies on a connection to an application, then the Connection property will be the first one to fill. Select an existing Connection or set up a new one.
-
Set up all relevant properties on your step. Make sure to set up all mandatory properties, marked with an asterisk (*). You can also edit the step's name by clicking the pencil icon to its right. This helps differentiate steps that might use the same Action but for different purposes.
-
Once you are done setting up the step's properties, in most cases you need to test the step. This is necessary not only to confirm that the step works, but also for the next steps in your workflow to have data to process. You will see a Test Step button below the properties that allows you to do this.
-
Once all steps are added and tested, you can test the entire flow with the Test Flow button that appears at the top of the flow, above the Trigger.
-
You are now ready to Publish the flow. Publishing a flow allows it to start executing live Runs.
AI Workflow Editor overview
WIP - image with number indicators and explanation below
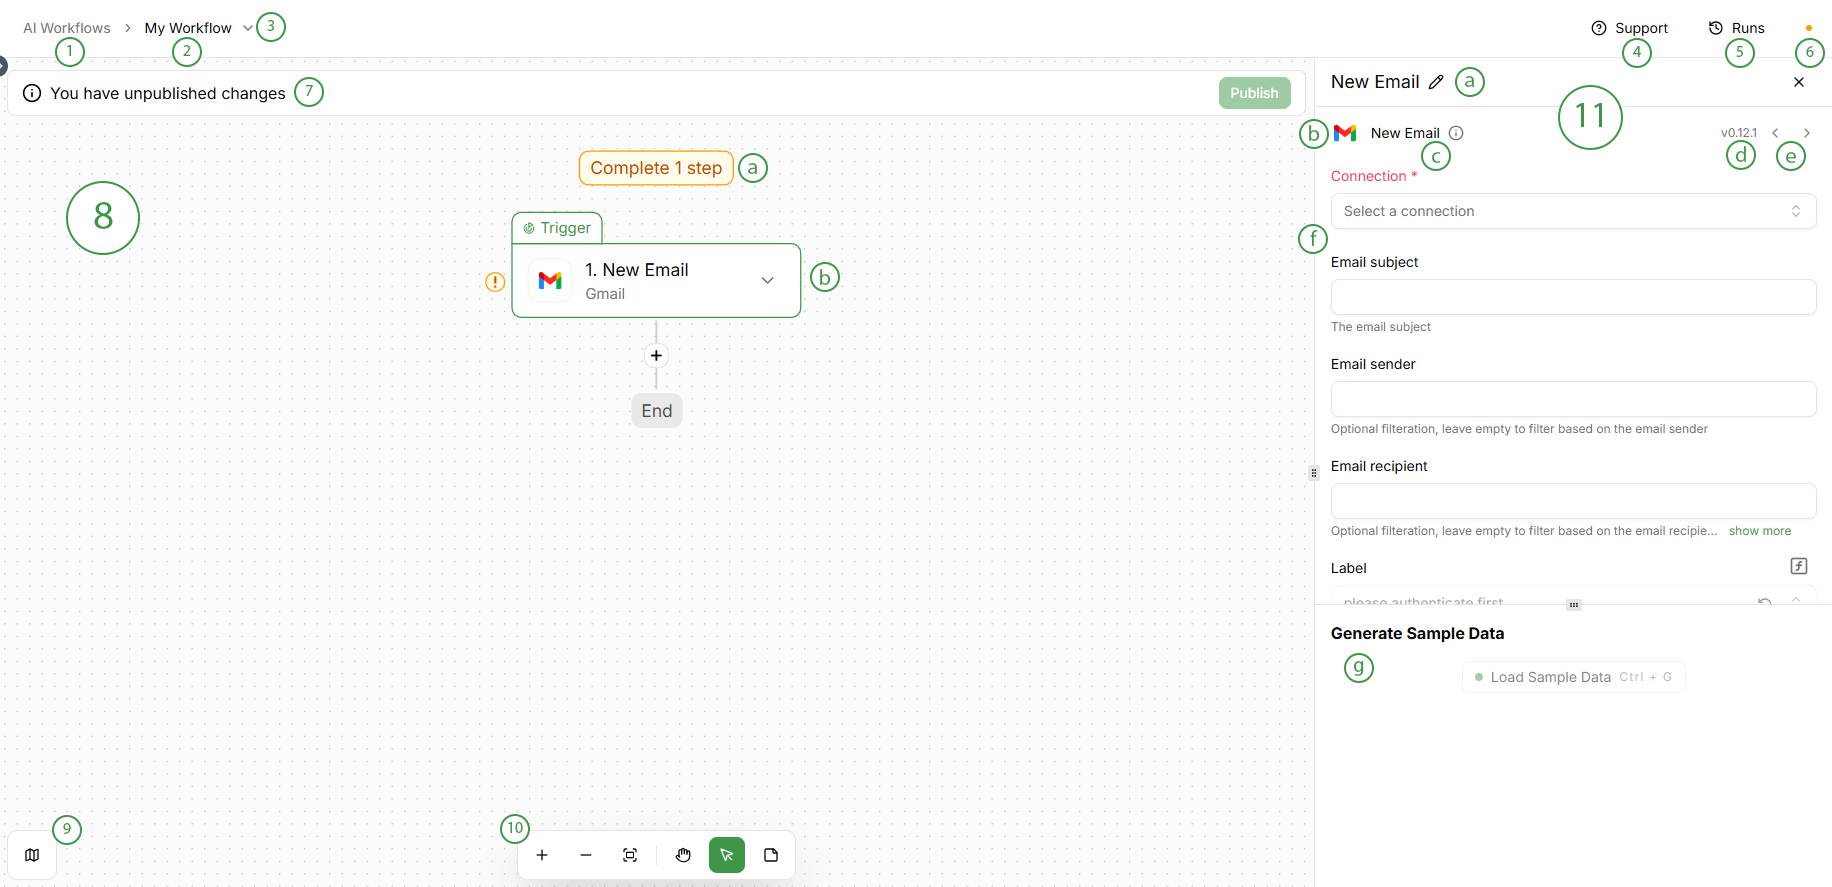
-
Link back to AI Workflows page
-
Flow title. You can edit it by clicking on it.
-
Flow actions arrow. The following options appear when clicking on it:
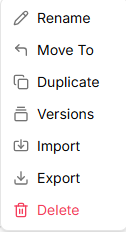
- Rename the flow
- Move To a folder
- Duplicate the flow
- Versions. See more details in the "Managing AI Workflows" section below.
- Import a flow from a JSON file to overwrite the current one
- Export the flow to a JSON file
- Delete the flow
-
Support. Redirects you to your ElectroNeek Portal's Support Center.,
-
Runs. View and manage your flow's runs. See more details in the "Managing AI Workflows" section below.
-
Flow status. Orange indicates Draft and green indicates Published.
- When the flow is published, a Status toggle appears to the right of this icon. This toggle allows changing the flow from active (turned on, ready to execute) to inactive (turned off).
- You will also see a Trigger type indicator that informs you at a glance of the kind of execution that this flow will have, including "Real time flow" (thunderbolt icon) for flows executed immediately when the Trigger occurs, and "Run every (...) minutes" (stopwatch icon) for flows that check for the Trigger every certain amount of minutes.
-
Notice bar. This bar will inform you if you have unpublished changes or if you're viewing a previous version of the flow.
-
Canvas. This is the area where the flow is designed. It includes the following elements:
- Indicator at the top, which shows the flow's readiness for testing (how many steps are missing), and when ready, becomes a button to test the entire flow.
- Steps. The actual blocks that make up the workflow. The first step is always the Trigger, and the ones after that are Actions. Right clicking a step provides options including:
- For Triggers: Replace, Paste After.
- For Actions: Replace, Copy, Duplicate, Skip, Paster After, Delete.
-
Minimap. Shows a miniature preview of the entire flow. You can also display it by pressing Ctrl+M.
-
Navigation bar. Allows for the following actions:
- Zoom in
- Zoom out
- Fit to view
- Grab mode (for moving around the canvas)
- Select mode (the default mode, for selecting steps to edit)
- Add note, which allows you to add personalized notes to your flow for easy readability. These notes support formatting and importing images via URL.
-
Properties tab. This resizeable tab on the right contains all the properties that the selected step contains for customization, as well as information on the current step. It includes:
- Step name, which is the Action name by default, but can be edited for clarity.
- Piece icon, representing the app that the Piece is a connector for.
- Action name
- Piece version
- Step navigation buttons, allowing you to navigate to the previous or next steps quickly.
- Step properties, including:
- Connection with the Piece's app, when applicable.
- Other properties, which allow for fields of different types (Text, Checkbox, Markdown, DateTime, Number, Static Dropdown, Static Multiple Dropdown, JSON, Dictionary, File, Arrays, Dynamic Dropdown, Dynamic Multi-Select Dropdown, and others.)
- Dynamic value button, represented by an "f" inside a square. This option allows for further personalizing the input of each property using variable names.
- Tooltips below each property.
- Generate Sample Data section. In this section you can test the step and view the test's output data.
No need to click SaveAll changes made to your AI Workflows are saved automatically.
Data Selector
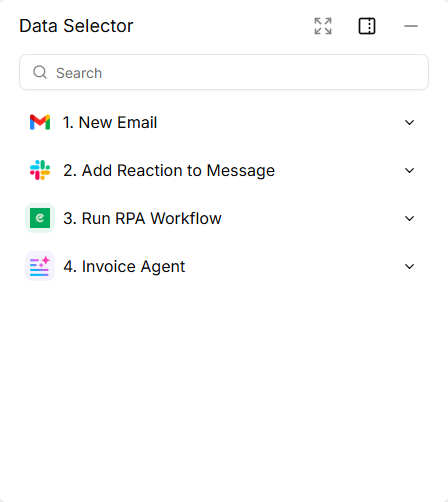
When entering data into any editable property in a step, you will see the Data Selector show up in a modal right next to the Properties tab. The Data Selector is automatically populated with all output values generated in all previous steps, including the Trigger.
If you haven't tested the steps in the "Generate Sample Data" section of their properties, you will see messages such as these:

After you test, you will see all of the step's data, organized as they are in the JSON response, like below:
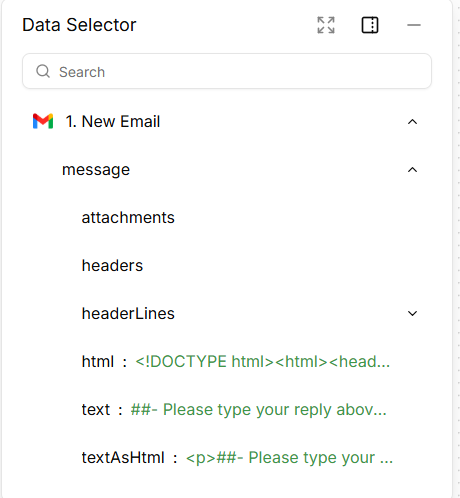
You can hover over each of these values and click "Insert" to add a dynamic reference to it in an editable property.
You can resize the Data Selector window using three modes: Expand (full-canvas view of the data), Dock (the default, smaller-size modal), and Minimize (hides the contents.)
Publishing an AI Workflow
When your flow is ready and you have tested it to your satisfaction, you can change its status from Draft to Published by clicking the Publish button.
When you edit an existing AI Workflow that is already in Published status, you will see a notice informing you that you have unpublished changes. These changes will save automatically, but will not impact any new Runs of the flow until you Publish the changes.
Each time you Publish a workflow, a new Version is created, and every time you run it, a new Run is created for it. See below for tips on how to manage each one.
Version control in AI Workflows
When you publish a new version of an AI Workflow, a Version is automatically created. You can view the version history of your flow by clicking on the Flow arrow menu (downward-pointing arrow on the right of the Flow name) and selecting "Versions".
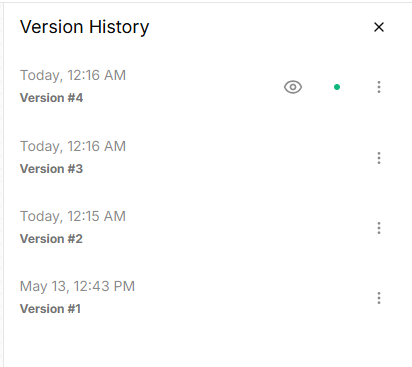
Versions are automatically numbered in sequence, and you can also quickly view the date and time when it was published. The "eye" icon indicates the version you are currently viewing in the canvas, and the green dot indicates the version that is currently active for new runs.
By clicking on the kebab menu (three vertical dots) on each version, you can choose to view that version in the canvas, or to start editing it as a new draft version, which if later published will act as a new version that replaces the current one.
When veiwing a version other than the published one, you will see a notice indicating the version you are viewing, along with options to use it as a draft, or to return to the active version for editing.
Recent runs of an AI Workflow
When an AI Workflow has been published and executed, you can see recent past runs by clicking on the "Runs" button on the top right.
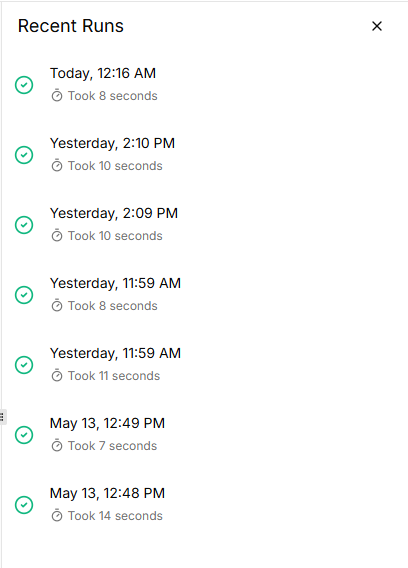
At a glance, you can see the status of the run (icon on the left; the examples above were all successful runs), the date and time of the run, and the duration.
By hovering over each run, you can see a "Retry run" button. This displays a menu with options to re-trigger the selected run, with the same trigger data from that instance, using the latest version of the flow. This is useful for failed runs that you want to recover after fixing an issue in your flow.
Managing AI Workflows
In the AI Workflows page of the AI Agent Management module, you can perform multiple different actions for managing your elements (Flows, Tables and Folders.) This includes:
- Search flows and tables using the provided search bar. Just type into it and it will act as a filter automatically.
- Filter by Type (Flows, Tables), Status (Enabled/Active, Disabled/Inactive), Connections (from your list of existing ones), and Folder (from the ones you created.)
- Import a flow from a JSON file.
- Create a new Flow, Table or Folder.
- Select flows (individually or together) for bulk actions.
- Pin elements to the tob by clicking on the star icon.
- Toggle the status of flows between Enabled/Active and Disabled/Inactive, only for flows that have been published.
- By clicking on the meatballs menu (three horizontal dots), you have access to more options for each element:
- For Flows: Rename, Duplicate, Move To, Export, Delete
- Flor Tables: Rename, Move To, Export, Delete
- For Folders: Rename, Delete
The AI Workflows section also includes pagination and a selector of how many elements should be shown per page.
About Tables
The AI Workflows section also includes the ability to create and manage Tables. These are built-in basic spreadsheets (or database tables) that can be read and modified by Flows.
Tables can be imported from JSON (creates a new table with fields and data) and CSV (adds records to an existing table), and can be downloaded to CSV.
Columns in Tables can be set up using the following types: Text, Number, Date and Dropdown.
Rows (Records) can be added and deleted manually or by the action of Flows (using the "Tables" Actions.) Events related to Tables can also be used as Triggers.
WarningTables have a limit of 10,000 rows (records) and 100 columns (fields) each.