
How-tos: Orchestrator SaaS Bot Launching
How to schedule a workflow
When a workflow is published to Orchestrator, it is possible to set up a schedule for it. In order to do that:
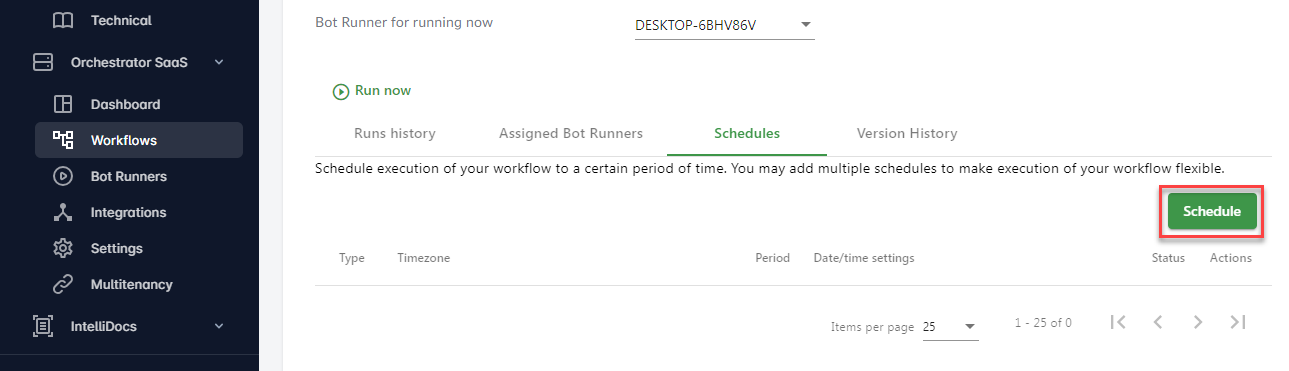
- Go to the "Orchestrator SaaS" page and go to the "Workflows" page. Find your workflow in the table and open it.
- Switch to the "Schedules" tab, and then click on "Schedule".
- Fill the parameters and Save.
Schedule and Launch Types
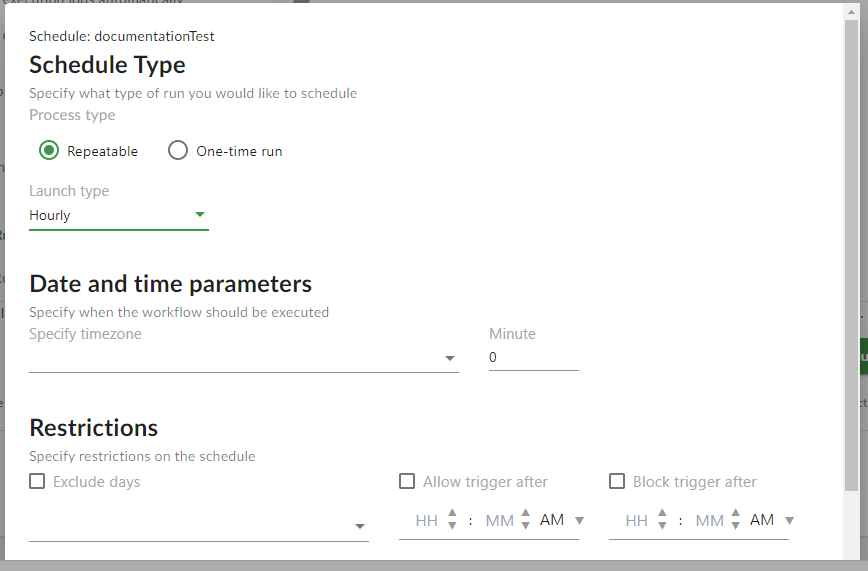
Select the type of the schedule:
- Repeatable - you want this workflow to run on a regular basis.
- Hourly - the workflow will be triggered every hour at a specific minute.
- Daily - the workflow will be triggered every day at a specific time.
- Weekly - the workflow will be triggered every week at a specific day and a specific time.
- Monthly - the workflow will be triggered every month at a specific day and a specific time.
- Custom - the workflow will have a custom trigger schedule, for example, "every 3 hours".
- One-time run - you want this workflow to be executed once at a specific day and time.
Date and time parameters
Date and time parameters depend on the process type and launch type. For each process type and launch type there is a common parameter - Specify timezone. This parameters sets up the time zone in which the workflow must be executed. We will not mention this parameter below any more.
Repeatable type
These are the other parameters for each launch type:
- Hourly:
- Minute - at which minute this workflow must be triggered every hour.
- Example: if you specify "
30", the workflow will be triggered every hour at the 30th minute: 12:30 PM, 13:30 PM, 14:30 PM, and so on.
- Daily:
- Time - at which time this workflow must be triggered every day.
- Example: if you specify "
3:30 PM" then this workflow will be triggered every day at 3:30 PM.
- Weekly:
- Day - at which day this workflow must be triggered every week.
- Time - at which time this workflow must be triggered every week.
- Example: if you specify "
Monday" for the Day parameter and "4:25 PM" for the Time parameter, the workflow will be triggered every week on Monday at 4:25 PM.
- Monthly:
- Day of month - at which day of month (by number) this workflow must be triggered every month.
- Time - at which time this workflow must be triggered every month.
- Example: if you specify "
5" for the Day of month parameter and "2:00 PM" for the Time parameter, the workflow will be triggered every fifth day of month at 2:00 PM.
- Custom:
- Hour, Minute, Second - the duration between triggers.
- Example: if you specify "
3" for the Hour parameter, "30" for the Minute parameter, and "30" for the Second parameter, the next trigger will happen in 3 hours 30 minutes 30 seconds. For example, the bot was executed at 1:00 PM, then the next execution will be at 4:30:30 PM.
One-time run
If the one-time run is selected, the parameters are the following:
- Date - on which exact day the workflow must be triggered.
- Time - at which time the bot must be triggered.
Example: if you specify "05.09.2021" for the Date parameter and "3:00 PM"for the Time parameter, the workflow will be executed on September 5, 2021 at 3:00 PM.
Restrictions
In some cases you may want to put restrictions on execution of a specific bot. For some launch types, there is no the ability to set up restrictions, for some launch types, you have this ability. Overall, three possible restrictions exist in the system:
- Exclude days - specify on which days this workflow should not be executed.
- Available for launch types: Hourly, Daily, Custom.
- Start trigger after - specify after which time the bot can be triggered. Before this time the trigger will not work.
- Available for launch types: Hourly, Custom.
- Block trigger after - specify before which time the bot can be triggered. After that time the trigger will not work.
- Available for launch types: Hourly, Custom.
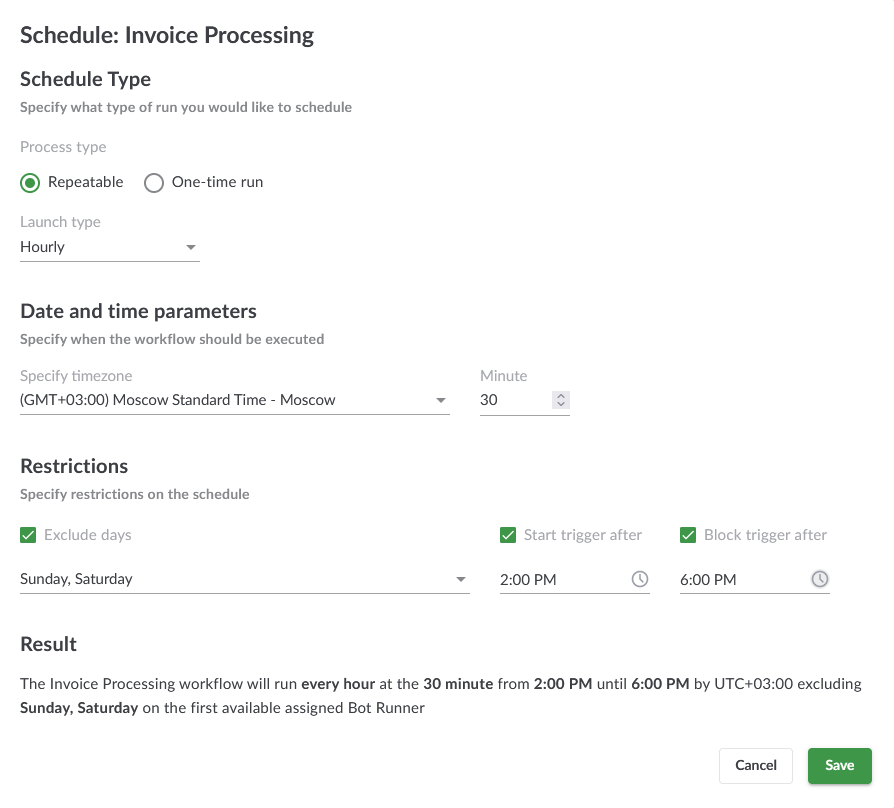
Example:
- Launch type is set to "Hourly".
- Exclude days is enabled, the value is "Saturday, Sunday"
- Start trigger after and Block trigger after are enabled and set to "2:00 PM" and "6:00 PM" respectively.
- Result: the bot will be triggered every hour from 2 PM until 6 PM and will not be triggered on Saturdays and Sundays at all.
- Once you've set up all the parameters, click "Save". The schedule will be added to the list of schedules. You may want to add another schedule. If so, repeat all the steps above.
An example is provided in the screenshot below:
Editing Schedules
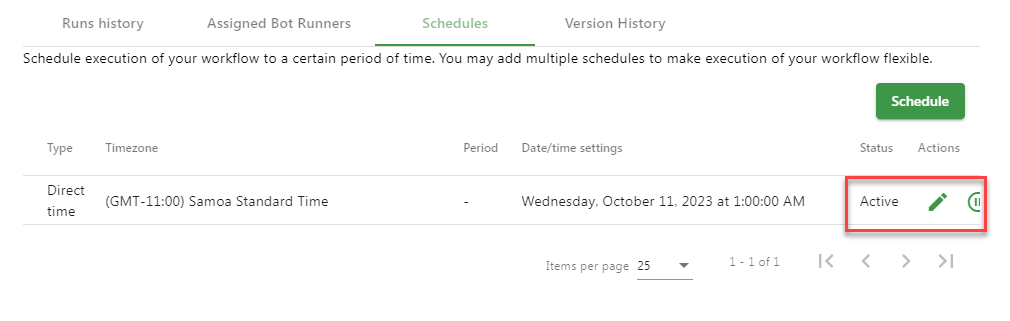
Every schedule has its status:
- If it's set to "Active", the schedule is in use. You may click on the "Pause" button to disable it.
- If it's set to "Inactive", the schedule is not applied. You may click on the "Play" button to enable it.
If you click on the "Edit" button, you will be able to edit the schedule. If you click on the "Delete" button, you will be able to delete the schedule from the list.
How to work with webhook links
What is a webhook link?
A webhook link is one of the ways to launch bots via Orchestrator SaaS. Such a link allows you to start a workflow via an HTTP request.
How to use it?
One possible scenario for using webhook links is to run a workflow from programs and applications that are not associated with ElectroNeek, but in which you want to integrate the ElectroNeek bot.
For example, if your company already has a program in a specific programming language that addresses a particular business problem, you can enhance its functionality by integrating it with the ElectroNeek bot using a webhook link.
How does it work?
You can generate a webhook link from the bot management page in Orchestrator.
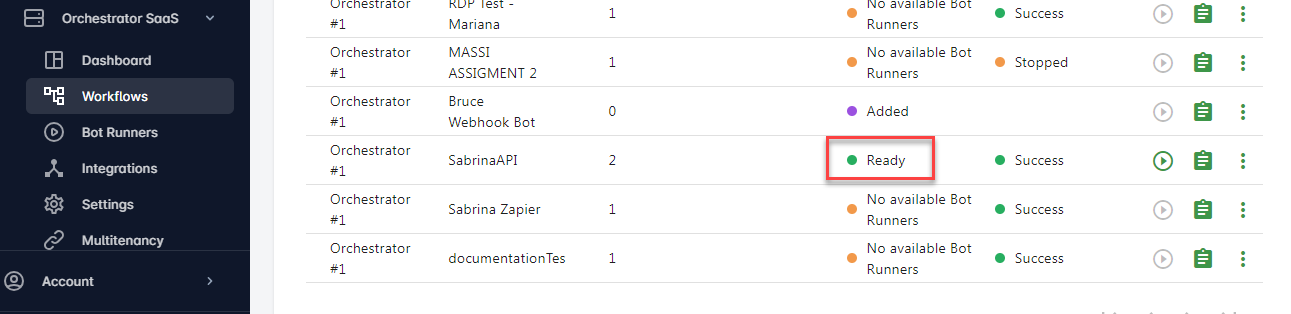
- Publish the created bot in Orchestrator SaaS.
- Make sure that the bot's status is displayed as "Ready".
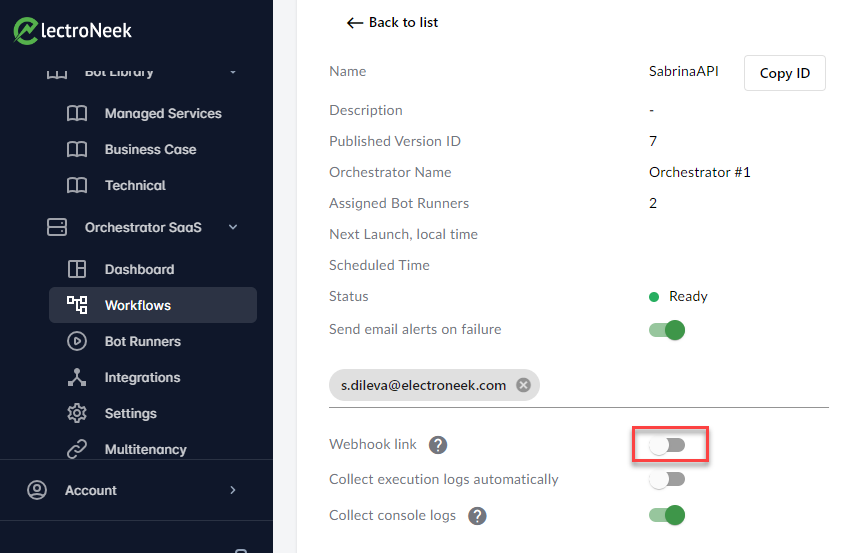
- Go to the "Webhook link" line in the bot's settings. Turn on the switch to create a link.
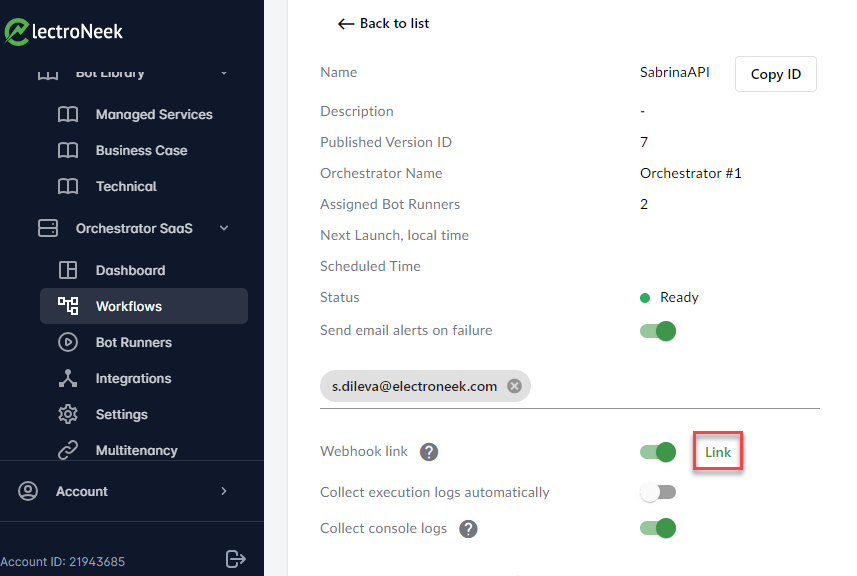
- Click the "Link" button to copy the webhook link to the clipboard.
Passing parameters into an HTTP request
It is possible to pass any parameters "inside" the bot when using a webhook link. In Studio Pro there is a variable webhook_data. This is where the parameters you set will be passed to.
You can use a webhook agent, such as Postman, to pass the parameters you want to the variable. Select the "POST" option, copy the webhook link and paste it into the line next to it. In the "Body" section, write down the parameters you want to pass to the variable.
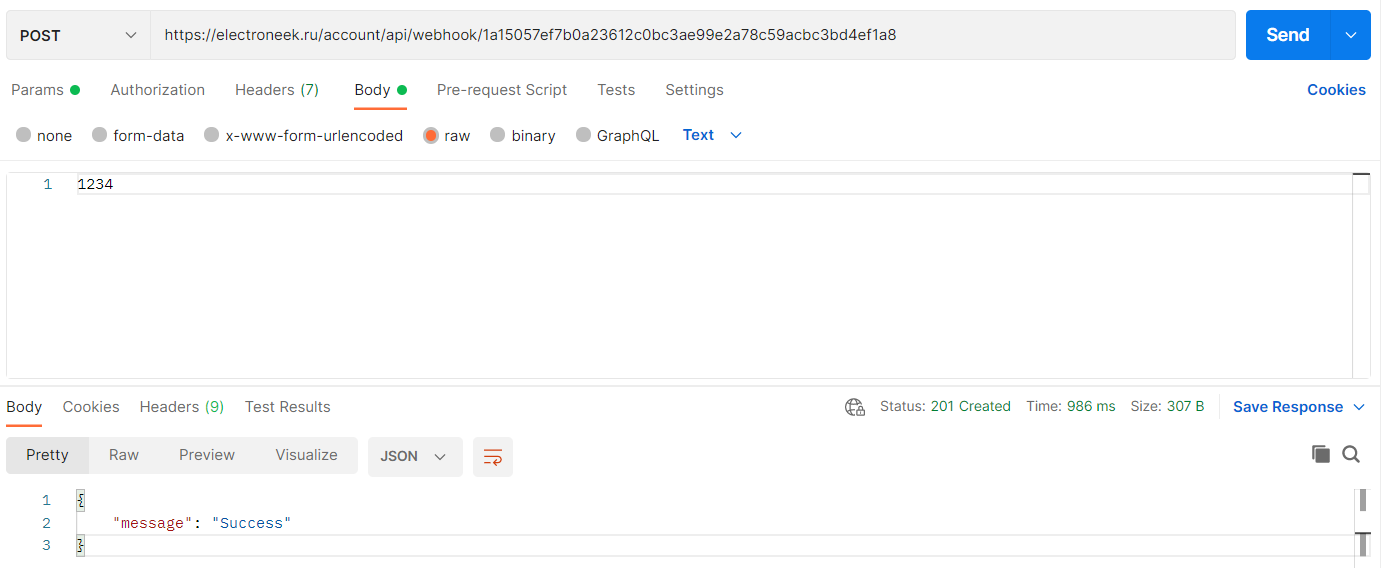
Example of parameters transferred to the bot through Postman
This is an example of how the workflow could be structured for passing the parameters:
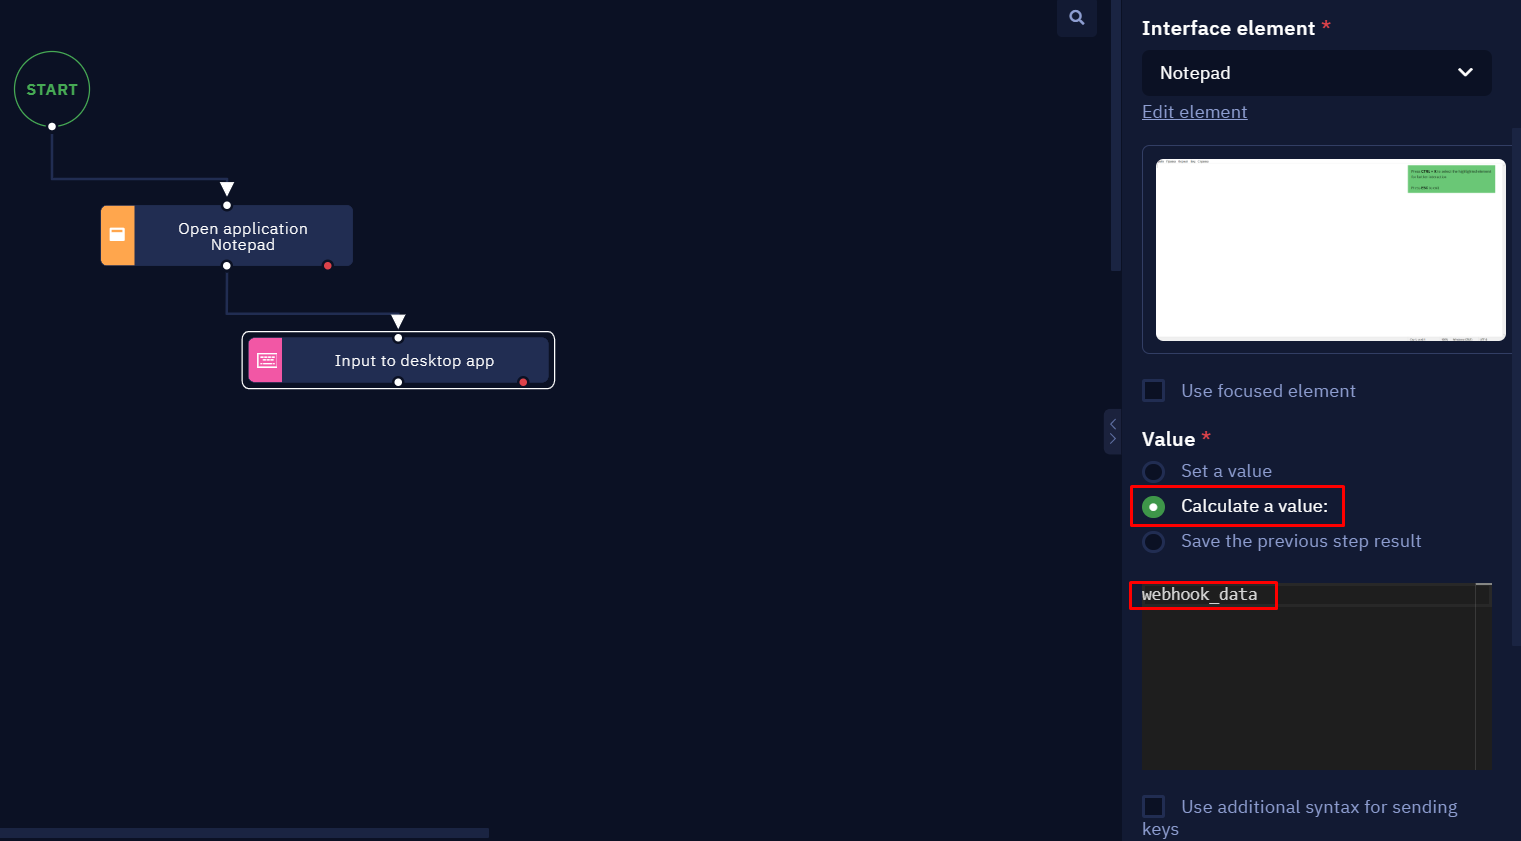
The "Value" parameter of the "Input to desktop app" activity uses the "Calculate a value" option and the webhook_data value is written down in the input field. This is necessary for the parameters passed to webhook_data to be used by this activity.
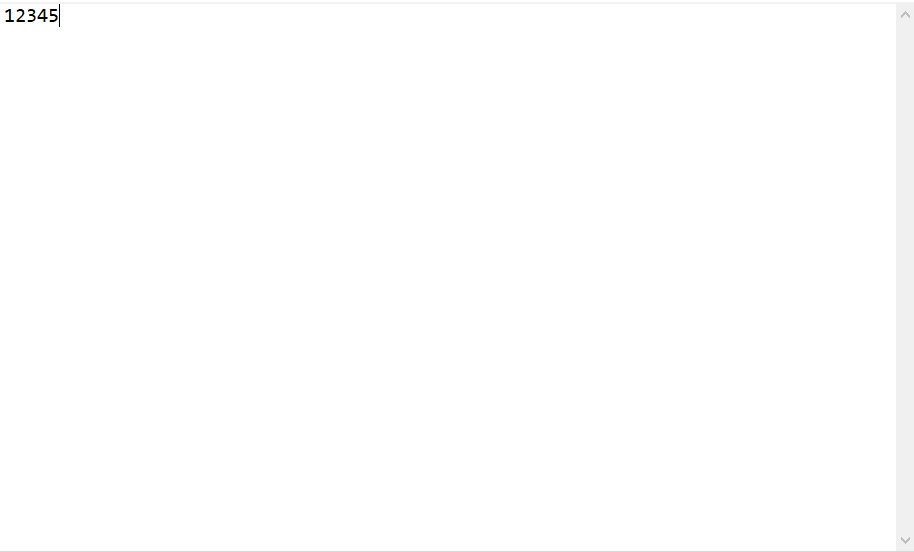
Thus, the result of this bot's actions in the Notepad will look like this:
How to run workflows sequentially using Webhook links in Orchestrator
Here is an example of a use case:
- The workflow_2 should be uploaded to Orchestrator SaaS and have the “Webhook Link” enabled.
- Copy the webhook link of the workflow.
- Open the workflow_1 and add the HTTP Request activity with the webhook link as a URL.
Note“HTTP Request” is usually added as the last activity. Otherwise, it is added to the queue of the Bot Runner and will only be launched when the Bot Runner is available.
- Upload workflow_1 to Orchestrator and schedule it.
The workflow_1 will be launched by schedule and will trigger workflow_2 at the end of its execution.
How to trigger a bot from Zapier
Introduction
The ElectroNeek platform supports integration with the Zapier automation service. Zapier has only one action applicable to ElectroNeek - "Launch bot". This action serves as a trigger for the bot published to Orchestrator. In this article, we will look at a simple example of an algorithm that is triggered by Zapier.
Preriquisities
Let's assume that you already have access to Zapier and the ElectroNeek RPA is available there. Basically, there are 4 steps required for ElectroNeek bots to work with Zapier:
- Create a bot in ElectroNeek Studio Pro.
- Publish the bot in Orchestrator SaaS.
- Assign Bot Runner to this bot.
- Create Zap.
So, in the ElectroNeek ecosystem, you need to have access to Bot Runner and Orchestrator SaaS. Access to Studio Pro is optional, as you can work with a bot already created by someone else.
Connecting to Zapier
Once everything is ready on the ElectroNeek side, you can proceed to create the Zap. To do this:
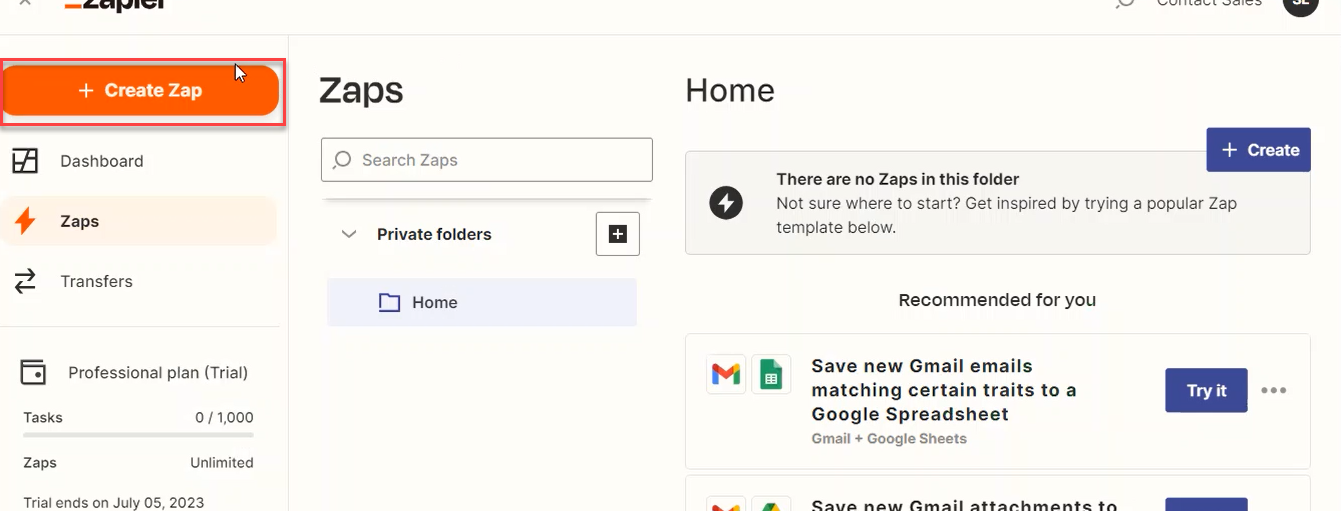
- Navigate zapier.com and log in.
- Click on "Create Zap".
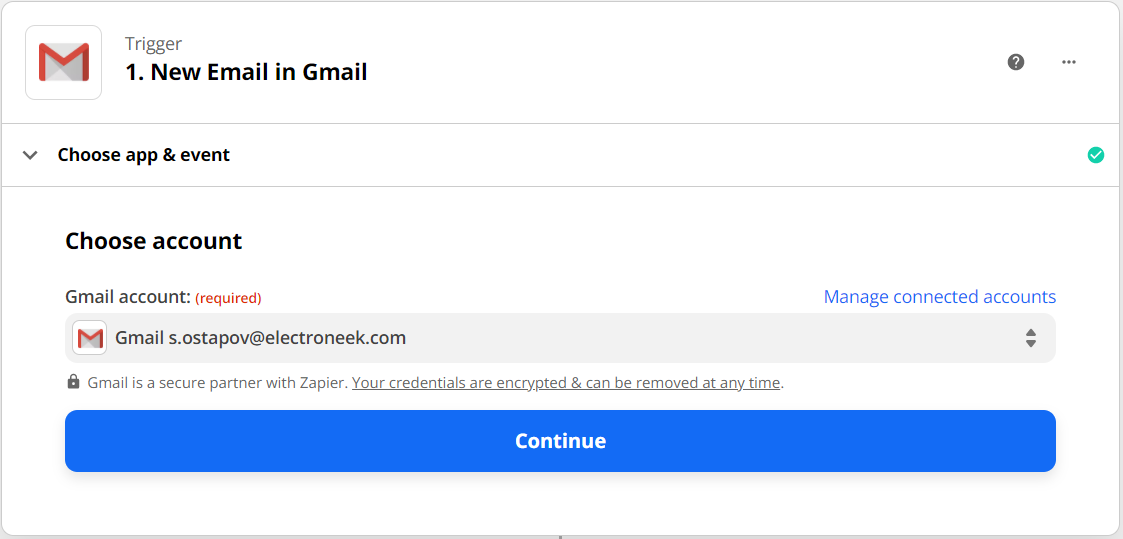
- Select the trigger you want. Follow the instructions on the screen. In some cases you need to check the trigger, authorize accounts, and so on.
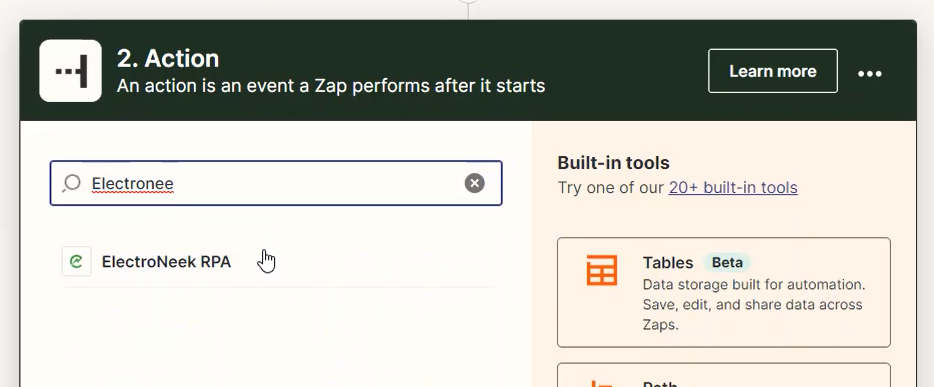
- On the "Action" page, select "ElectroNeek RPA".
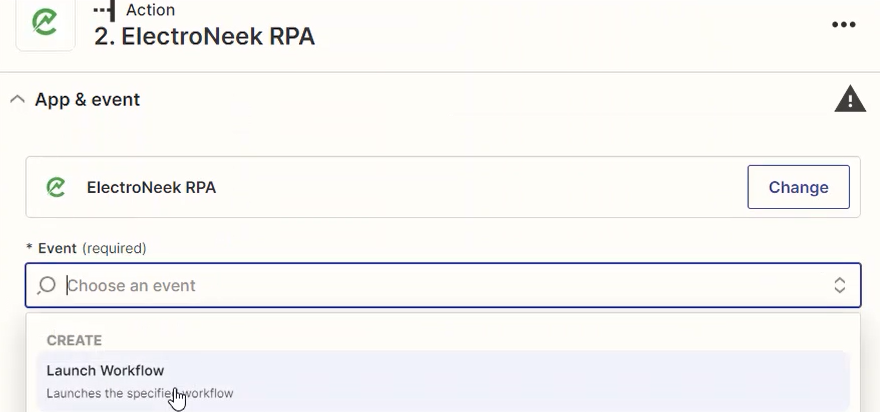
- In the "Event" parameter, select "Launch workflow".
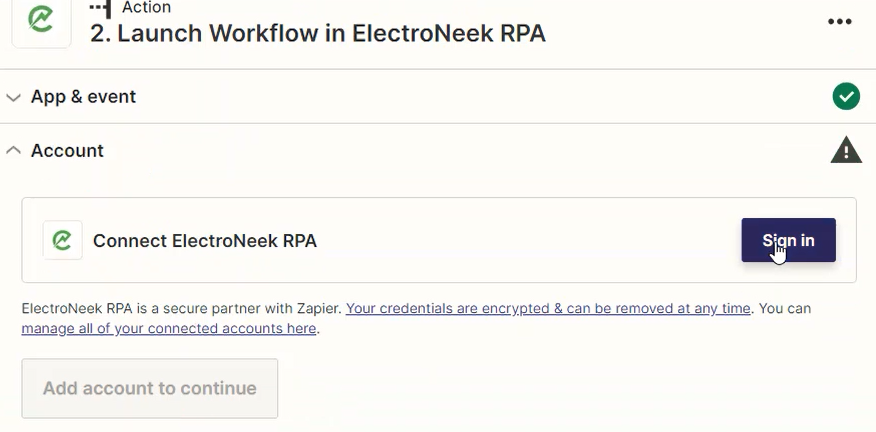
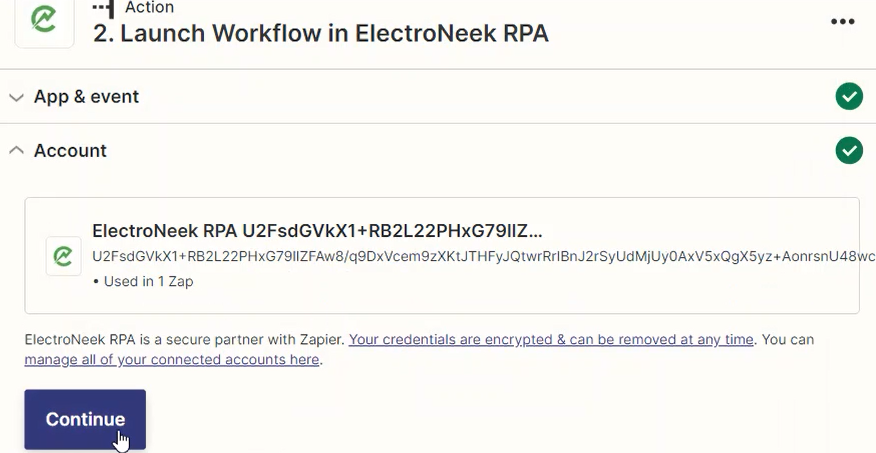
- In "Account" go to "Sign in".
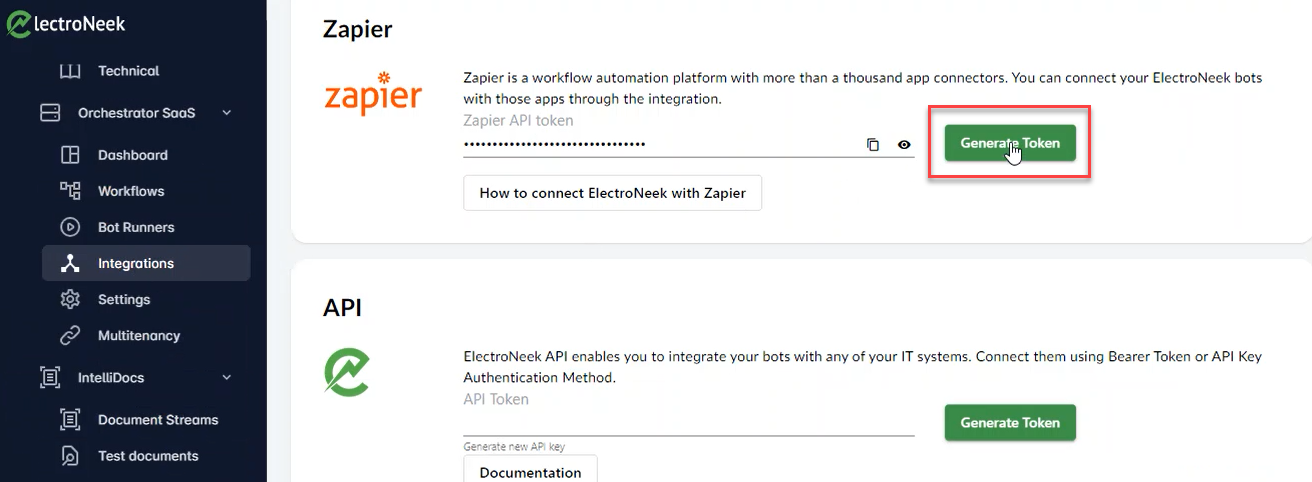
- A pop up window will appear. Go to Orchestrator SaaS > Integrations and generate a Zapier Token.
- Paste this token in the pop up window and continue.
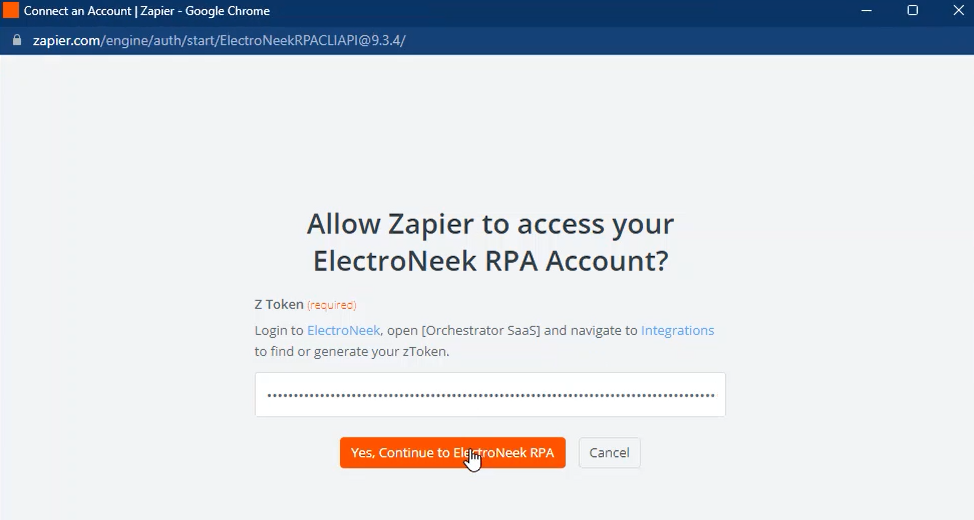
- Return to Zapier and continue.
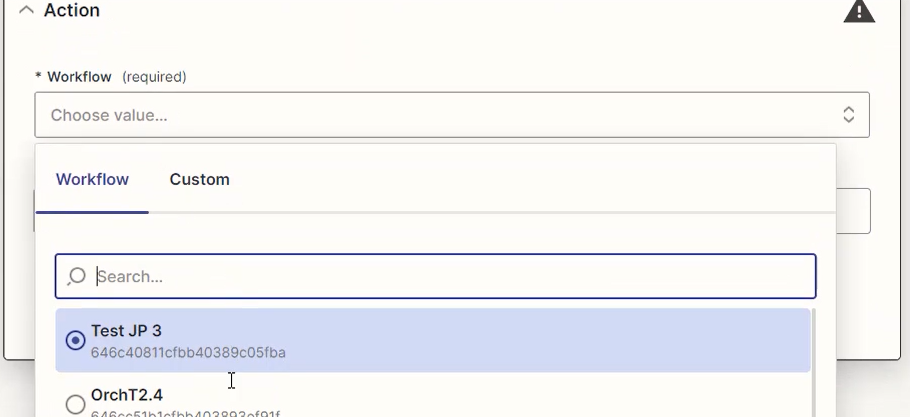
- Select your workflow.
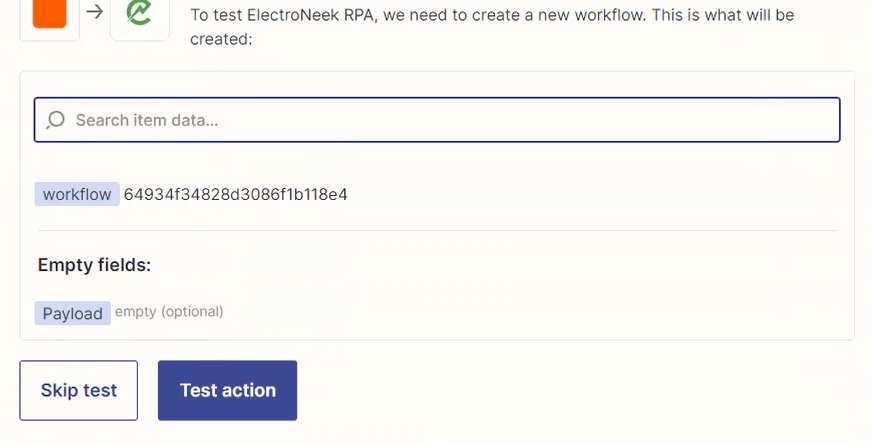
- Continue and click on "Test action".
- Click on "Publish".
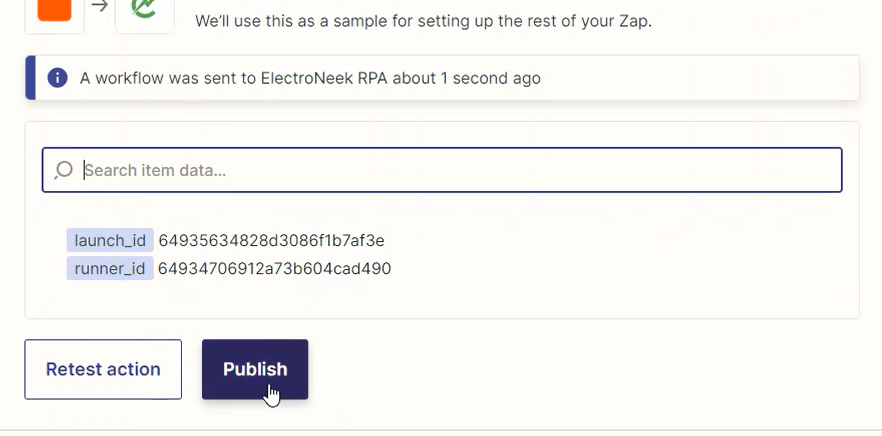
- You'll see the following success message:

- You can check your workflow's run history and you'll see a new execution was triggered.
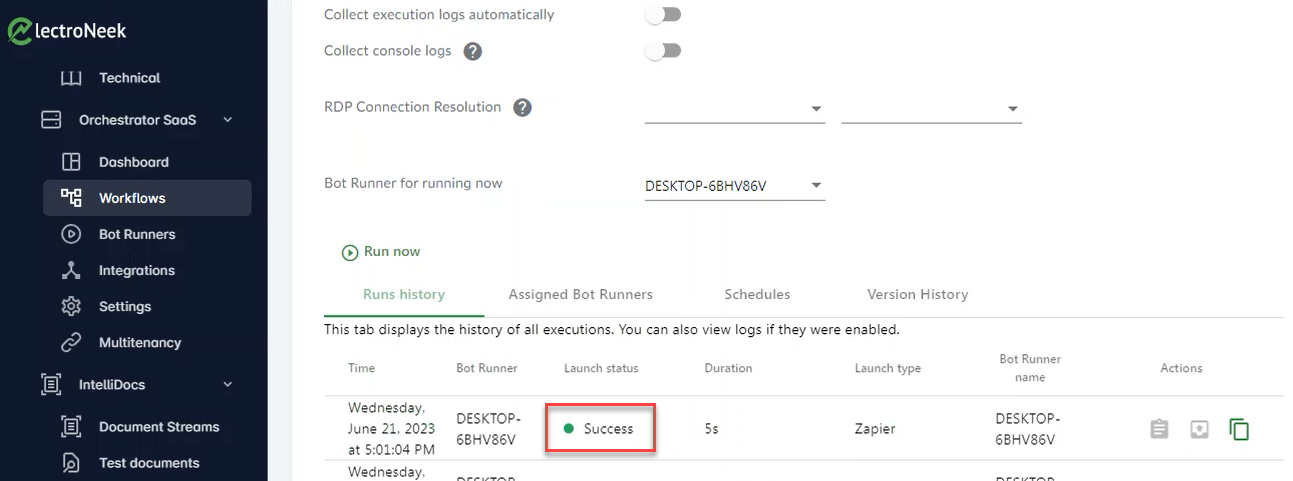
- The bot will be lunched automatically by the trigger selected in step 3.