How-tos: Studio Pro Web Scraping Examples
How to extract data from a Word file
In various workflow scenarios, there's often a need to extract specific data from a Word file, enabling you to effectively utilize the extracted information in your subsequent tasks. This article outlines a step-by-step guide to precisely extract targeted data from a Word document, facilitating seamless integration into your workflow.
Instructions
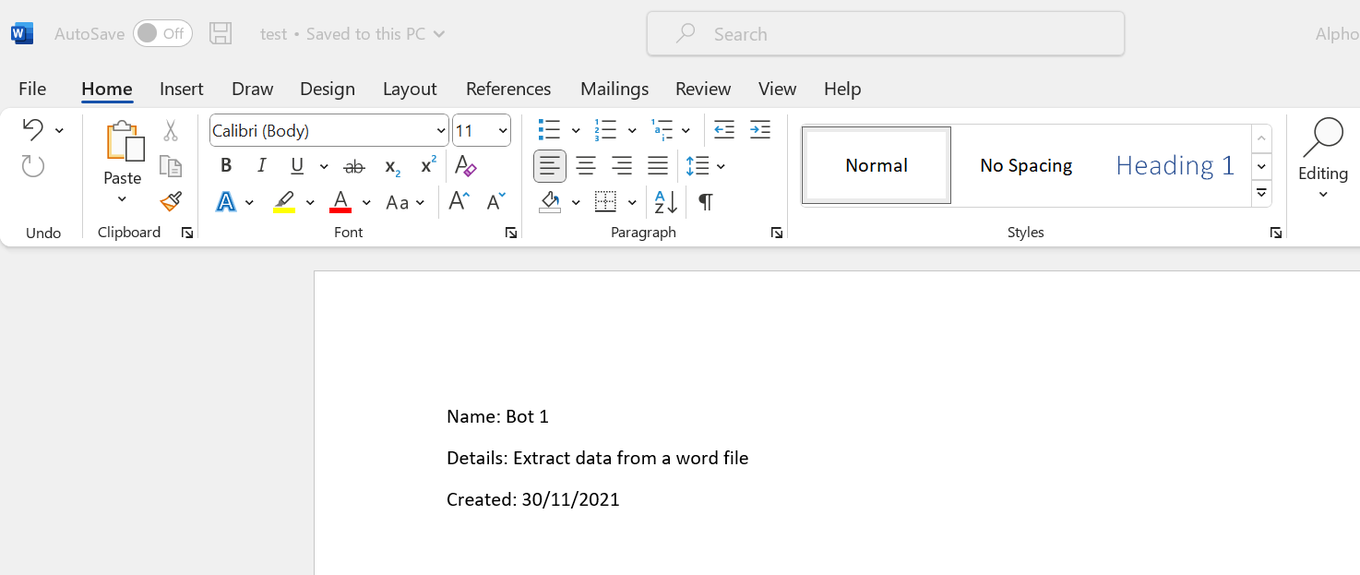
- Let's assume you want to extract information such as 'Name,' 'Details,' and 'Created' from a Word file, as demonstrated in the screenshot below:
- Use the Read Word file activity to access the content of the Word document. Store the content in a variable named word_content.
- The value stored in the variable ‘word_content’ will be of the following format:
<p>Name: Bot 1</p><p>Details: Extract data from a word file</p><p>Created: 30/11/2021</p>-
Extract the 'Name,' 'Details,' and 'Created' data using three separate 'Extract text' activities.
- In the 1st 'Extract text' activity, set the 'After' extraction parameter as "
Name:" and the 'Before' extraction parameter as "<" with occurrence value set to2. - In the 2nd 'Extract text' activity, set the 'After' extraction parameter as "
Details:" and the 'Before' extraction parameter as "<" with occurrence value set to4. - In the 3rd 'Extract text' activity, set the 'After' extraction parameter as "Created:" and the 'Before' extraction parameter as "
<" with occurrence value set to6.
- In the 1st 'Extract text' activity, set the 'After' extraction parameter as "
-
After each 'Extract text' activity, ensure to use an 'Assign value to variable' activity to store the extracted values in separate variables.
-
Execute the workflow to initiate the extraction process.
-
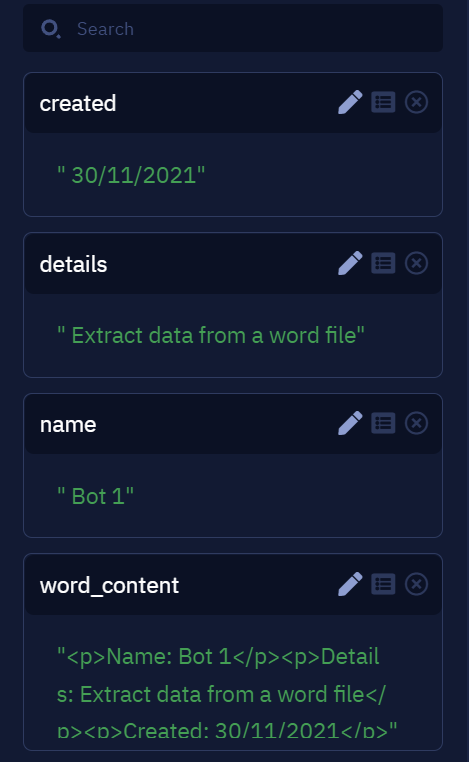
You will receive an output similar to the one shown in this screenshot:
How to select multiple options in a drop-down menu
Instructions
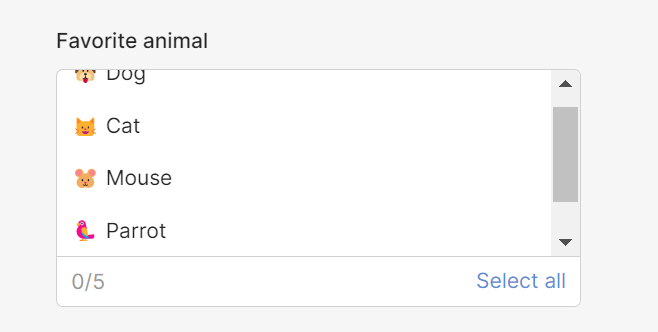
The objective is to select the "Mouse" and "Parrot" options from the following webpage:
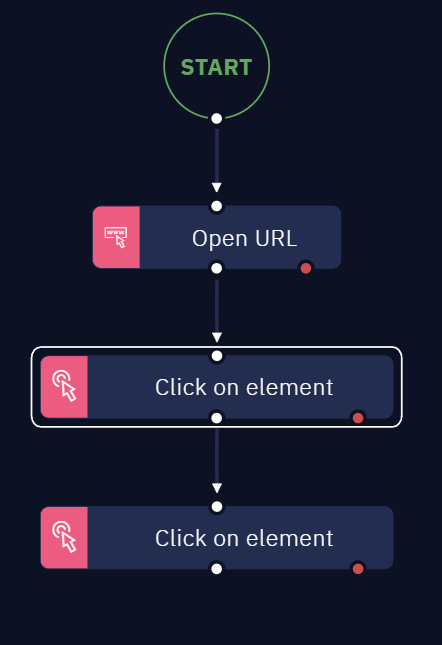
- Use the Open URL Activity and insert this URL: Multiselect Listbox | Retool Component Library.
- Add the "Click on element" activity and select the element labeled as "Mouse" from the webpage.
- Add the Key Modifier "Ctrl" as shown below:
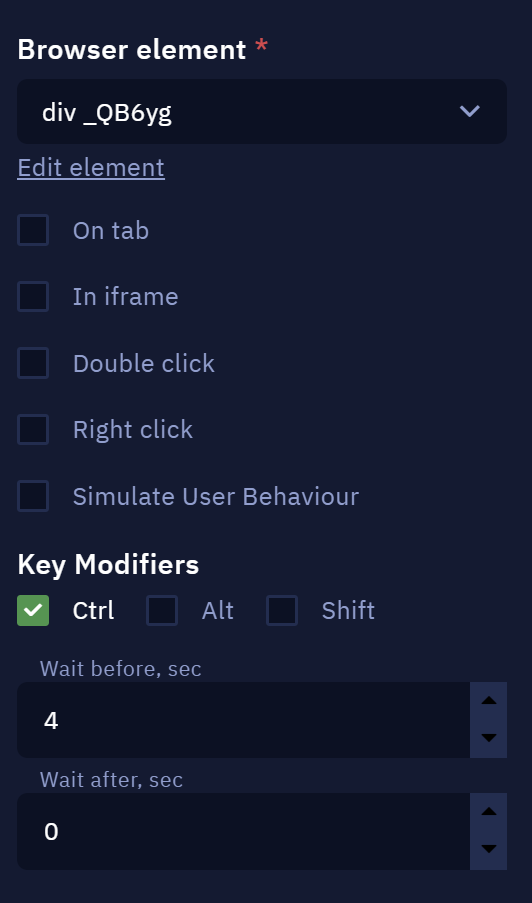
- Repeat the process for the second element, the "Parrot".
- As a result, both elements will be selected in the drop-down menu.
How to scrap a table from a web page
Many websites conveniently offer options to download table data as files like .xlsx, .csv, or .pdf. Yet, there are times when the table is the sole representation, and the bot can't easily copy-paste it to a file. For these scenarios, here's a straightforward and effective solution.
Solution
The solution is based on:
- Basic math principles applied to arrays.
- Element's XPath, specifically for table rows and columns.
Here's how the solution works step by step:
- To start, we skip the header and begin at the second row (
row_index = 2). - Loop through the columns in a row.
- Store data and repeat . The values are stored in a variable, and these actions are repeated within the loop.
- By the end, we obtain an array with a flat structure of values. All the values from each row are organized sequentially.
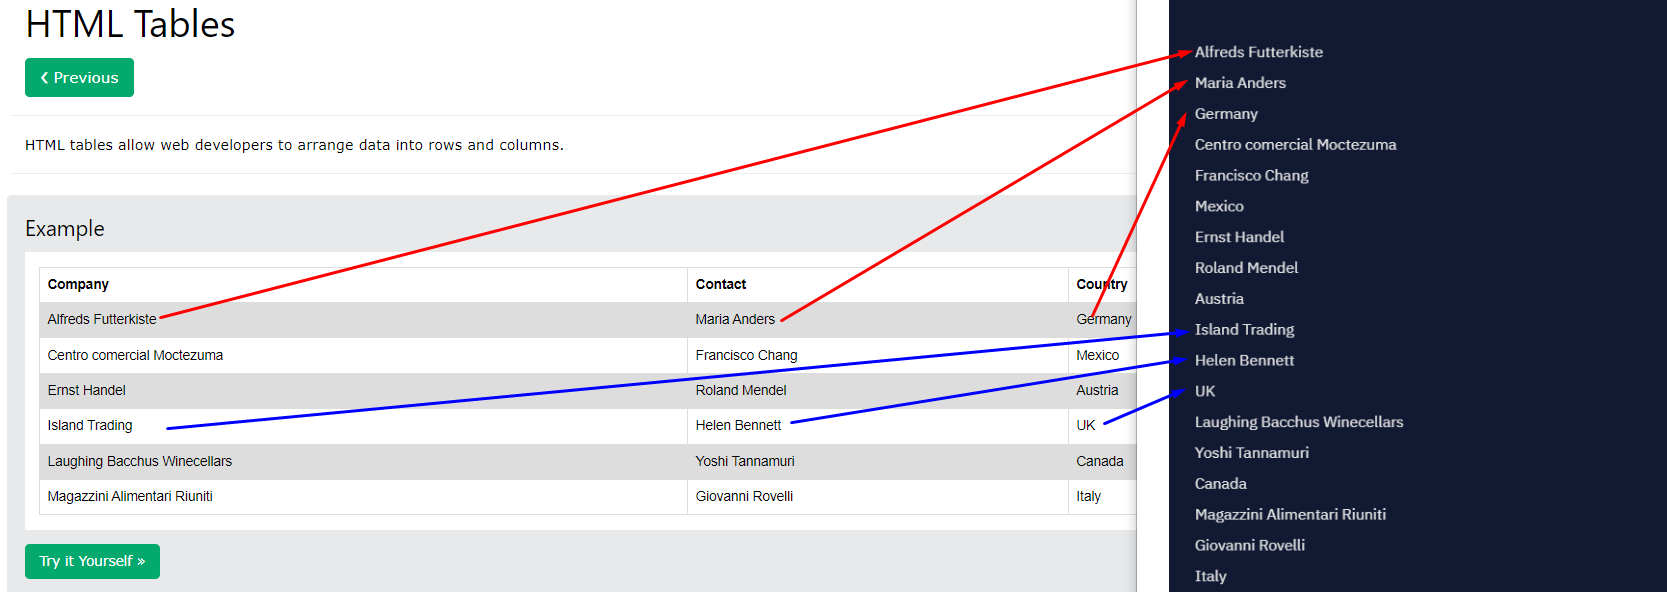
To practically implement this, understanding the table structure is crucial. For instance, identifying specific index patterns for columns like "Company name," "Contact," and "Country" allows for reassembling the table using an array.

Alternatively, you can channel the output into the "Append row to Excel file" activity, incorporating each row into an xlsx file. This method essentially rebuilds the table as a spreadsheet, aligning with the original format. Please refer to our documentation's "Append row to Excel file" section for further guidance on this process.
How to type in the Windows File Explorer path bar
Discover how to input text into the path bar of Windows File Explorer efficiently.
Instructions
Follow these simple steps to effectively type text into the path bar of Windows File Explorer:
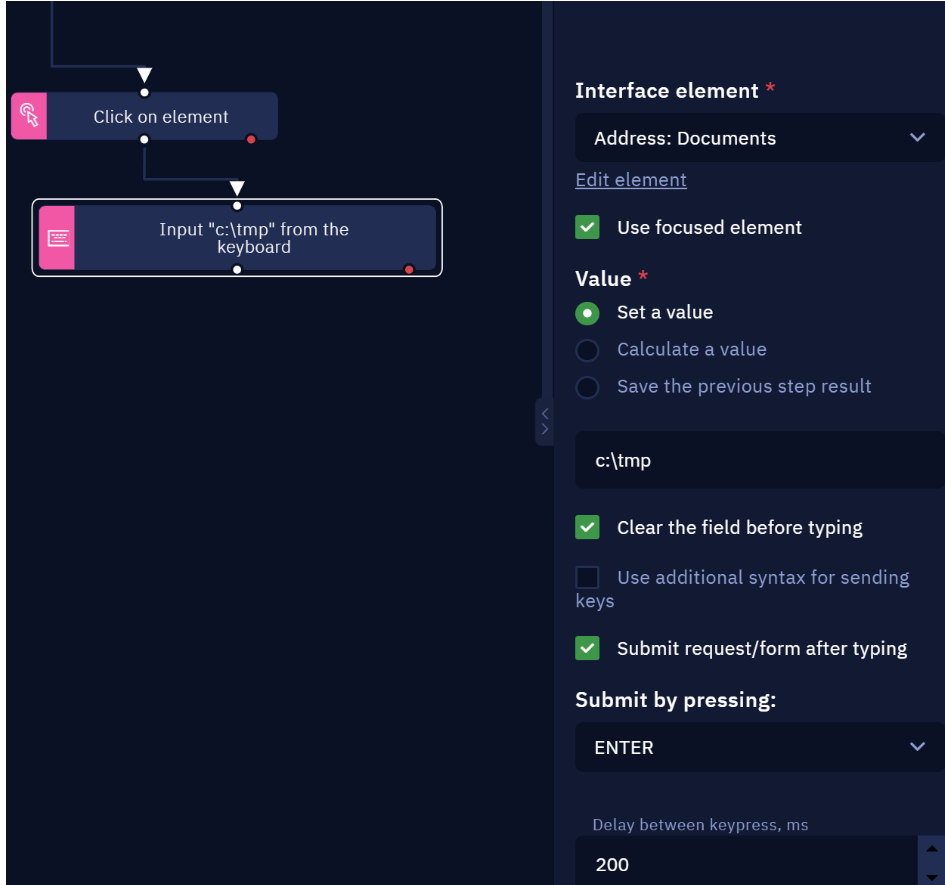
- Begin by adding a "Click on element" activity to your workflow. Select the bounding box that encompasses the path bar within the Windows File Explorer window.
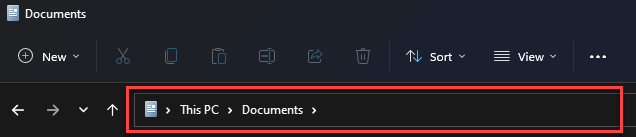
- Configure the activity to perform a single left-click action on the path bar.
- Integrate the "Input to desktop app" activity into your workflow. Make sure to check the "Use focused element" option in this activity.
How to read multiple sheets using a single 'Get values' activity
In scenarios where you need to extract data from all sheets in Google Sheets one by one, using a single 'Get values' activity can simplify the process. This article demonstrates how to achieve this.
Instructions
Follow these steps to efficiently read the contents of multiple sheets using a single 'Get values' activity:
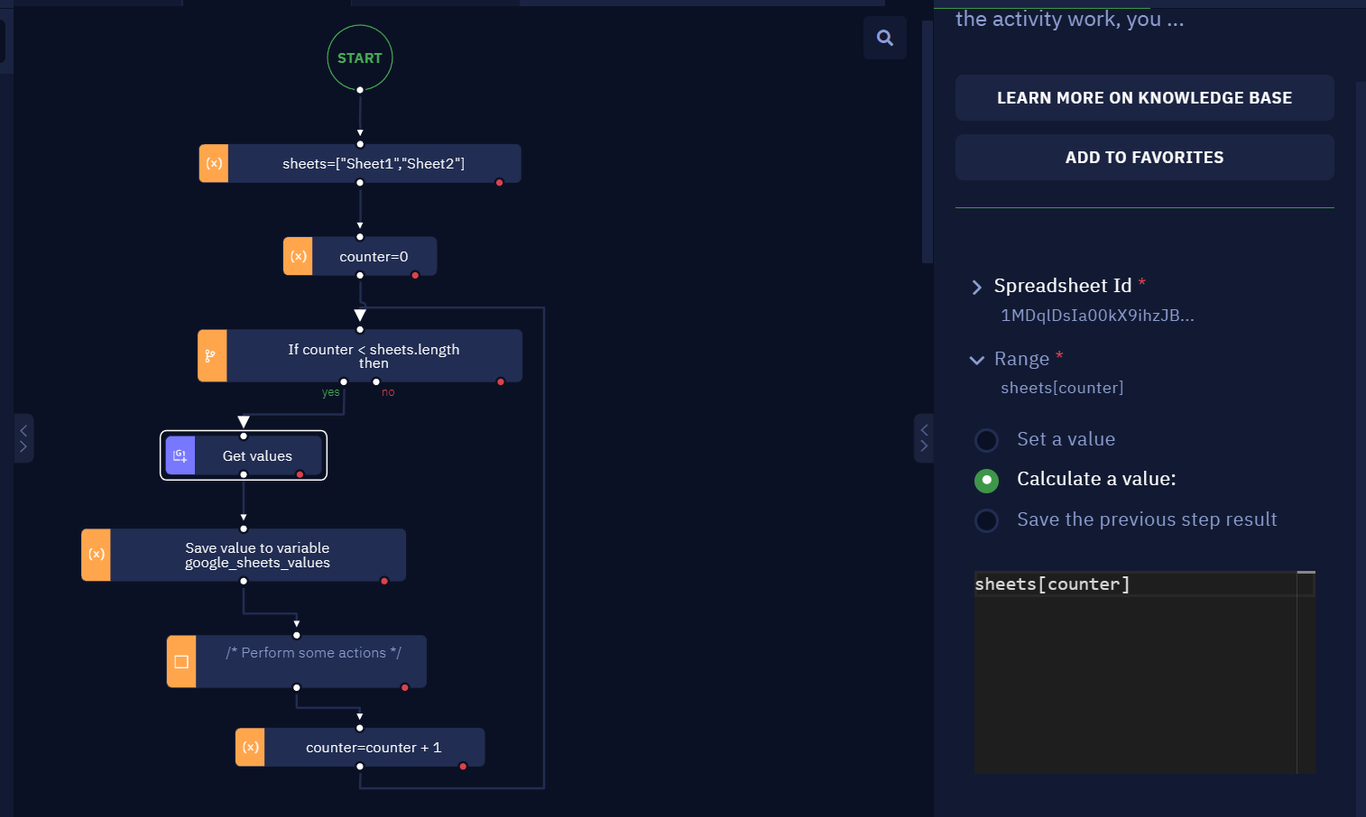
- Create an array named '
sheets' to hold the names of sheets you want to extract data from. - Set up a counter. Create a variable named '
counter' and set its value to0. - Use an 'If…then' activity with the condition
counter < sheets.length. - Retrieve data using the 'Get Values' activity.
- Within the 'If…then' activity, employ the 'Get values' activity and set the value '
Spreadsheet Id'. - In the 'Range' parameter of the 'Get values' activity, choose the option 'Calculate a value:' and enter '
sheets[counter]'. - Store extracted data in a variable. In this example, all data extracted from the sheet will be stored in the variable 'google_sheets_values'.
- Within the 'If…then' activity, employ the 'Get values' activity and set the value '
- Employ other activities to process the extracted data if needed.
- Increment the 'counter' variable by 1 after processing each sheet. This ensures the 'Get values' activity extracts data from the next sheet in the next iteration.