How-tos: Files
Moving files to a network folder
Description
We can save a lot of time by automating the process of moving files — and we can do that all across our internal network. In this article you find two methods to move a file from one folder to another.
Instructions
Method #1
- Add the Move file activity
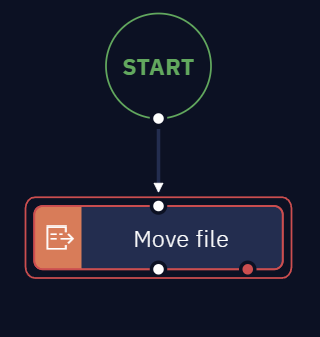
- In the "Path" option, choose "Set a value" and insert the file path
- Run the workflow.
Method #2
Add the Command Prompt activity

- Inside the Command Prompt in the option command, add the following syntax:
move "%USERPROFILE%\Move_file\test.txt" "%USERPROFILE%\Move_file\destiny"
- Replace the
"%USERPROFILE%\Music\howto\Move_file\test.txt"with your file path - Replace the
%USERPROFILE%\Music\howto\Move_file\destinywith your destiny folder path
- Run the workflow — and it's done!
NoteThis Methods works for network folders that are mapped in your system.
Uploading Files via FTP/HTTP
Description
The File Transfer Protocol (FTP) is an application we can use to transfer of files from one computer to another — or, basically, any device in the world that is connected to the Internet. In this article, you will learn how to upload a file to an FTP server using Studio Pro.
Instructions
In this example, we use cURL, a program that you can access through the terminal (CMD) using the Command Prompt activity of Studio Pro. To do so, follow these steps:
-
Use the Command Prompt activity located in OS Automation/System
-
Select the “Calculate a value” option and enter the following command:
curl -s -T [LOCAL_FILE] ftp://[FTP_HOSTNAME]/[FTP_DIRECTORY_PATH]
Bear in mind that:
- [LOCAL_FILE][LOCAL_FILE] is the file you want to upload to the FTP Server.
- [FTP_HOSTNAME][FTP_HOSTNAME] is the name of the server you want to work with.
- [FTP_DIRECTORY_PATH][FTP_DIRECTORY_PATH] is the directory in the FTP Server where you want to upload the [LOCAL_FILE][LOCAL_FILE].
For example, a complete upload file to FTP command would look like this:
curl -s -T test_photo.png ftp://ftp.example.com/dir/path/

This way you can upload any file to the desired FTP server just using the [LOCAL_FILE][LOCAL_FILE] as a variable.
Now, if you want to upload multiple files at the same time, do the following:
curl -s -T 'image[1-99].jpg' ftp://ftp.example.com/upload/
1curl -s -T '{Huey,Dewey,Louie}.jpg' ftp://ftp.example.com/nephews/
Complete detail about the cURL program can be found on cURL - How To Use.
NoteIt’s important to add the “-s” parameter in order to cURL work properly with Studio Pro.
Managing Files Paths
Description
When uploading a bot to Orchestrator using files existing on a machine, the paths to these files cannot be relative paths. Otherwise, when Bot Runner runs a bot, it looks for files in locations impossible to access from that device.
In this article, you will learn how to run workflows from different a machine when they need to interact with files locally saved.
Notice that you can also use these instructions if you face a "File not found" error message in the logs.
Instructions
To ensure that bots run as expected, always use full paths to any needed files. This works for normal paths or UNC paths as long as they are full paths and not relative ones. Here's what we need to do:
- When using an activity, into the "Directory path", click "Set value" and then enter the full directory path as shown in the following screenshot.

- Another option is to select the UNC path as in the image below.

NoteIf the file path is entered only with the file name, the Bot Runner will look for this file in the directory where Bot Runner is installed. Look at this example

Related articles
Any activities that reference a file path would need to be set up in this manner. This includes, for example, Excel Activities and OS Automation Activities.
How to work with folders in Windows
In this article you'll learn how to create folders, list their content and delete them.
Instructions
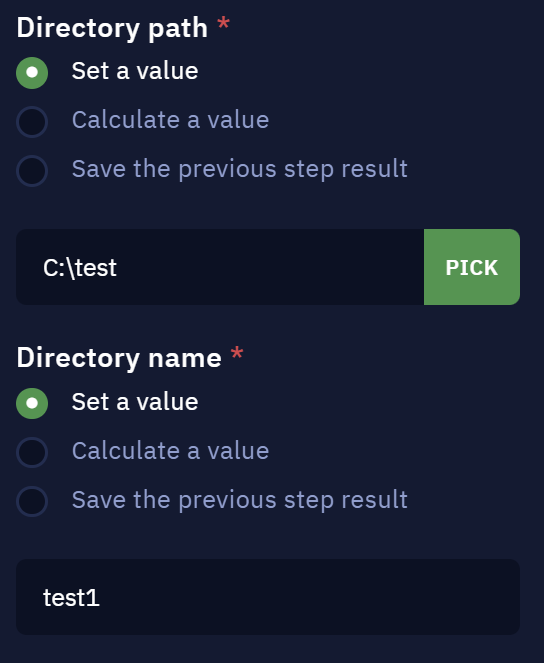
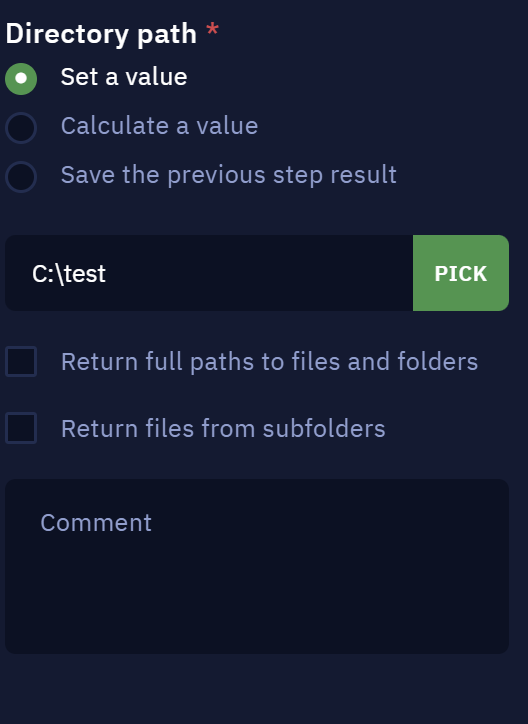
- Add the "Create directory" activity to your workflow.

- Add the following configuration:
- To list the contents of the created directory, include a "List directory files" activity. Save the result in a variable named "
directory_files".

- In order to delete this folder, add the “Command prompt” activity with the command:
rmdir C:\test\test1.
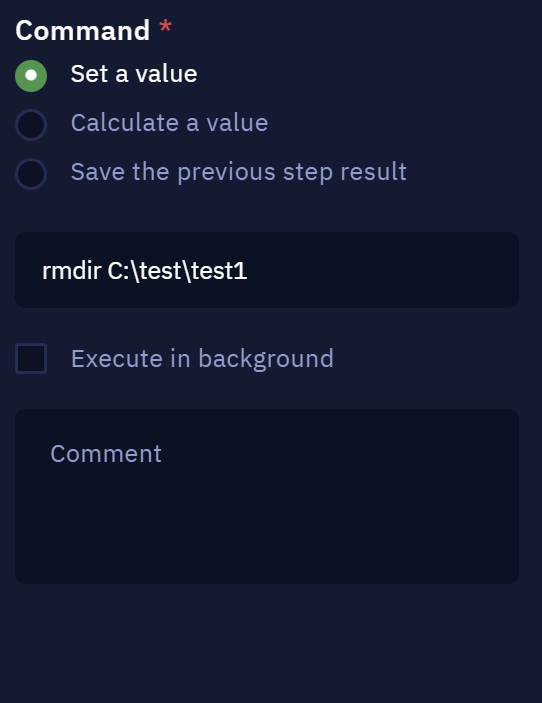
NoteKeep in mind that this command can only remove empty folders. If the folder holds files or subfolders, these must be deleted before you can remove the folder itself.
- The final result will look like this:

How to rename a file
Instructions
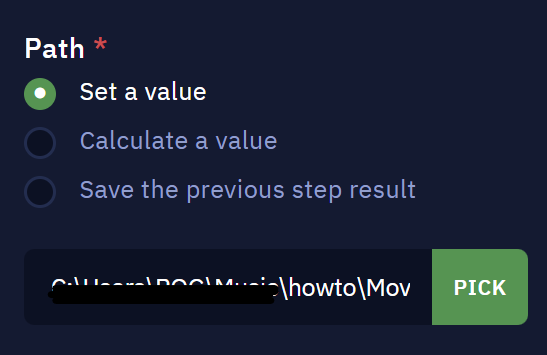
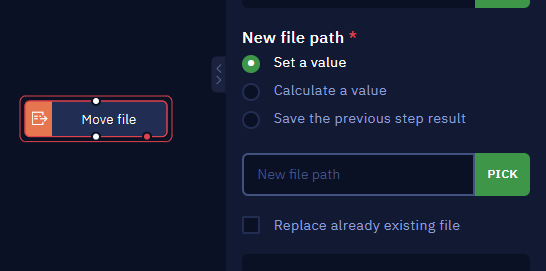
- Add the Move File activity to your workflow.
- Use the Pick button to indicate the the path of the file to be renamed.
- Check the "Replace already existing file" option.
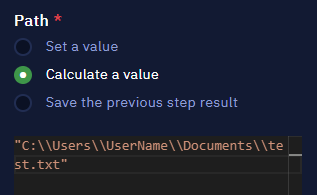
NoteDynamic paths, are declared using the "calculate a value" option.
Caution
- Be cautios when working Javascript escape sequences.
- Caution: Avoid changing the file extension while renaming.